FABRIC MAZE TUTORIAL
Follow this fabric maze tutorial to make the perfect DIY marble game for your toddler. The printable maze pattern makes it easy!
Yield: 1
Materials
- Fabric Scraps for maze add 3/4 inch to the long and short size of your maze. For my printable, I cut out 2- 7 1/4″ and 10 1/4″ rectangles as well as 2- 2″ squares.
- Contrasting thread you do not want the thread to match the fabric.
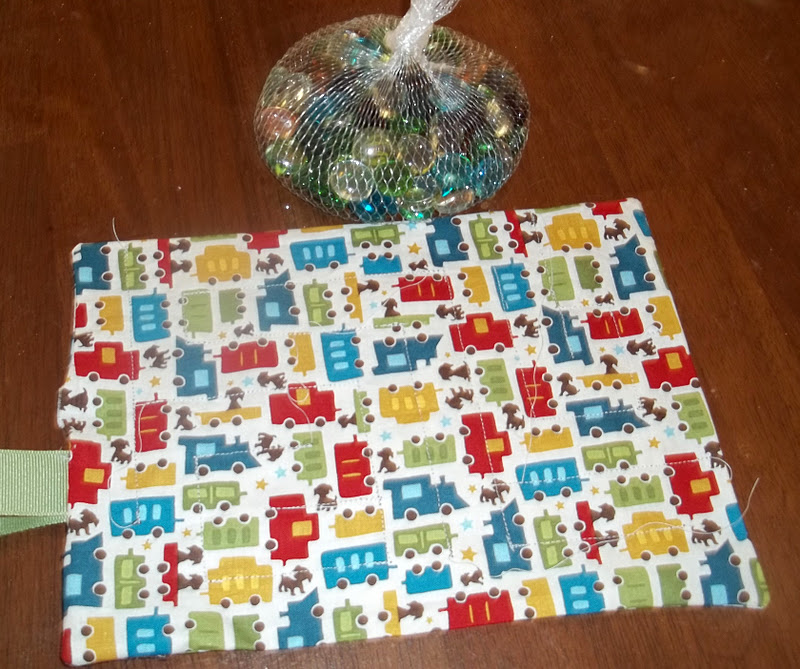
- Decorative glass stone or find a bag full of marbles at the dollar store
- Printed Maze
- Ribbon cut 5″ length
Instructions
- 1. Prepare the materials
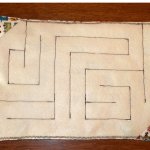
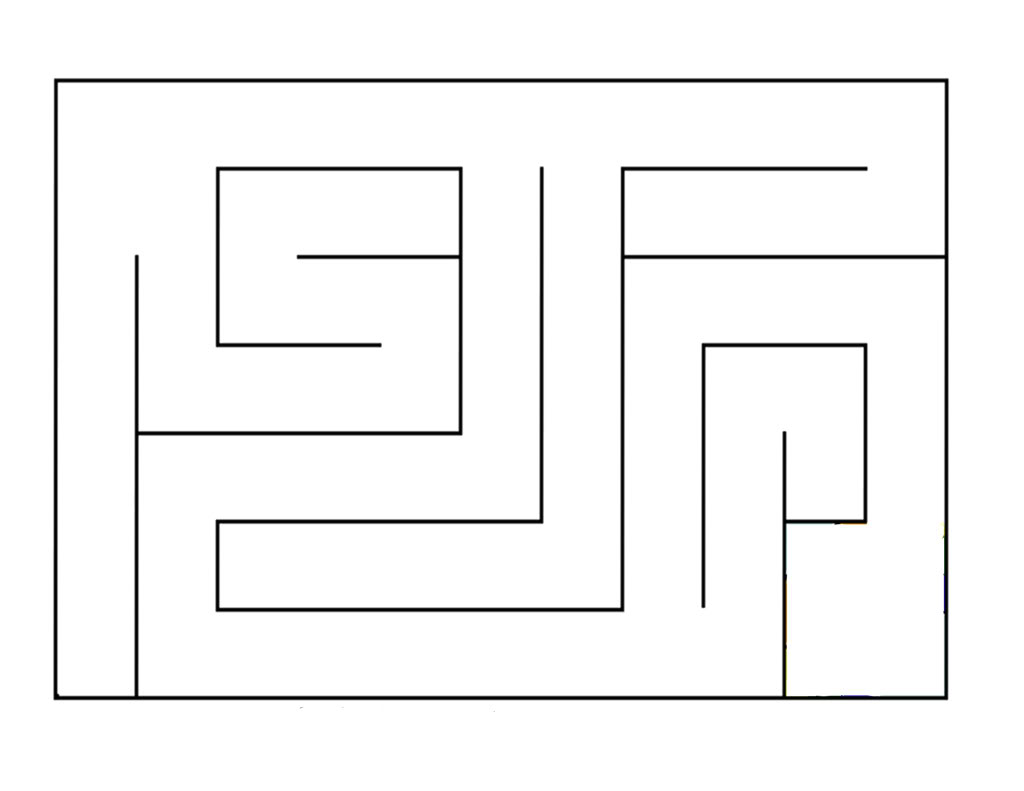
- 2. Print and cut out maze, and measure the length and width of the maze itself. This maze should be about 6 1/2″ by 9 1/2″ after printing.
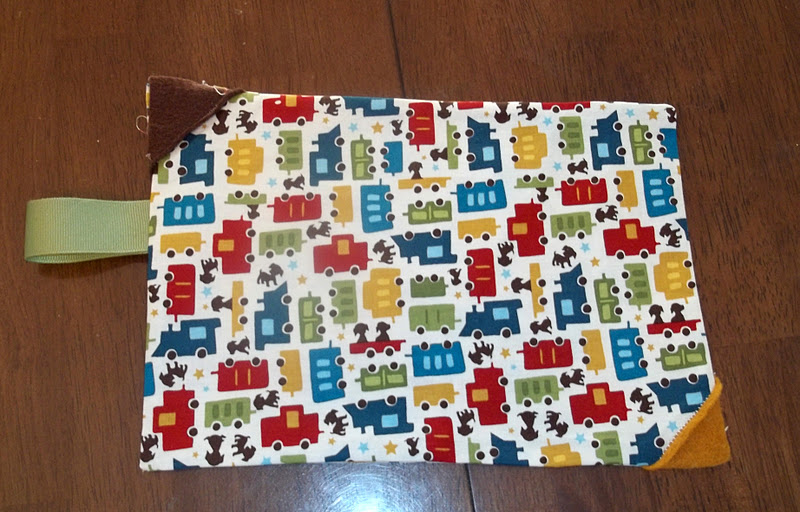
- 3. Cut two rectangular pieces of fabric 3/4″ longer then the long and short side of the maze. It works out nicely if you do one solid colored fabric for the front, and a fun patterned for the back… (I learned that after I took these pictures)!
- 4. In addition cut two, two inch fabric squares for the corner piece. Fold the square down the diagonal of the square to make a triange, if using felt just cut the square in half, because you do not need a finished edge.
- 5. On the right side of the front fabric, sew fabric triangles to opposite corners, (this will denote the start and finish of the maze). Look at the maze and make sure you put them in the right corners. Fold the ribbon in half and tack it to the edge of the fabric. Your pieces should now look like the picture above.
- 7. Turn right side out, and press.
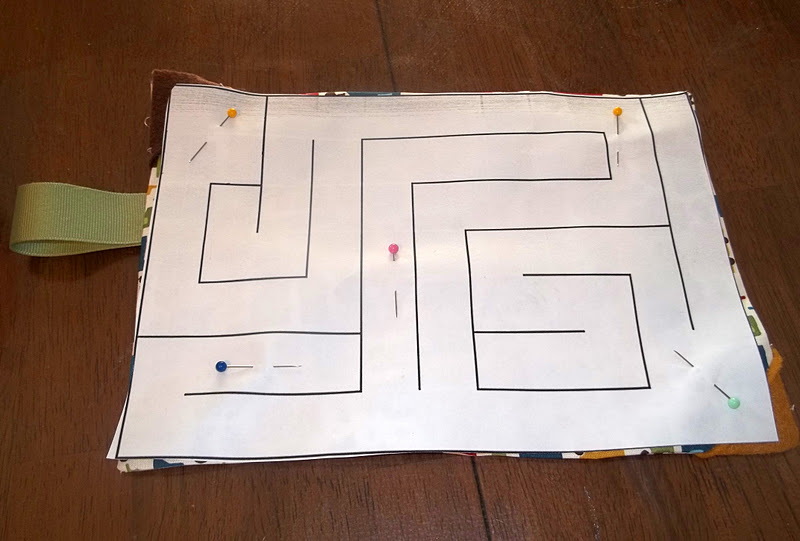
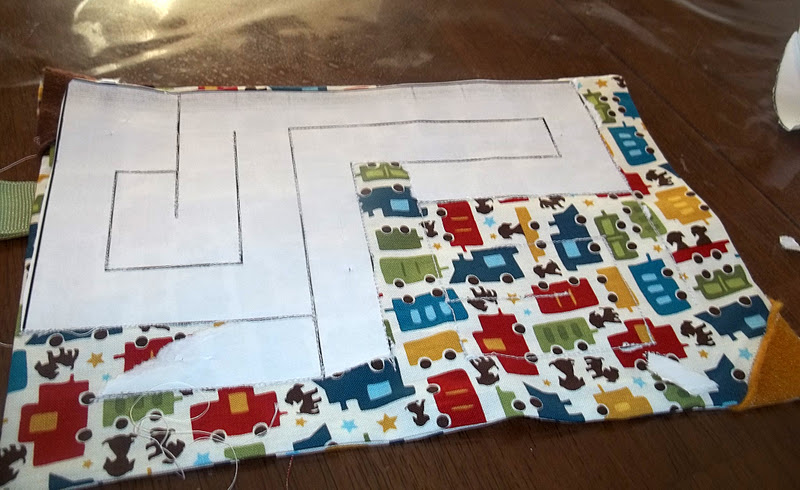
- 9. Sew on the paper (it will be ok), directly on the lines of the maze. MAKE SURE YOU BACK STITCH, at every corner, and at the end of every line. It is best if you use a contrasting thread, so that you can see the lines clearly, (I learned this by trial and error too!). You do not need to sew the perimeter border of the maze.
- 11. Place a flat glass stone, in the opening.
- 12. Close the opening up, and zig zag stitch around the outside, and you are ready to go!