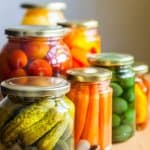
Canning Process
Learn how to safely process foods for canning.
Materials
- 12 Quart Water Bath Canner with Lid - best for foods with high acidity like salsa tomatoes and fruit.
- 23 Quart Pressure Canner - good for foods with low acidity like meat and soup.
- Ball Mason Jars - size of jar and size of the mouth will vary depending on what recipe you are canning. For example wide mouth quart jars are best for pickling and regular mouth pints are what we use for salsa.
- Snap Lids and Rings - new unused snap lids are needed to get a good seal on your jars. Rings may be saved and reused.
- Canning Jar Lifter - this is used to lift the hot jars safely out of the boiling water bath.
- Magnet Snap Lid Lifter - this makes pulling the snap lids from the water after being sterilizer much easier.
- Jar Canning Funnel - perfect for pouring salsa and jam into mason jars.
- Ladle - for pouring liquid into the jars.
- Over the Sink Strainer - this is my go-to strainer for processing a lot of fruit or vegetables.
- Rubber Tongs - for grasping hot jars and lids when sterilizing.
- Tea Towels - used for cleaning and handling hot jars.
Instructions
- 1. Prepare the recipe. Make sure that you have read the recipe completely and have all the required ingredients.
- Some recipes are prepared a day ahead of time to allow the ingredients to soak in their own natural flavors and juices.
- 2. Pour into jars. Once the recipe is prepared pour it into jars with a ladle and funnel if required. Make sure to leave enough head space, usually 1 inch from the top of the jar.
3. Put the snap lid and rings onto the jars. Be sure to wipe the rim of the jar with a clean damp cloth to remove any excess liquid or spill over.
Place the snap lid on top of the jar, then screw on the ring to just finger tight. - 4. Process the jars. Place the jars into the processor as directed in the recipe.
- 5. Prepare the counter top. Set tea towels out to receive the jars upon removal from the canning pot with the canning tongs.
- Do not set them directly on the counter surface, as this may cause breakage because of the sudden temperature change. Tighten the rings on the lid if needed.
- 6. Cool the jars. Allow the jars to cool on the counter until you hear the snap lids pop.
Once the lid has popped on the canning jar, it is a sign that your food has been sealed properly and can be stored for safe keeping. - 7. Label the jars. Use printed labels or a sharpie marker to write the date and contents on each jar.
