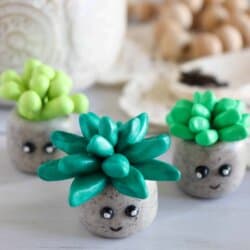
Mini Succulent Clay Craft
This DIY mini succulent clay craft is fun to create and makes the cutest little plants that you have ever seen! Follow this step by step visual tutorial...
Yield: 3
Materials
- parchment paper
- baking sheet
- polymer clay in green dark green, light green, grey and black
- clay cutting and shaping tools
- toothpicks
- black sharpie fine tip marker
- white glue
- white paint
- mod podge
- paint brush
Instructions
- 1. Begin by forming the clay into a soft, malleable ball
- 2. Roll 1 cm clay balls in each of the three colors.
- 4. Cone, tear drops and leaves.
- 8. Flatten a ball into a flat disk and press the cone shapes around the edge.
- 11. Layer alternatingly to create another plant.
- 15. Roll 6-8 tiny black balls of clay for eyes.
- 17. Bake the clay as directed in the oven. For me that was 25 minutes at 200 degrees
- 18. Once the clay has cooled, glue the black balls into the eyes and draw a mouth on the pot with a sharpie.
- 21. Using a toothpick, place each plant top into the clay pot.


