Angry Birds Costume Tutorial and Patterns
Create your own DIY Angry Birds costume with this fun tutorial! Learn how to craft the iconic characters for a playful and memorable Halloween look.

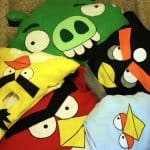
Today I am sharing this Angry Birds costume tutorial that is complete with free patterns! I freaking love how these costumes turned out. I have been working very hard to bring you the complete tutorial before Halloween this year so that perhaps you can make your very own Angry Birds costume for the family.
Too busy to make this right away? Pin it for later! Pin this post to your favorite board on Pinterest and it will be there when you’re ready!

Costume Notes:
Beware this post has lots of photos.
I jump from metric to imperial measurements all the time ~ sorry!
The Green Pig is sized for my husband {mens large}
The Red Bird is sized for myself {womens large}
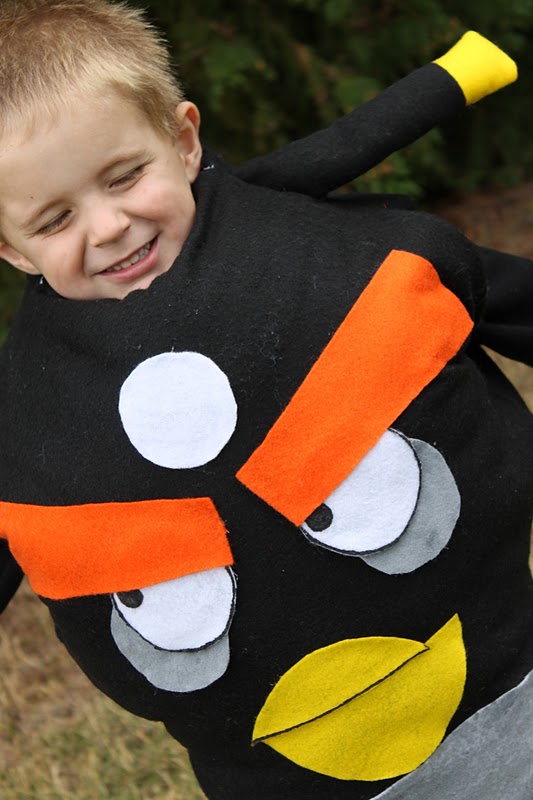
The Black Bird is a child size 6
The Blue Bird is a child size 4
The Yellow Bird is a child size 3

**If your costume is fitting too small try adding side and shoulder paneling in a coordinating felt colour. Simply cut pieces of fabric {approx. 6″x8″ for the sides and 4″x4″ for the shoulders on the adult costumes} and sew them into place where the sewing lines are in Step 9 of the green pig.**

Click here for three more Angry Bird children’s costume patterns!

If you have any questions please don’t hesitate to email me heatherpainchaud{at}hotmail{dot}com

Materials (aff links):
Black head band {for pig crown}
How to make a Green Pig costume:

Green Pig

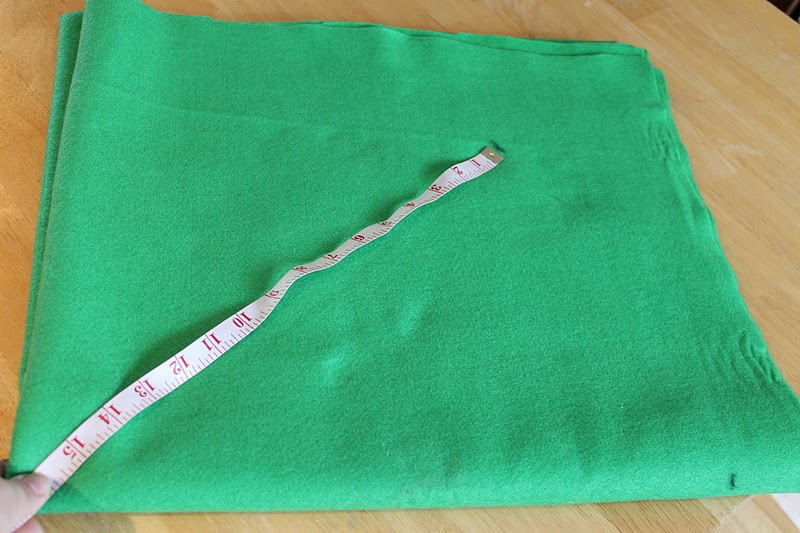
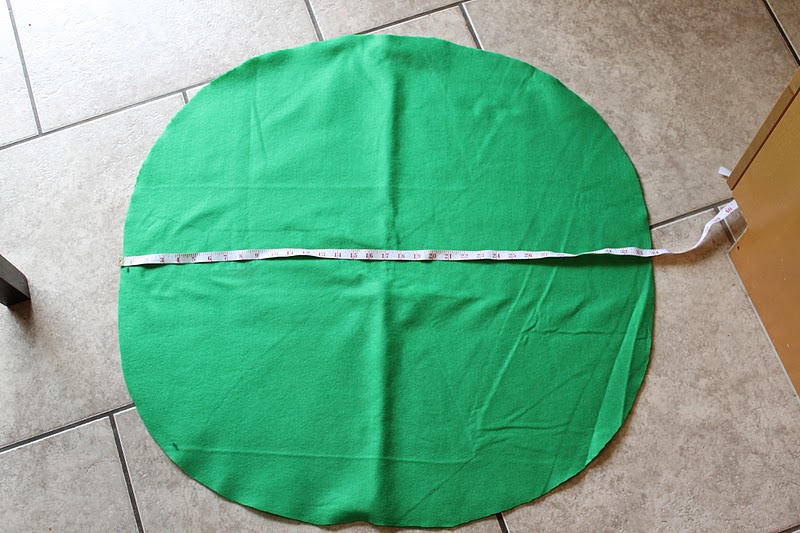
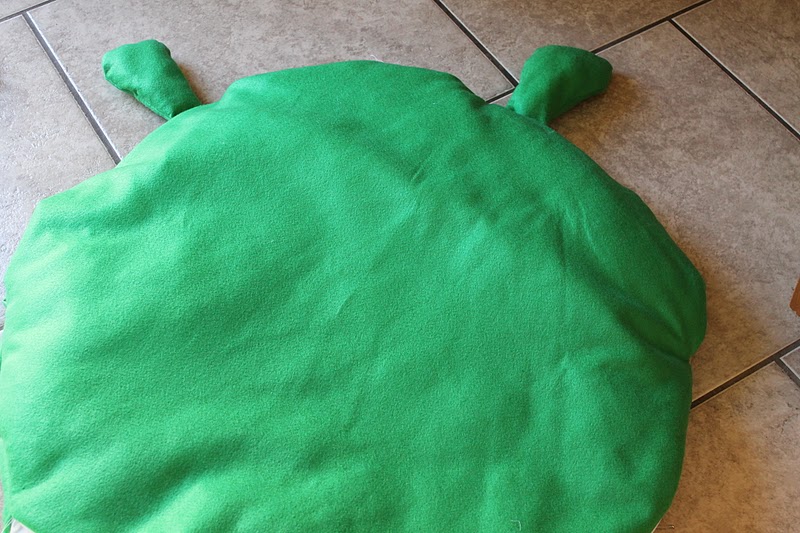
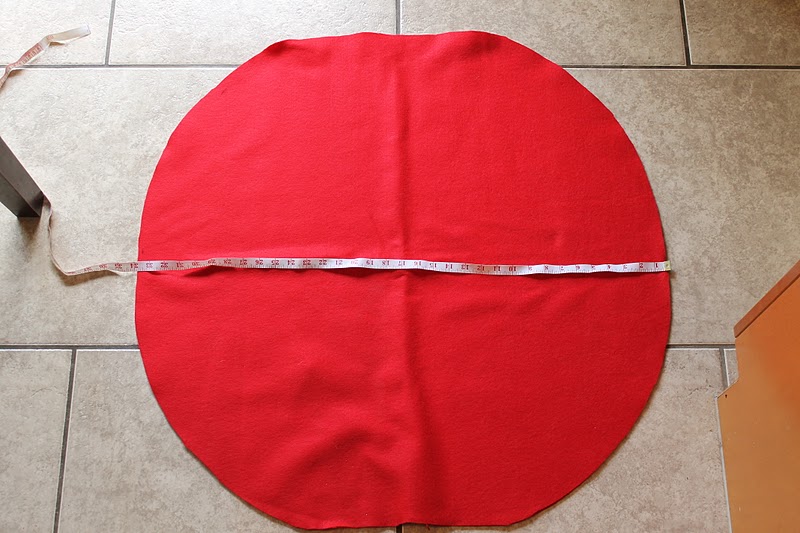
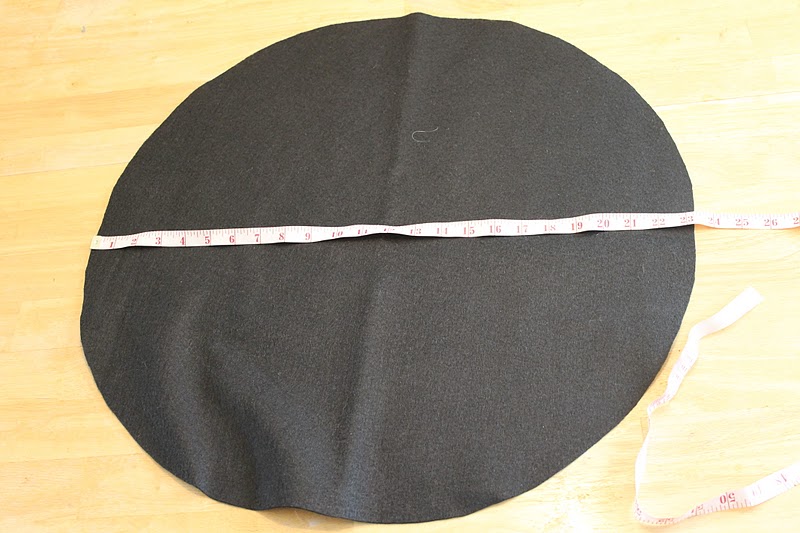
1. Fold the felt into quarters and measure 16″ from the center fold.

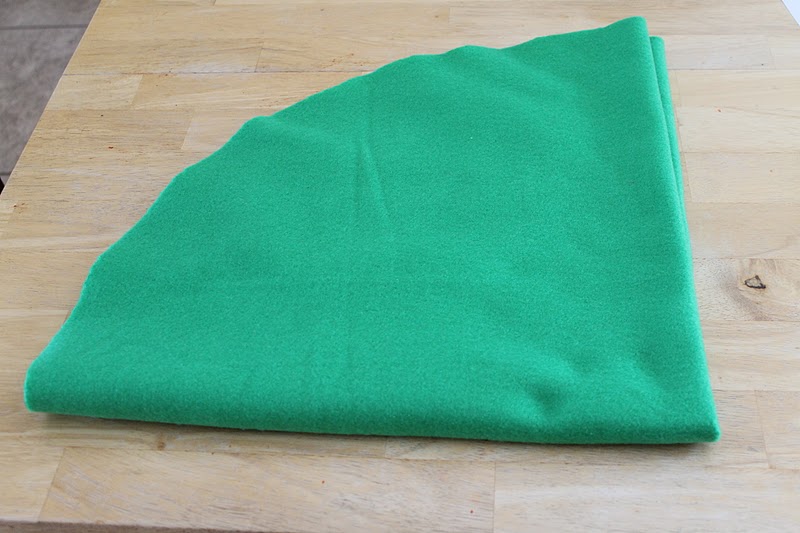
2. Cut a curve along your measurements to create a circle when unfolded.

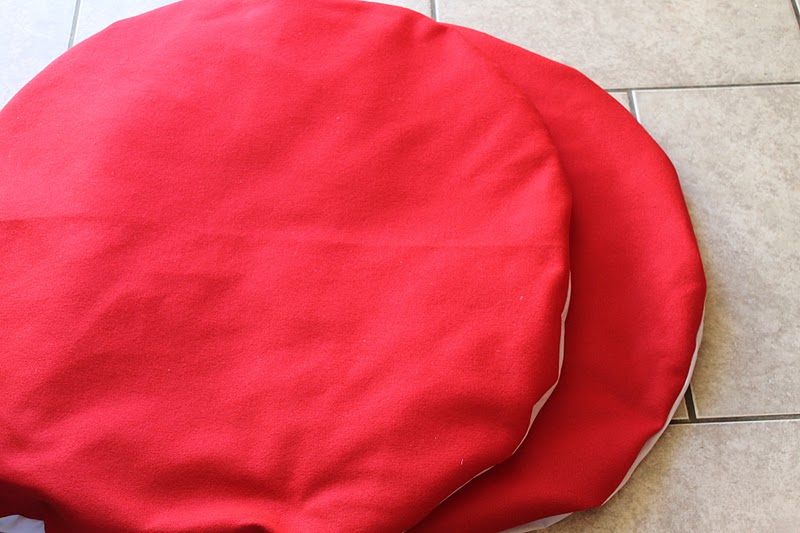
3. Your circle should measure 32″ in diameter {repeat these steps so that you have two 32″ green circles}

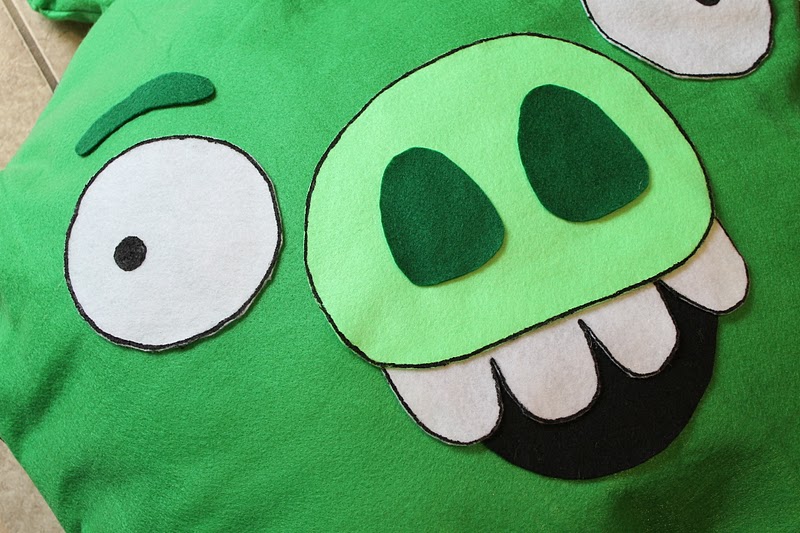
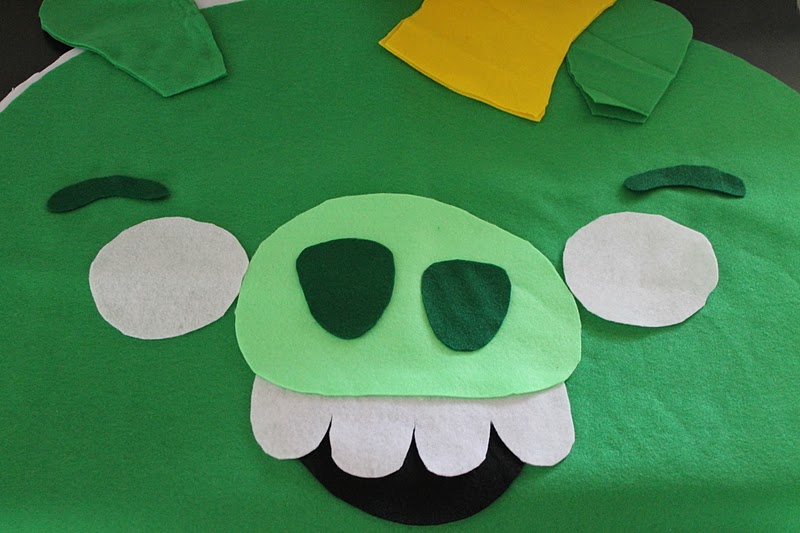
4. Cut two 32″ circles out of cotton and cut your features out of felt. Go here, here, here and here for the patterns.

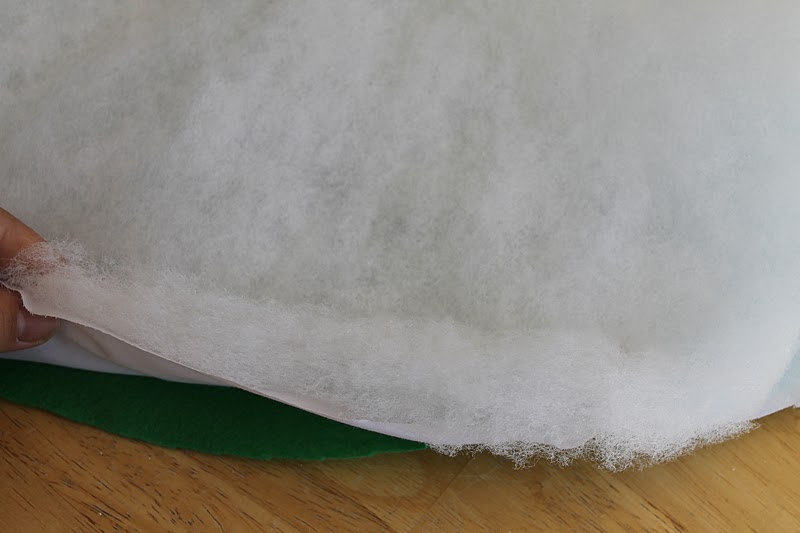
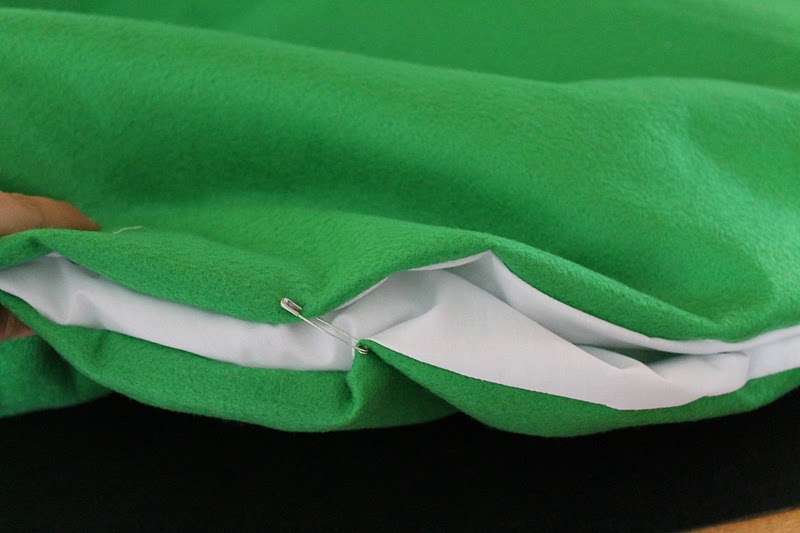
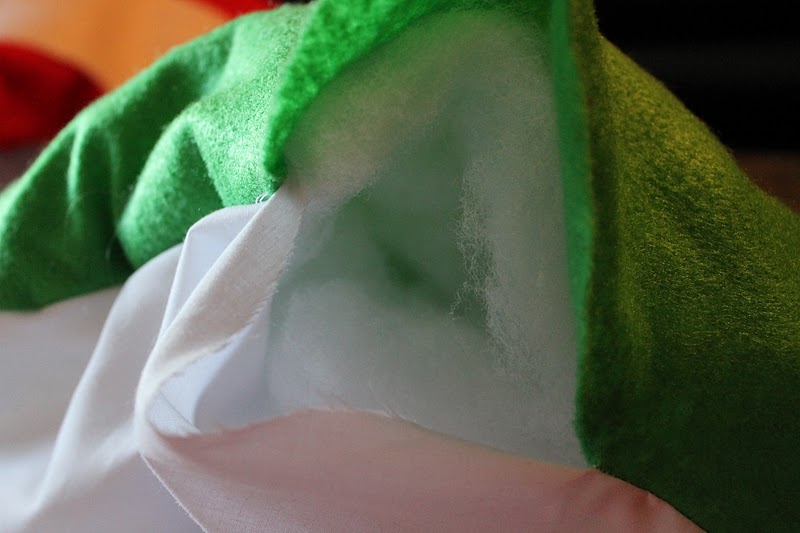
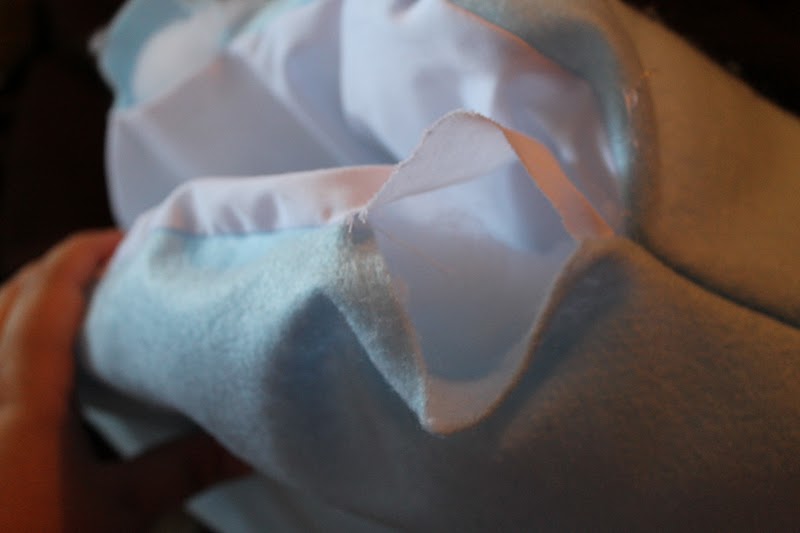
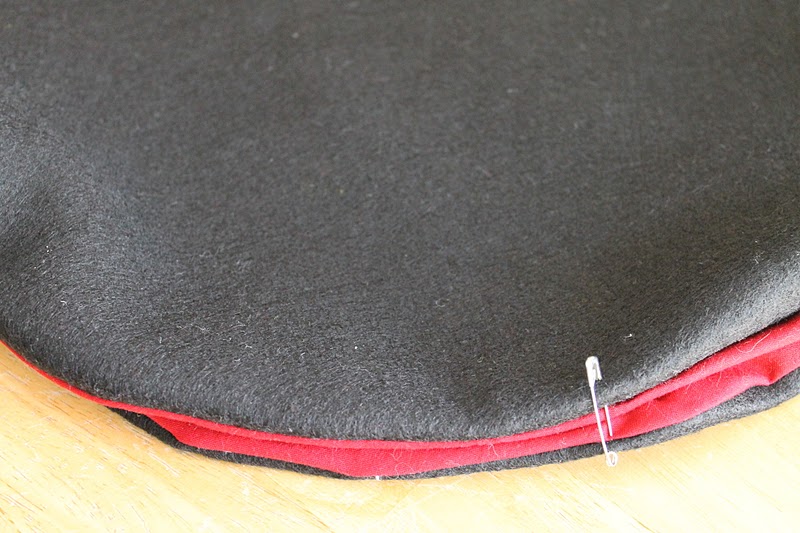
5. Lay one green circle and one cotton circle, right sides together. Top with a circle of quilt batting and pin together. The quilt batting is used in the adult costumes to provided added support to the upper portion and a smoother, less bumpy look to the finished costume. Sew together using a 1/4″ seam allowance.

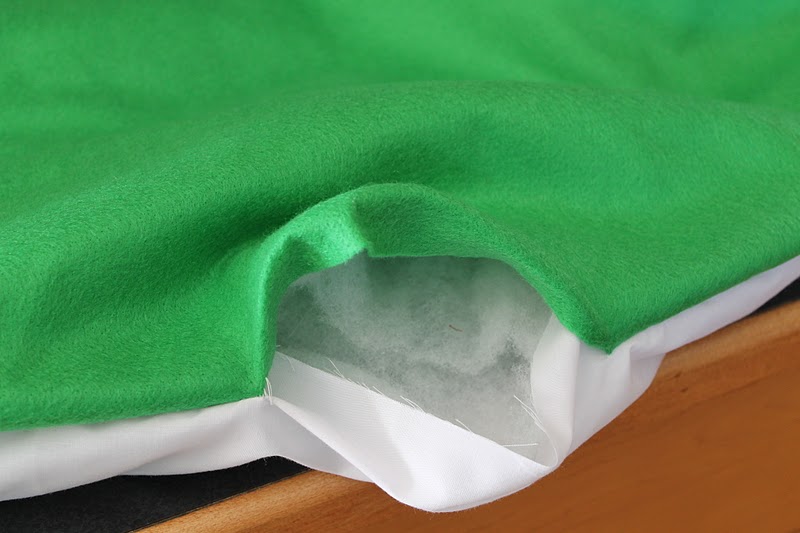
6. Be sure to leave a 4-6″ hole while sewing so that you can invert the piece, right sides out.

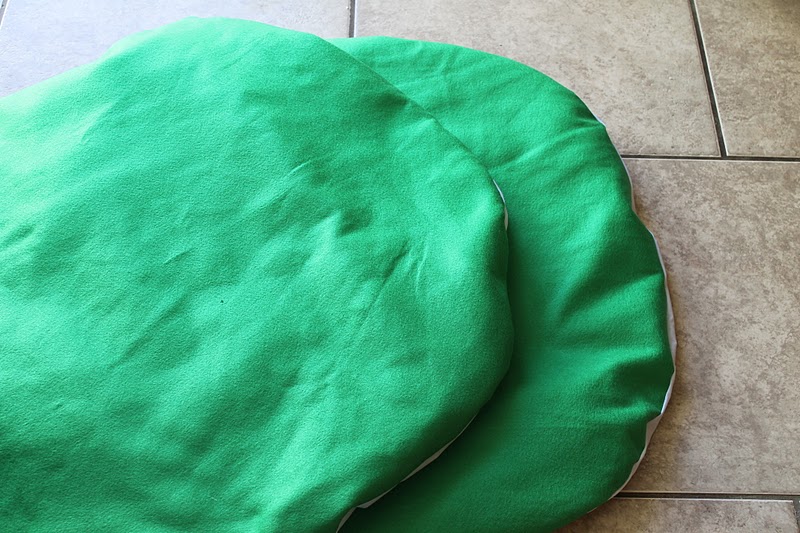
7. Repeat steps 5 & 6 so that you have two stuffed circles. These are the back and front of the pig.

8. Pin the back and the front together. At this point I had Darcy try it on so that I could get the placement of his head and arms right.

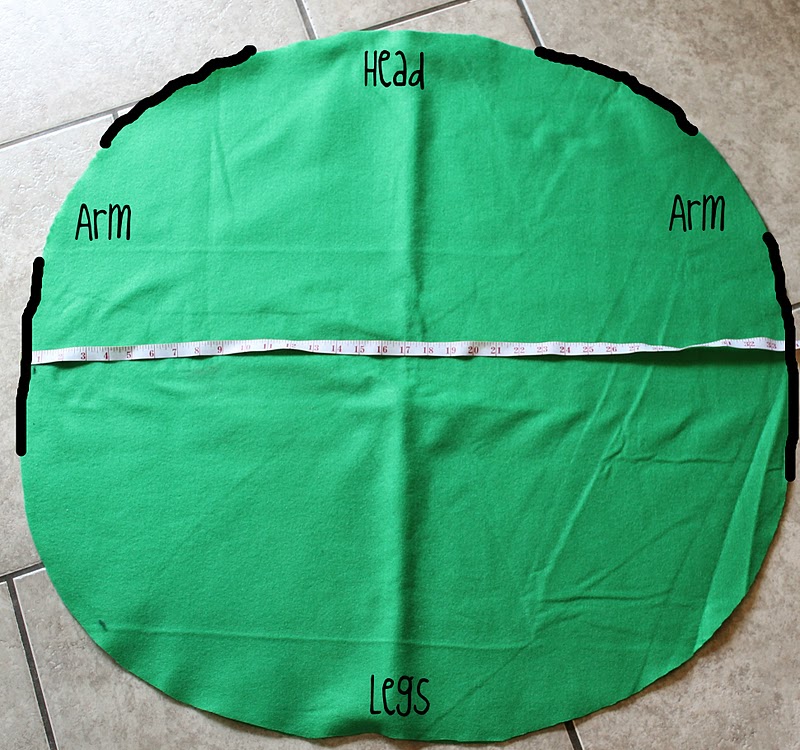
9. Here is an example of where you are going to sew the back and front together {black lines = sew here}. The best way to get a good fit is to have your wearer try it on. Sew the ear pieces from the pattern together and stuff them with batting.

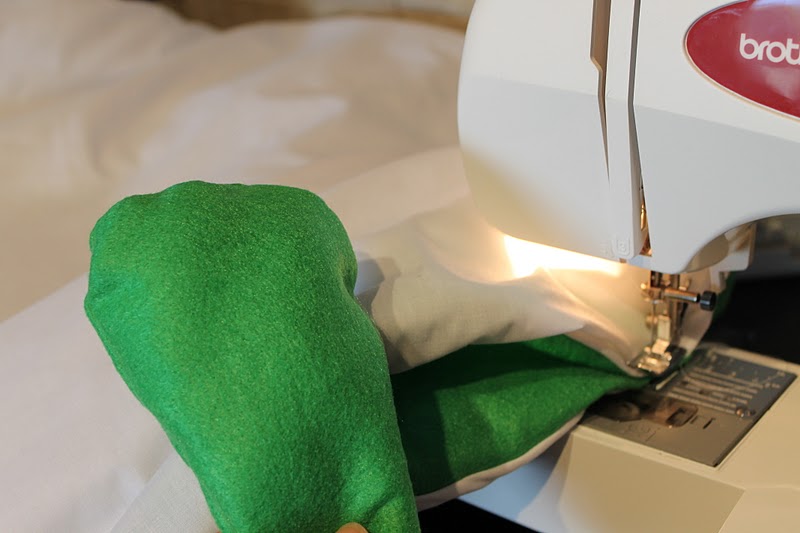
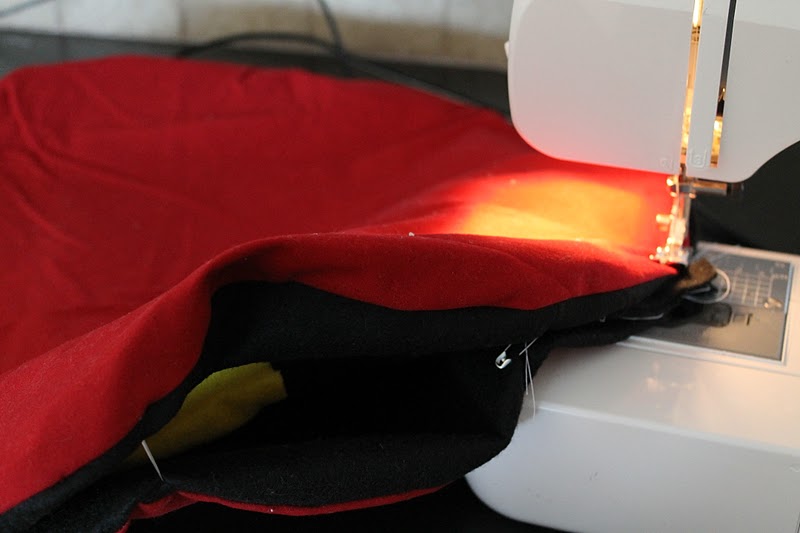
10. Sew the front and back of the pig together, right sides facing, 1/4″ seam, along the black lines in step 9. Don’t forget to sew the ears into the shoulder seam.

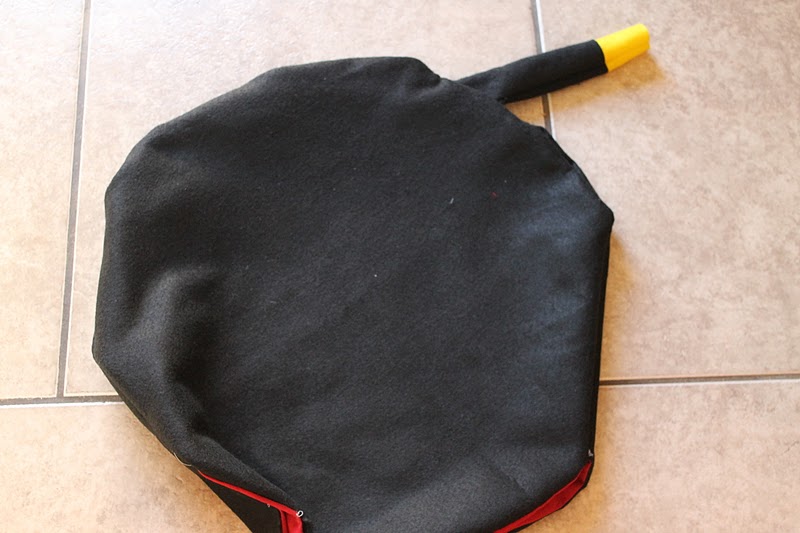
11. Invert the pig so the right sides are facing out.

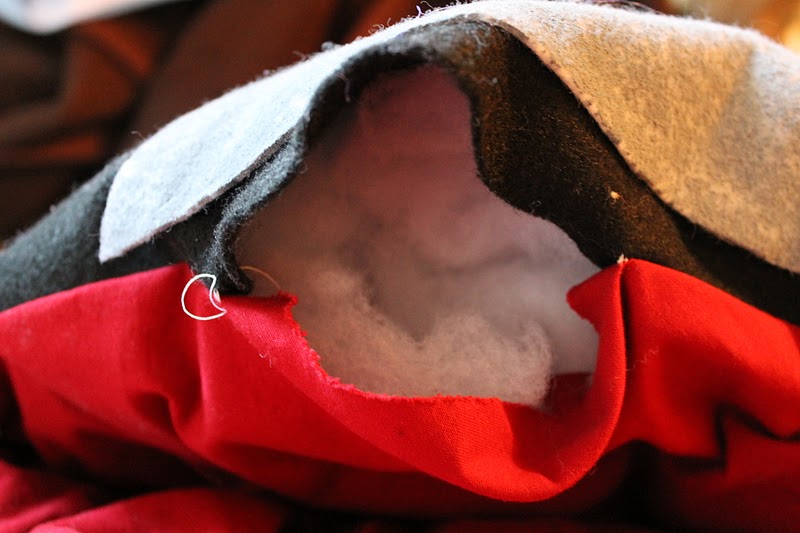
12. Stuff the front and the back of the pig with pillow stuffing. I really played with the fullness and amount of stuffing. Stuff it then try it on to see if it is full enough for you. Sew or hot glue the hole closed.

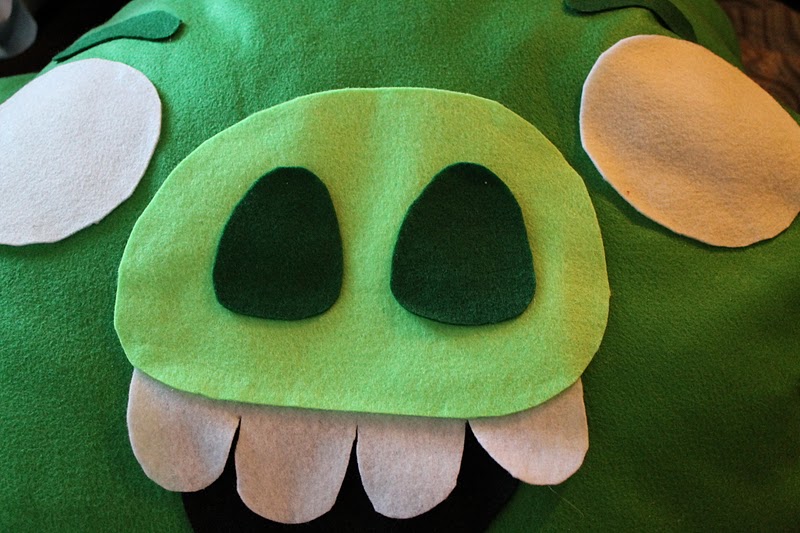
13. Hot glue gun the features to the front of the pig.

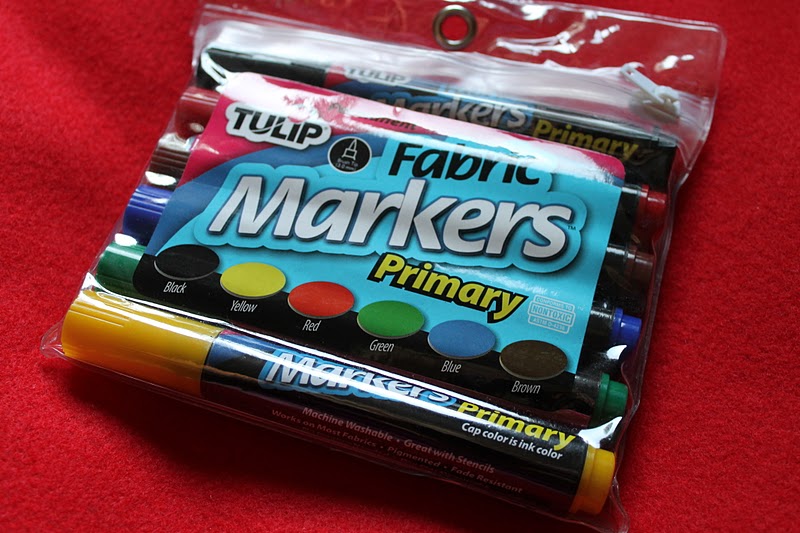
14. Outline the features with fabric markers or paint {paint actually worked better for me}.

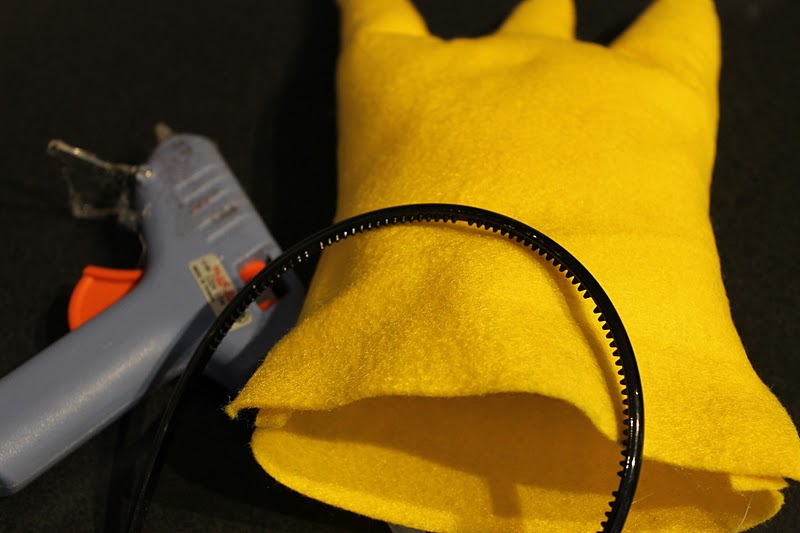
15. Sew the crown together and stuff it with batting.

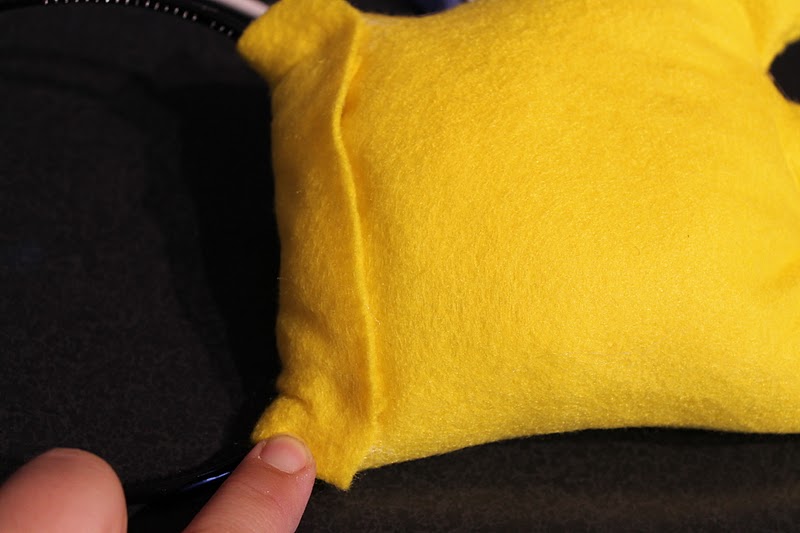
16. Wrap the end of the crown around a head band.

17. Hot glue the crown in place.

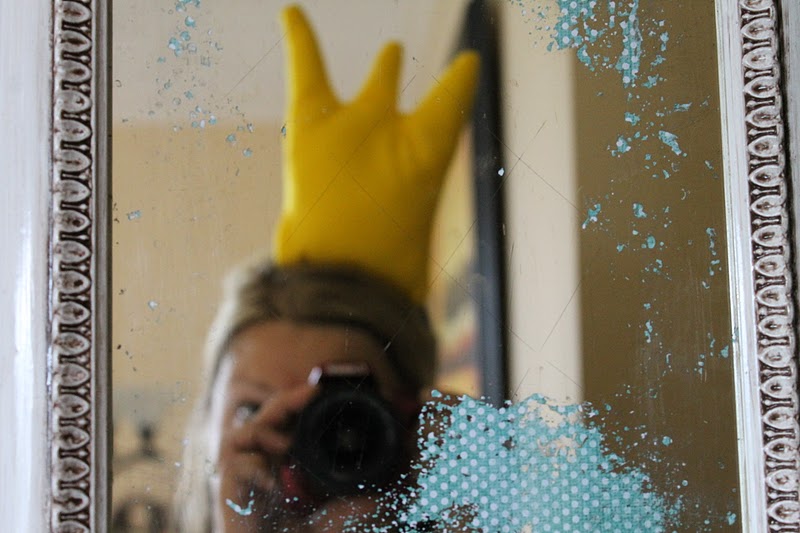
Nice eh?

How to make the Red Bird costume:

Red Bird

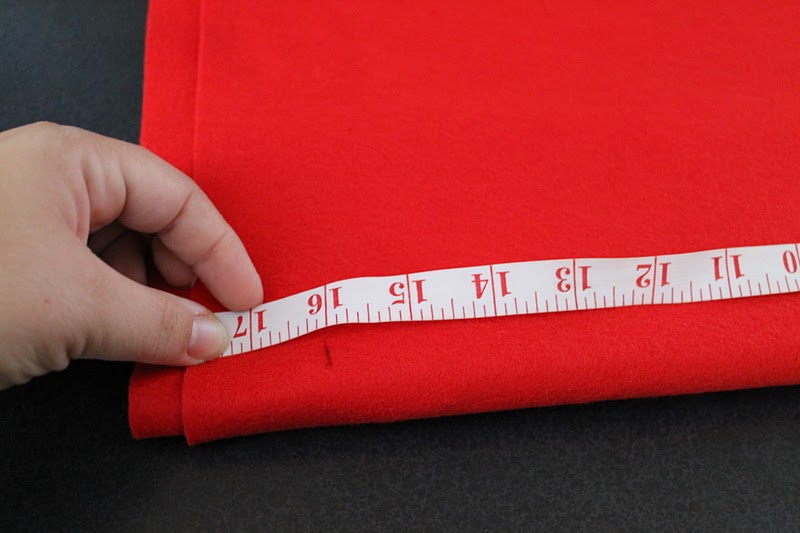
1. Fold the felt into quarters and measure 16″ from the center.

2. Cut a curve along your measurements to create a circle when unfolded.

3. Your circle should measure 32″ in diameter {repeat these steps so that you have two 32″ red circles}

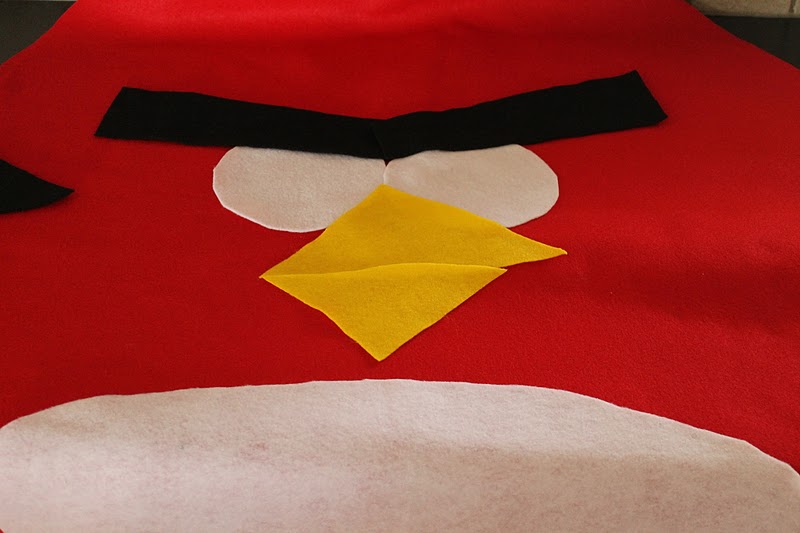
4. Cut two 32″ circles out of cotton and cut your features out of felt. Go here, here and here for the patterns.

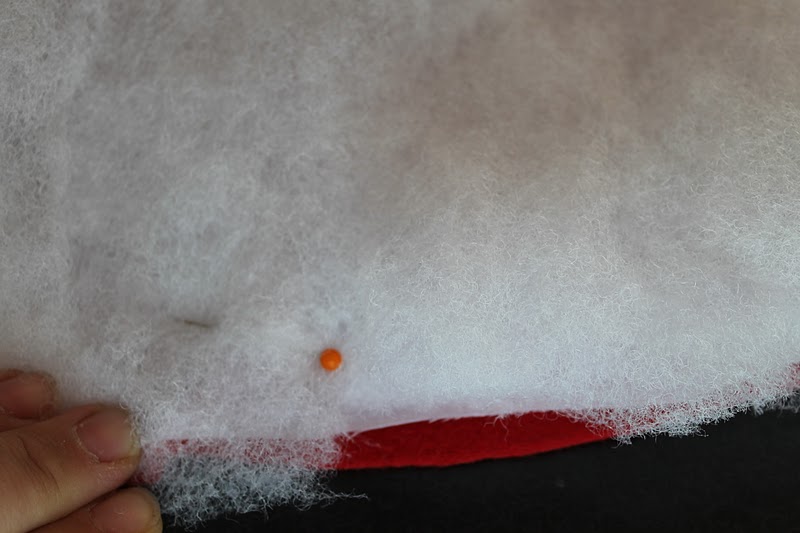
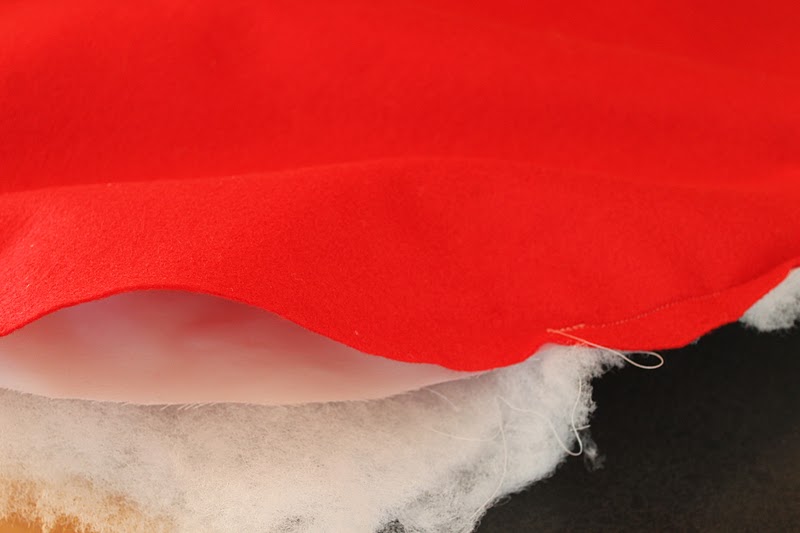
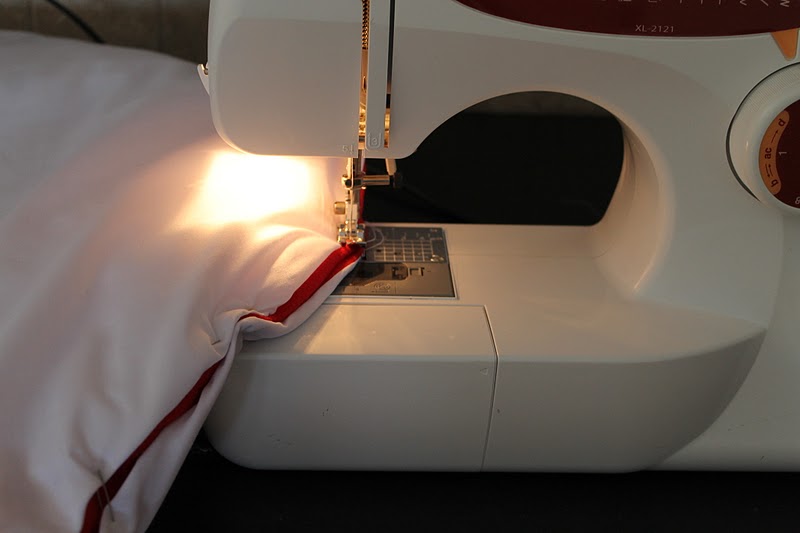
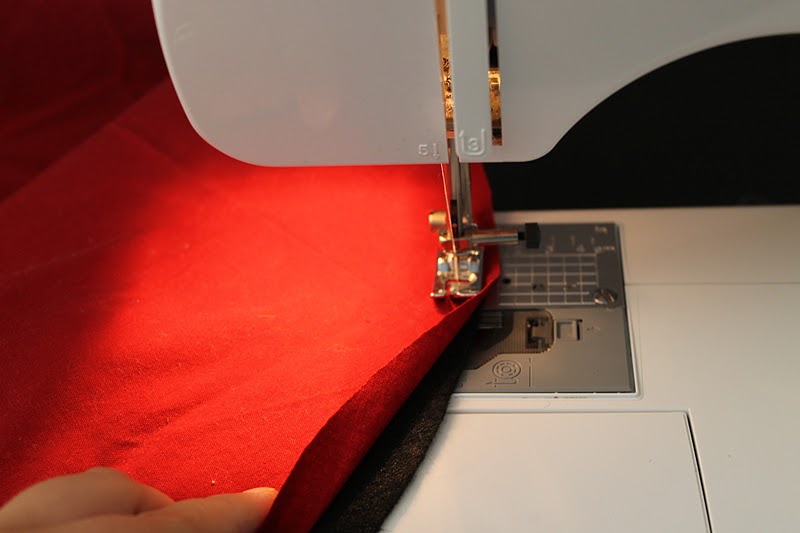
5. Lay one red circle and one cotton circle, right sides together. Top with a circle of quilt batting and pin together. The quilt batting is used in the adult costumes to provided added support to the upper portion and a smoother, less bumpy look to the finished costume. Sew together using a 1/4″ seam allowance.

6. Be sure to leave a 4-6″ hole while sewing so that you can invert the piece, right sides out.

7. Repeat steps 5 & 6 so that you have two stuffed circles. These are the back and front of the red bird.


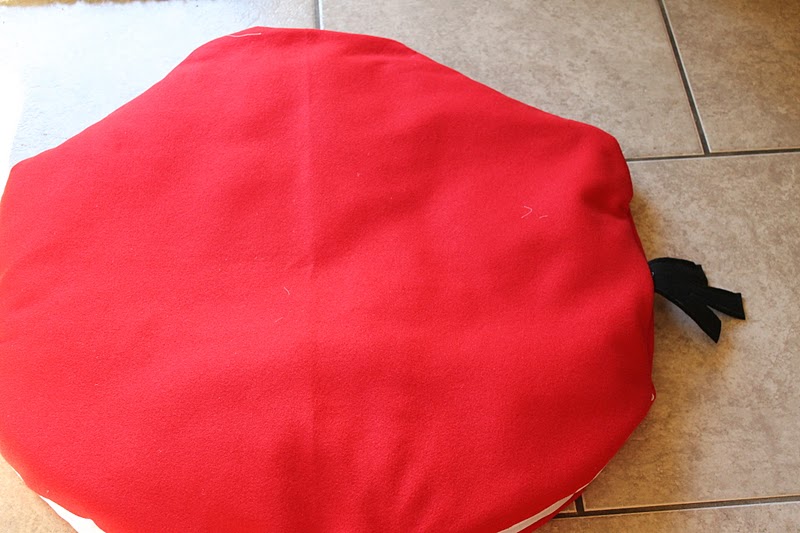
9. Go to the Green Pig Step 9 for an example of where you are going to sew the back and front together {black lines = sew here}. The best way to get a good fit is to have your wearer try it on. Sew the tail pieces from the pattern together.

10. Sew the front and back of the red bird together, right sides facing, 1/4″ seam, along the black lines in Step 9. Don’t forget to sew the tail into the side seam.

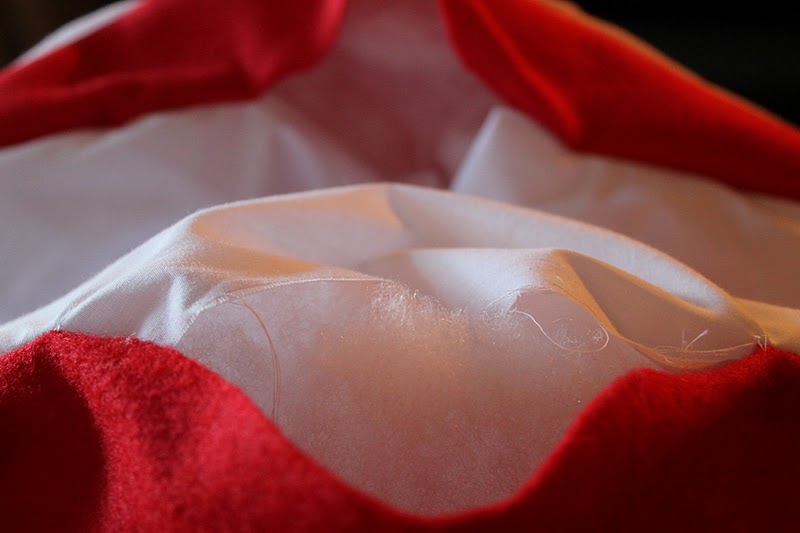
11. Invert the bird so the right sides are facing out.

12. Stuff the front and the back of the red bird with pillow stuffing. I really played with the fullness and amount of stuffing. Stuff it then try it on to see if it is full enough for you. Sew or hot glue the hole closed.

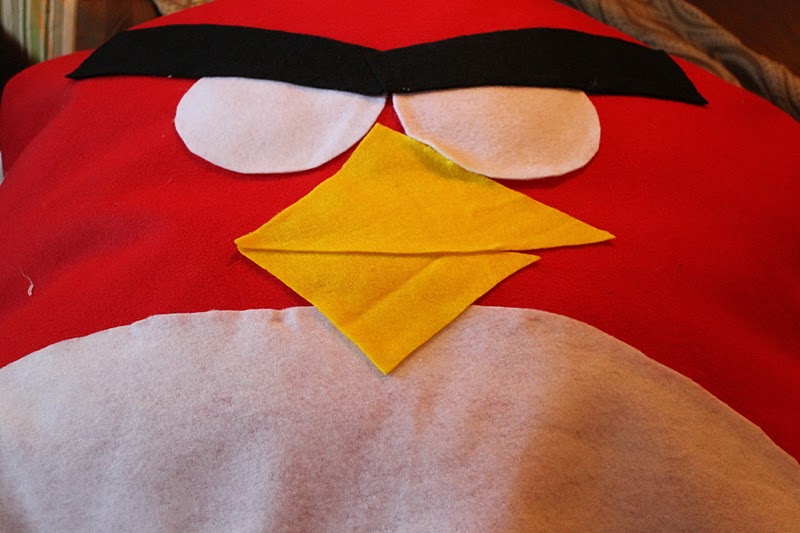
13. Hot glue gun the features to the front of the bird.
14. Outline the features with fabric markers or paint {paint actually worked better for me}.
How to make a Blue Bird costume:

Blue Bird{s}

1.Fold the felt into quarters and measure 9 1/2″ from the center

2.Cut a curve along your measurements to create a circle when unfolded.
3.Your circle should measure 19″ in diameter {repeat these steps so that you have two 19″ blue circles}

4.Cut two 19″ circles out of cotton and cut your features out of felt. Go here for the pattern.

5. Lay one blue circle and one cotton circle, right sides together and pin together.

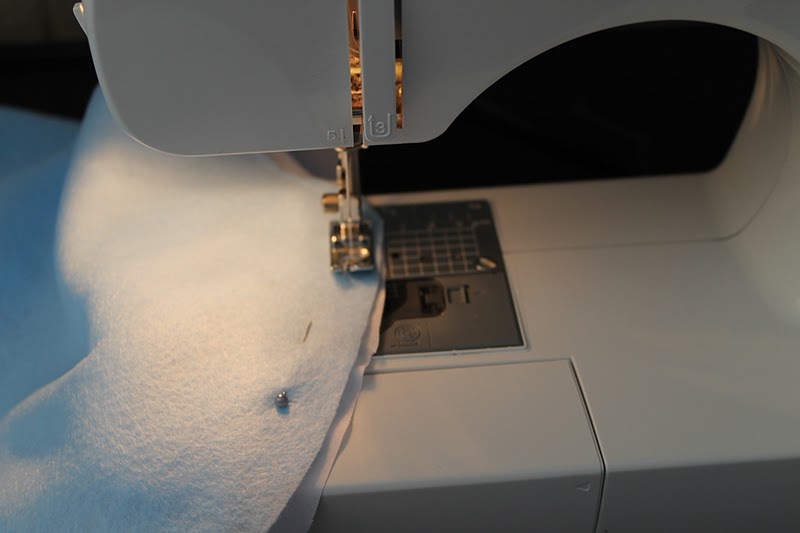
6. Sew sides together using a 1/4″ seam allowance.

7. Be sure to leave a 4-6″ hole while sewing so that you can invert the piece, right sides out.

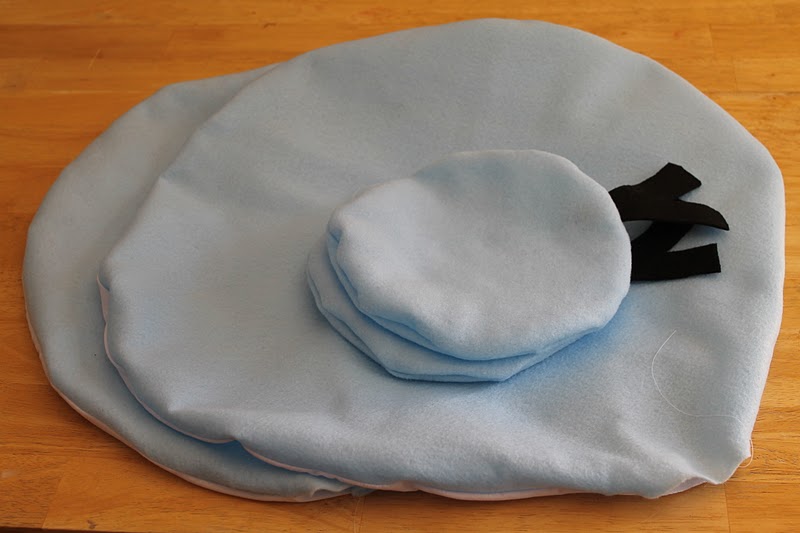
8. Repeat steps 5 – 7 so that you have two circles. These are the back and front of the bird. {I created two extra, small blue bird stuffys as part of this costume ~ sorry no tute for those}.

9. Pin the back and the front together. At this point I had one of the kids try it on so that I could get the placement of the head and arms right.

10. Green Pig Step 9 is an example of where you are going to sew the back and front together {black lines = sew here}. The best way to get a good fit is to have your wearer try it on.

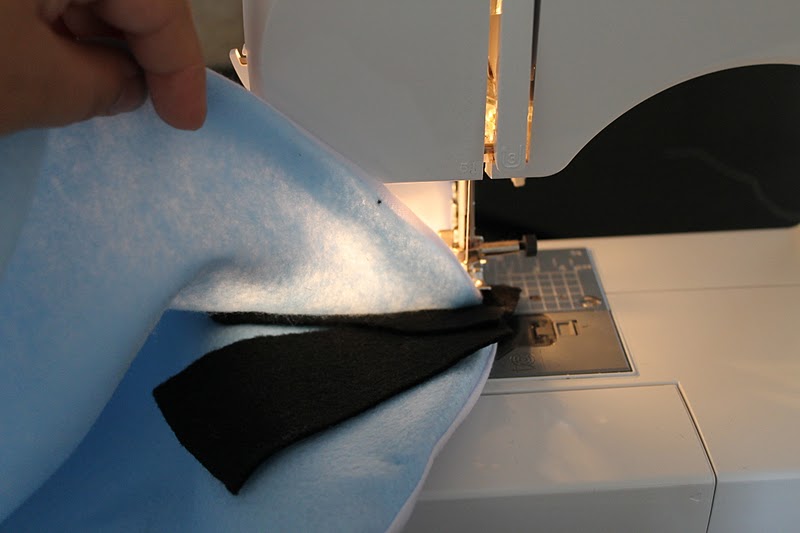
11. Sew the front and back of the bird together, right sides facing, 1/4″ seam, along the black lines in Step 9. Don’t forget to sew the tail into the side seam.


13. Stuff the front and the back of the bird with pillow stuffing. I really played with the fullness and amount of stuffing. Stuff it then try it on to see if it is full enough for you. Sew or hot glue the hole closed.

13. Hot glue gun the features to the front of the bird.
14. Outline the features with fabric markers or paint {paint actually worked better for me}.
How to make a Black Bird costume:

Black Bird

1. Fold the felt into quarters and measure 11 1/2″ from the center.
2. Cut a curve along your measurements to create a circle when unfolded.3. Your circle should measure 23″ in diameter {repeat these steps so that you have two 23″ black circles}

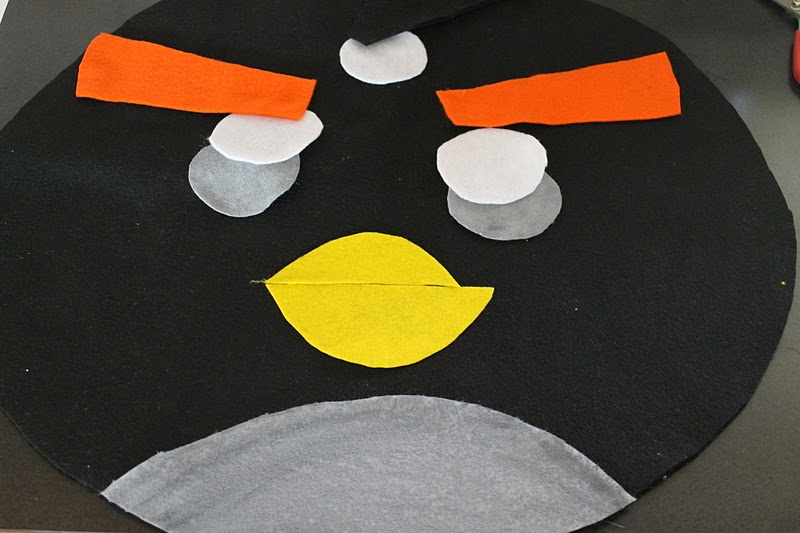
4. Cut two 23″ circles out of cotton {my cotton was red in this example} and cut your features out of felt. Go here and here for the pattern.

5. Lay one black circle and one cotton circle, right sides together and pin together. Sew together using a 1/4″ seam allowance.

6. Be sure to leave a 4-6″ hole while sewing so that you can invert the piece, right sides out.

7. Repeat steps 5 & 6 so that you have two circles. These are the back and front of the bird.

8. Pin the back and the front together. At this point I had one of them try it on so that I could get the placement of the head and arms right.

9. Sew the front and back of the bird together, right sides facing, 1/4″ seam, along the black lines in Step 9 of the pig. Don’t forget to sew the top feather into the sholder seam.


11. Stuff the front and the back of the bird with pillow stuffing. I really played with the fullness and amount of stuffing. Stuff it then try it on to see if it is full enough for you. Sew or hot glue the hole closed.

12. Hot glue gun the features to the front of the bird.
13. Outline the features with fabric markers or paint {paint actually worked better for me}.

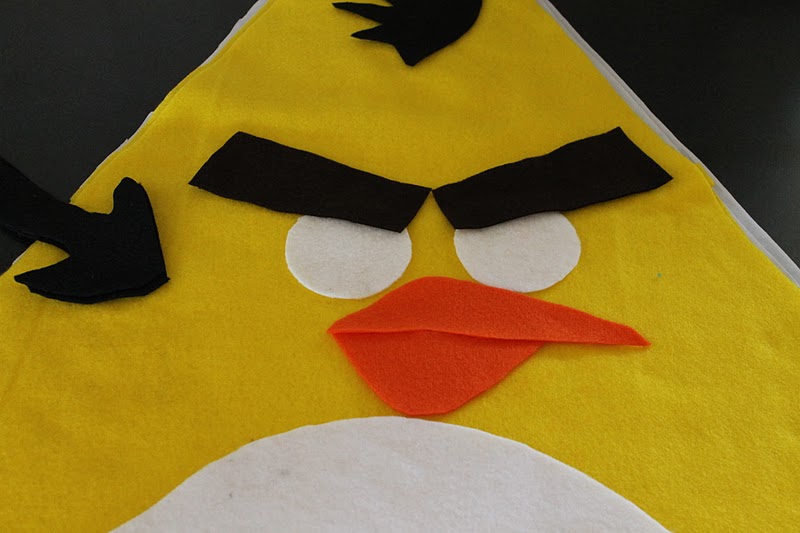
How to make a Yellow Bird costume:

Yellow Bird

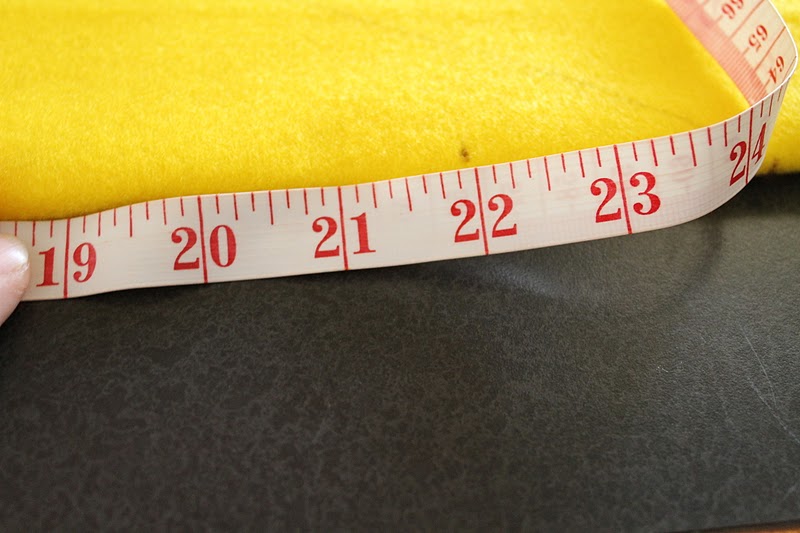
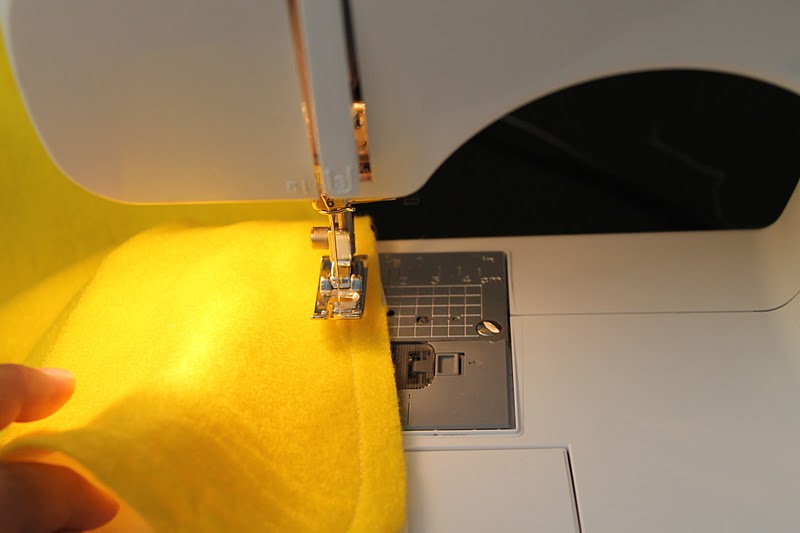
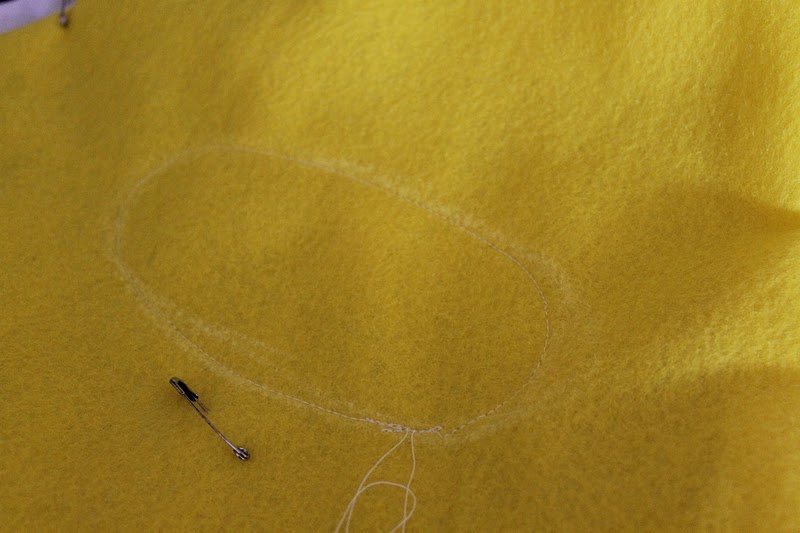
1. Fold your felt in half and mark 22″ along the edge.

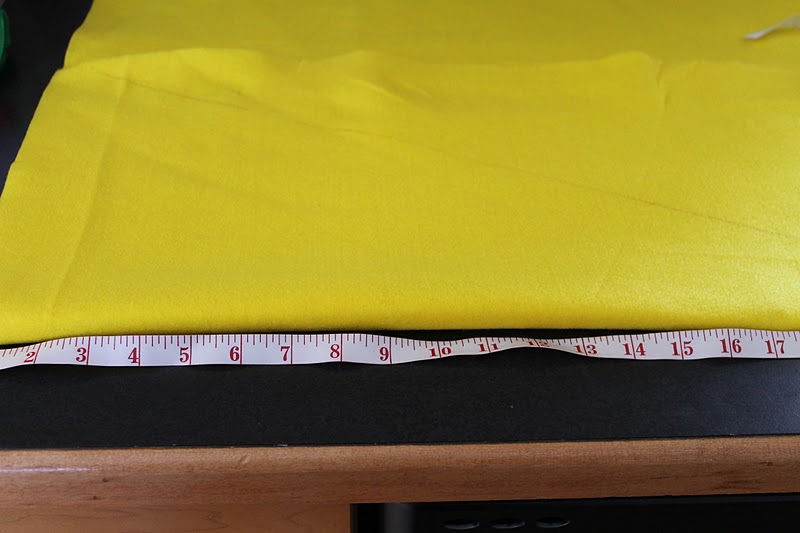
2. Draw a sloped line from the 22″ mark to approx. 12 1/2″ along the bottom. Cut out the shape and unfold to reveal a triangle.


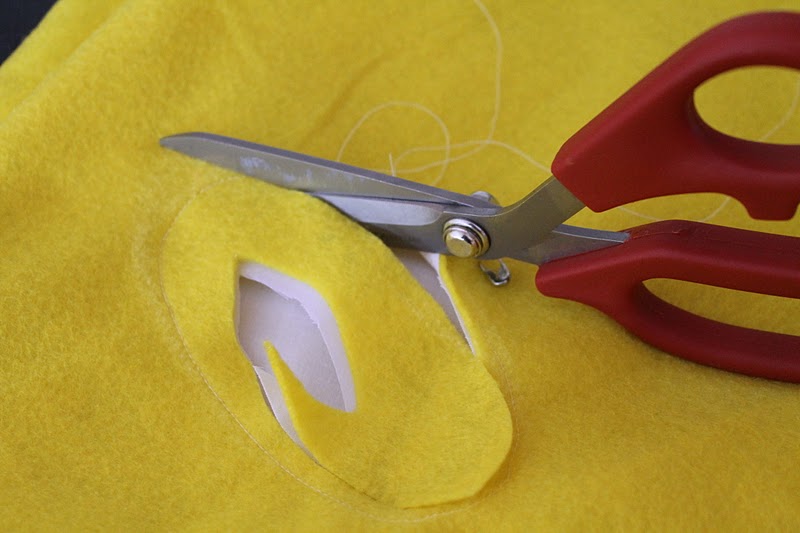
3. Cut out two pieces of cotton the same size as the felt triangle and cut out the bird features. Go here and here for the pattern.


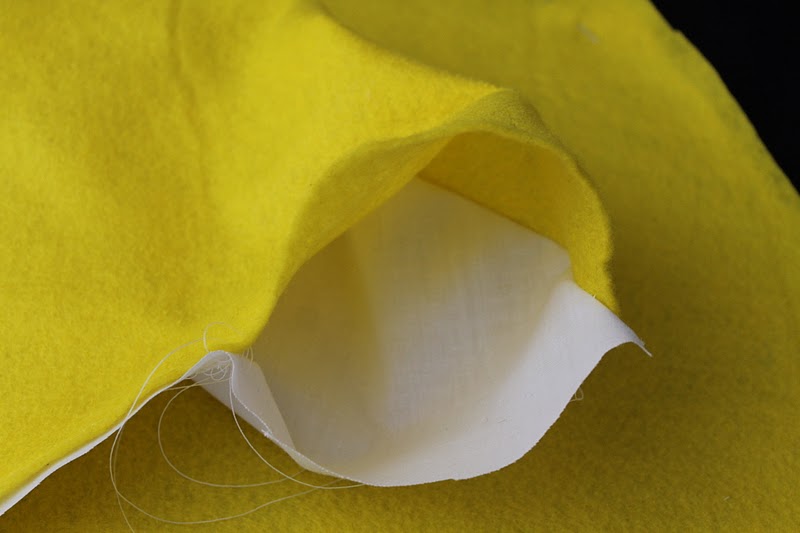
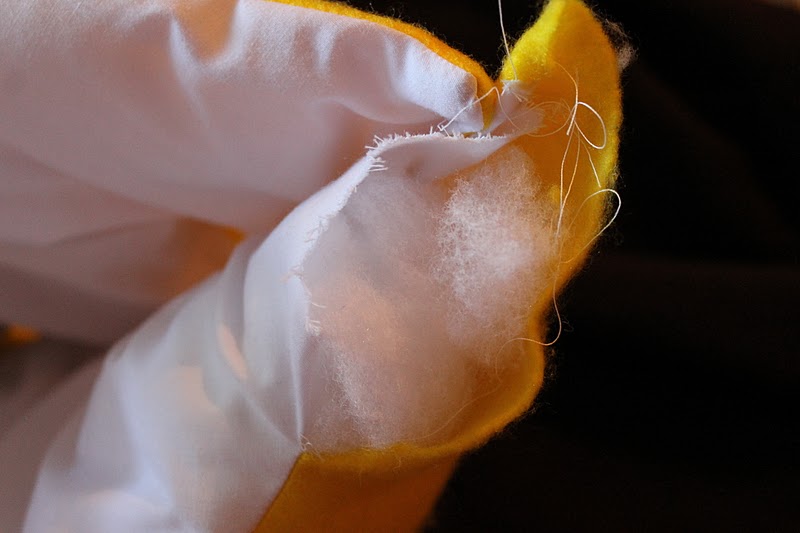
5. Be sure to leave a 4-6″ hole while sewing so that you can invert the piece, right sides out.


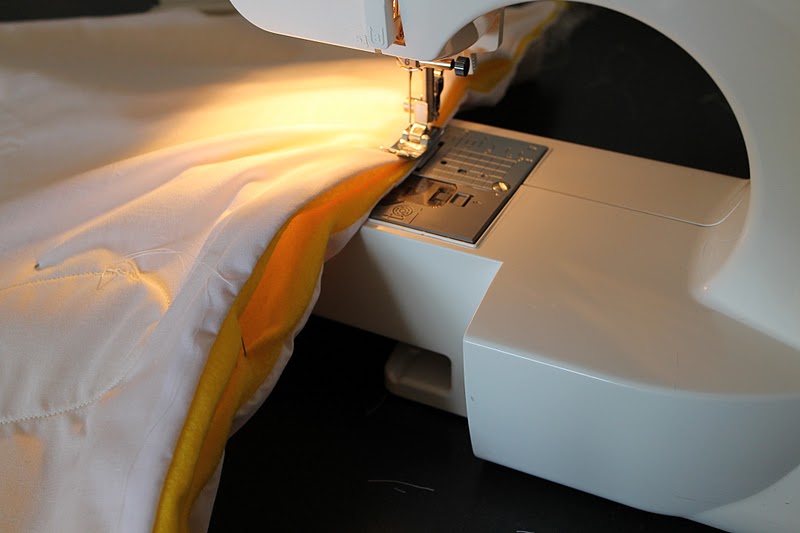
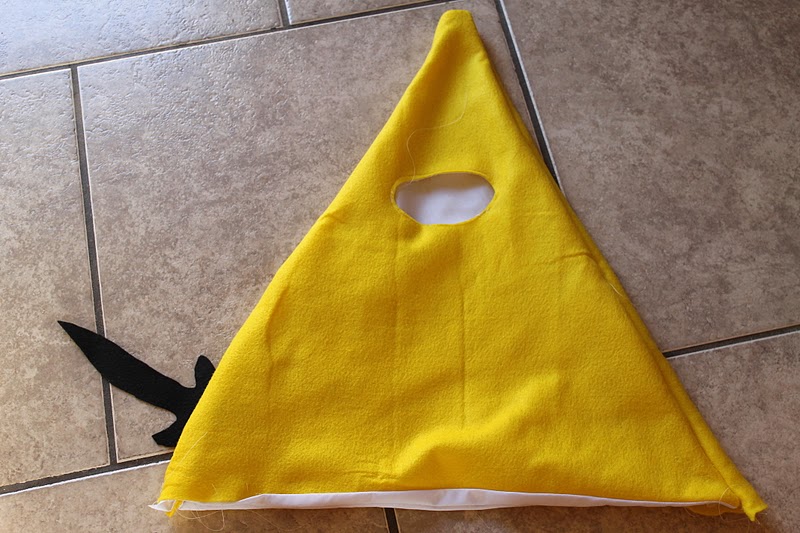
9. Sew the front and back, right sides together using a 1/4″ seam.

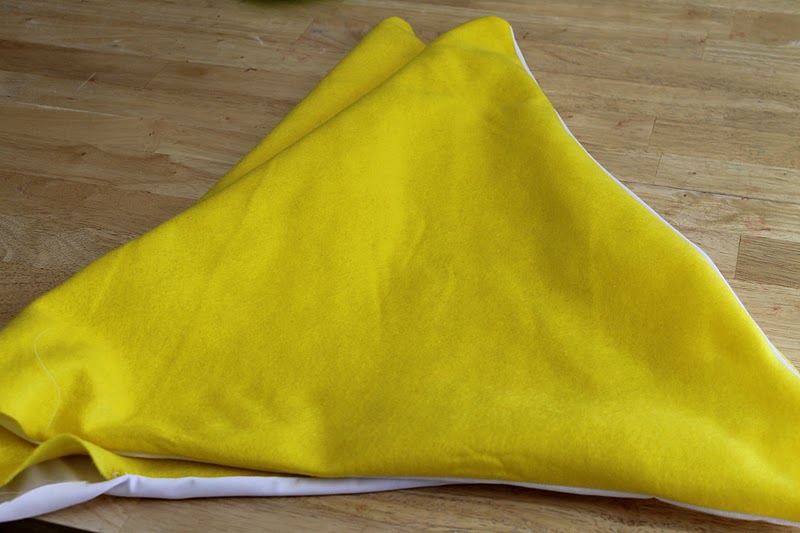
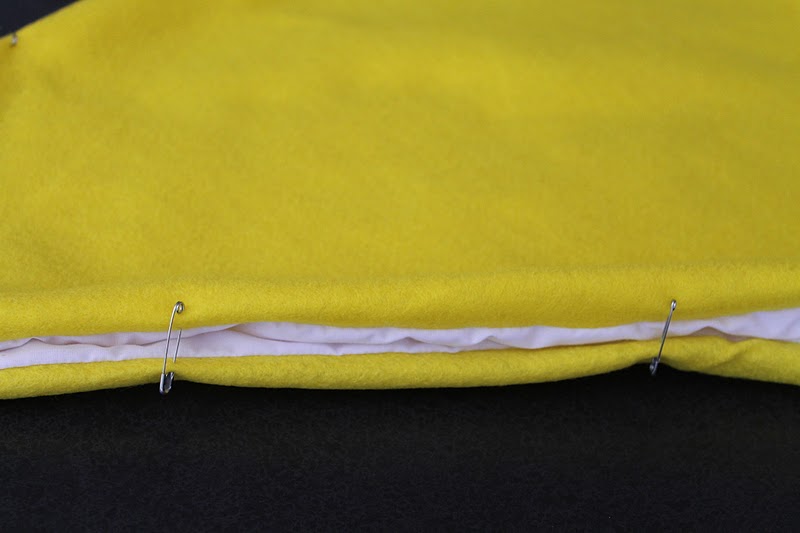
10. Don’t forget to sew the tail into the side seam.


13. Stuff the costume with cotton batting.

13. Hot glue gun the features to the front of the bird.
14. Outline the features with fabric markers or paint {paint actually worked better for me}.


[mv_create title=”More Family Costume Ideas” key=”35″ type=”list” layout=”hero”]
ANGRY BIRDS COSTUME TUTORIAL
Materials
- 1 ½ meters of green & red felt
- 1 meter of blue black & yellow felt
- ½ meter of white felt
- 10 meters of broadcloth {an inexpensive lightweight cotton}
- 1 sheet of craft felt {found at a craft or dollar store} in these colours: orange brown, light green, dark green and grey.
- 6 meters of quilt batting
- 1 large bag of poly fil
- Black fabric paint or fabric marker
- Black head band {for pig crown}
- Scissors
- Thread
- Hot Glue Gun
- Glue sticks
- Pins
- Measuring tape
Instructions
- 1. Fold the felt into quarters and measure 16″ from the center fold.
- 5. Lay one green circle and one cotton circle, right sides together. Top with a circle of quilt batting and pin together. The quilt batting is used in the adult costumes to provided added support to the upper portion and a smoother, less bumpy look to the finished costume. Sew together using a 1/4″ seam allowance.
- 7. Repeat steps 5 & 6 so that you have two stuffed circles. These are the back and front of the pig.
- 8. Pin the back and the front together. At this point I had Darcy try it on so that I could get the placement of his head and arms right. 9. Here is an example of where you are going to sew the back and front together {black lines = sew here}. The best way to get a good fit is to have your wearer try it on. Sew the ear pieces from the pattern together and stuff them with batting.10. Sew the front and back of the pig together, right sides facing, 1/4″ seam, along the black lines in step 9. Don’t forget to sew the ears into the shoulder seam.11. Invert the pig so the right sides are facing out.12. Stuff the front and the back of the pig with pillow stuffing. I really played with the fullness and amount of stuffing. Stuff it then try it on to see if it is full enough for you. Sew or hot glue the hole closed.13. Hot glue gun the features to the front of the pig.14. Outline the features with fabric markers or paint {paint actually worked better for me}.15. Sew the crown together and stuff it with batting.16. Wrap the end of the crown around a head band.17. Hot glue the crown in place.Red Bird
- 1. Fold the felt into quarters and measure 16″ from the center.2. Cut a curve along your measurements to create a circle when unfolded.3. Your circle should measure 32″ in diameter {repeat these steps so that you have two 32″ red circles.4. Cut two 32″ circles out of cotton and cut your features out of felt. Go here, here and here for the patterns.5. Lay one red circle and one cotton circle, right sides together. Top with a circle of quilt batting and pin together. The quilt batting is used in the adult costumes to provided added support to the upper portion and a smoother, less bumpy look to the finished costume. Sew together using a 1/4″ seam allowance.6. Be sure to leave a 4-6″ hole while sewing so that you can invert the piece, right sides out.7. Repeat steps 5 & 6 so that you have two stuffed circles. These are the back and front of the red bird.8. Pin the back and the front together. At this point I tried it on so that I could get the placement of my head and arms right.9. Go to the Green Pig Step 9 for an example of where you are going to sew the back and front together {black lines = sew here}. The best way to get a good fit is to have your wearer try it on. Sew the tail pieces from the pattern together.10. Sew the front and back of the red bird together, right sides facing, 1/4″ seam, along the black lines in Step 9. Don’t forget to sew the tail into the side seam.11. Invert the bird so the right sides are facing out.12. Stuff the front and the back of the red bird with pillow stuffing. I really played with the fullness and amount of stuffing. Stuff it then try it on to see if it is full enough for you. Sew or hot glue the hole closed.13. Hot glue gun the features to the front of the bird.14. Outline the features with fabric markers or paint {paint actually worked better for me}.

Wow! That’s impressive! Great job.
Ohhhhhh my goodness gracious. This is incredible. Your tutorial looks awesome!!!! Can’t wait to see a pic of the whole family suited up!
Wow! You went to a lot of work! These look so great! Angry birds is such a fun idea for your family halloween costumes! I have a party going on over at my blog if you want to join! I’d love to have you! Check it out under the “Stache Party” page on my blog: mylilpumpkinpatch.blogspot.com
Heather, This has to be one of the best costume tutorials EVER!! I can’t wait to share with my readers and send them your way!!
Those are freakin’ awesome! And I’ve never even played the game!
Those are AWESOME!! I was toying with the idea of dressing all my kids as Angry Birds and now you’ve made it a lot easier for me. Thank you!
Oh my freakin’ heck! That is AWESOME!!! If only I could sew!
This looks great! LOVE!!!
Jenny
http://www.simcoestreet.blogspot.com
I am dying to see you all in them! great job!
AMAZING. Love it!
LOOOOOOVE THIS. SO DARN CUTE. My two older kids would love this. Especially my older son. They area always stealing my phone to play angry birds. WELL DONE. winks-jen
Great costumes! My kids have been begging for pillows and I think I may use your tutorial for some bird pillows. Can’t wait to see them on everyone!
Awesome tutorial! My kids decided this is what they are being for Halloween. Quick question, when I click the “here” links for the face features they are all the same thing “red bird C” Am I missing something? Anyway thanks so much for the awesome tutorial, going to the fabric store today!!
soooooo awesome!!! my kids would love these. wish I was crafty enough to pull these off. You rock!
These are so great! I’m curious — do you know how wide your felt was off the bolt? The fabric store I use says it is 72 inches wide, so if your bolt is smaller I don’t want to end up with an insane amount of felt. :o)
how fun
This is so awesome!!!! Thanks so much for this, I’m thinking about doing this for Halloween also, so thanks again!
Wow. My kids are all totally impressed and wishing they hadn’t already picked out and bought their costumes!
Wow! these look great! My 6 year old wants to be the red bird. I’m thinking about trying it but i’m a little intimidated.
It’s amazing that a game inspired this (a game that I was addicted to until hubby cut me off haha). These costumes are awesome! You did a fabulous job and people are going to envy this costumes when you are out on Halloween ;)