Free Crochet Tote Bag Pattern
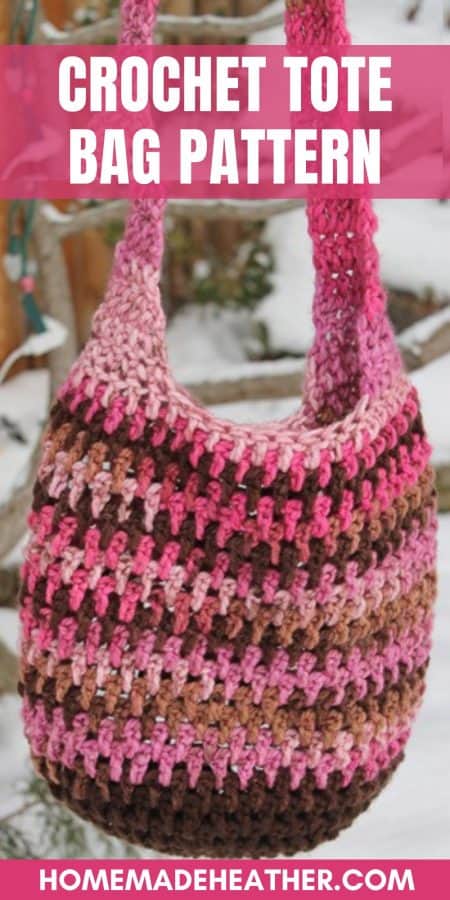
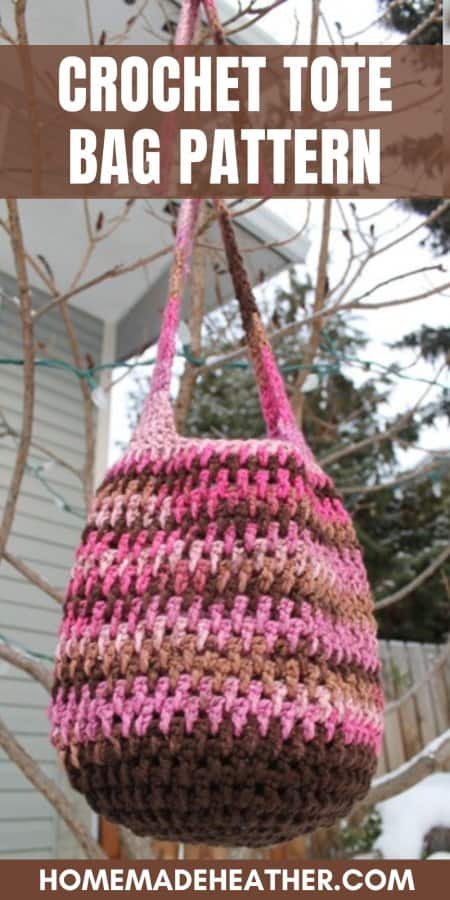
This crochet tote bag pattern makes the perfect market bags for a trip to the grocery store or farmers market. Make this cute bag in your favorite color!
I love having extra crochet bags on hand, I keep them in the car, by the front door, and in my purse. I just feel better bringing my own bag with me when I’m shopping. Today’s crocheted bag pattern is ideal!
Too busy to make this right away? Pin it for later! Pin this post to your favorite board on Pinterest and it will be there when you’re ready!
This beautiful tote is the perfect everyday use bag. It’s the perfect size to take with you to the farmers’ market, grocery store, or library.
It works wonderfully for fresh produce and is an excellent alternative to plastic bags. You’ll definitely want to make more than one!
This free crochet pattern is ideal for advanced beginners. It uses basic crochet stitches and involves working in the round.
This post contains affiliate links.
Crochet Supplies:
- 7 mm crochet hook
- Yarn needle
- Stitch marker
- Worsted weight yarn
- Scissors

Crochet Abbreviations:
- CH – Chain
- SL ST – Slip stitch
- ST – Stitch
- SC – Single Crochet stitch
- HDC – Half Double Crochet stitch
- DC – Double Crochet stitch
- INC – Increase
Before you get started, make sure you have the following:
- About 250 yards of yarn
- An I hook
- A safety pin for marking stitches.
- A flower or other embellishment to spice it up!

Crochet Tote Bag Pattern:
Ch 3.
Round 1: Work 12 DC in the first chain from hook, sl st to join in the top of the first DC. (12)
2: Ch 2, 2 DC in each stitch around, sl st to join to the top of the first DC. (24)
3: Ch 2, *DC in the next stitch, 2 DC in the next* around, sl st to join in the top of the first DC. (36)
4: Ch 2, *DC in the next 2 stitches, 2 DC in the next* around, sl st to join in the top of the first DC.(48)
Beginning at round 5, work in a spiral to form the body of the bag. Do not join at the end of the round. Mark the first stitch of each round with a safety pin or stitch marker to mark your spot.
5: Ch 3, *DC, ch 1* into each stitch.
6-23: DC, ch 1 in each ch 1 space. (48)
At the end of round 23, join with a slip stitch to the first DC of the previous round.
24: Ch 2, DC in each ch 1 space.
Round 25: Ch 2, DC between each DC of the previous round. (48)
How to make the handles:
The handles are worked in rows. The Ch 2 does count as a stitch here. Work between stitches, but you could work in the stitches, too.
Row 1: Ch 2, DC in the next 9 stitches. (10)
2: Ch 2, turn, DC decrease in the next two stitches, DC in the next 5, DC decrease in the last two stitches. (8)
3: Ch 2, turn, DC decrease in the next two stitches, DC in the next 3, DC decrease in the last two stitches. (6)
Rows 4-15: Ch 2, turn, DC in the next 5 stitches. (6)
Stop here or continue to make the handle longer if desired. Keep in mind that the yarn will stretch over time.
Fold the bag in half to determine where to work the handle on the other side of the bag. Single crochet the two sides of the handle together on the wrong side.
Tie off the yarn and weave in the ends with a yarn needle.

Market tote bag variations:
- Create a finished edge of single crochet stitches or slip stitches around the sides of the handle to help prevent stretching.
- Use this free pattern as a beach bag or toy tote.
- Try making this into crochet purses. You can even line your purse with fabric!
- Make your bag striped by using different colors. It’s the perfect way to use up small amounts of yarn.

Tips and Tricks:
- When choosing crochet projects, always check the skill level needed, to be sure it’s a good fit for you.
- Crochet hook size can make a real difference in the size of your finished crochet items. If you tend to crochet quite tightly, it may be beneficial to go up a size. If your stitches tend to be loose, go down a size.
- For easy washing, choose a worsted weight cotton yarn.
Enter your name and email below to get an instant download of the files! You are then registered for my weekly email Newsletter that is full of fun recipes, easy crafts, and free printables.
File Usage
- All digital files on Homemade Heather are for personal use only.
- Please direct others to the original website link when sharing.
- Digital reselling, resharing, or distribution is prohibited and NOT allowed.
Leave a comment and let me know how this crocheted tote bag turned out for you! I would love to see the variations you come up with! Happy crocheting!
Crochet Tote Bag Pattern
Materials
- 7 mm crochet hook
- Yarn needle
- Stitch marker
- Worsted weight yarn
- Scissors
Instructions
- Ch 3.
- Round 1: Work 12 DC in the first chain from hook, sl st to join in the top of the first DC. (12)
- 2: Ch 2, 2 DC in each stitch around, sl st to join to the top of the first DC. (24)
- 3: Ch 2, *DC in the next stitch, 2 DC in the next* around, sl st to join in the top of the first DC. (36)
- 4: Ch 2, *DC in the next 2 stitches, 2 DC in the next* around, sl st to join in the top of the first DC.(48)
- Beginning at round 5, work in a spiral to form the body of the bag. Do not join at the end of the round. Mark the first stitch of each round with a safety pin or stitch marker to mark your spot.
- 5: Ch 3, *DC, ch 1* into each stitch.
- 6-23: DC, ch 1 in each ch 1 space. (48)
- At the end of round 23, join with a slip stitch to the first DC of the previous round.
24: Ch 2, DC in each ch 1 space. - Round 25: Ch 2, DC between each DC of the previous round. (48)
- The handles are worked in rows. The Ch 2 does count as a stitch here. Work between stitches, but you could work in the stitches, too.
- Row 1: Ch 2, DC in the next 9 stitches. (10)
- 2: Ch 2, turn, DC decrease in the next two stitches, DC in the next 5, DC decrease in the last two stitches. (8)
- 3: Ch 2, turn, DC decrease in the next two stitches, DC in the next 3, DC decrease in the last two stitches. (6)
Rows 4-15: Ch 2, turn, DC in the next 5 stitches. (6) - Stop here or continue to make the handle longer if desired. Keep in mind that the yarn will stretch over time.
- Cut the yarn and weave ends in with the tapestry needle. Fold the bag in half to determine where to start the other side of the handle and work the handle on the other side of the bag.
- Single crochet the two sides of the handle together on the wrong side. Tie off the yarn and weave in the ends with a yarn needle.
