How To Make Watercolor Bookmarks
Discover how to make watercolor bookmarks in this simple tutorial — perfect for kids, gifting, or adding a handmade touch to reading time.

Looking for a fun art project? These watercolor bookmarks are easy to make, totally customizable, and perfect for creative kids of all ages.
You might enjoy this watercolor pencil Easter chick tutorial too.
Too busy to make this right away? Pin it for later! Pin this post to your favorite board on Pinterest and it will be there when you’re ready!

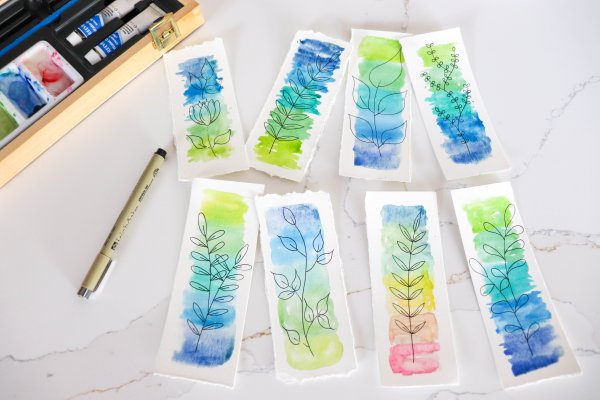
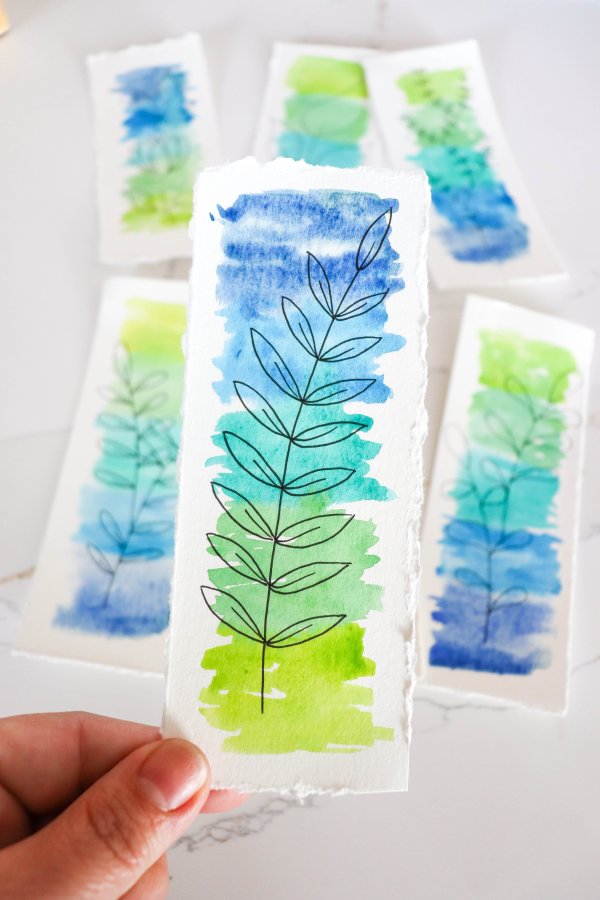
These lovely bookmarks are made using watercolor paint and a permanent black marker — two things that are easy to find at your local craft or dollar store.
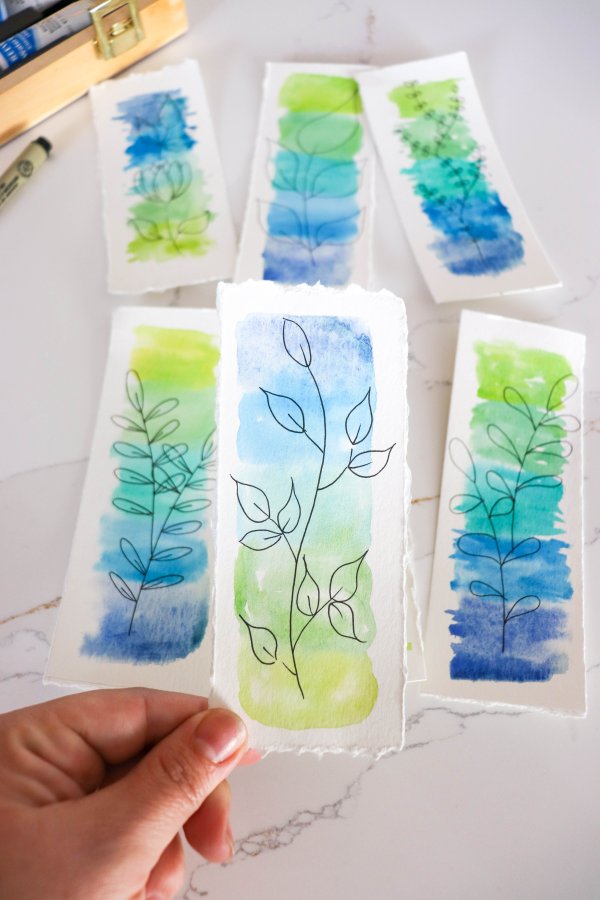
These watercolor bookmarks would make great gifts! You could give them to Mom with a Chapters gift card or to a friend, along with a copy of your favorite book.
How to Make Watercolor Bookmarks
This post contains affiliate links.
Supplies
- 9″x12″ 140lb watercolor paper – Heavy cardstock paper may be used as an alternative to watercolor paper. It’s important to use thick, heavy paper for this project, as the water tends to warp and tear traditional printer paper.
- Watercolor paints
- Paint palette
- Paint brush
- Pencil and eraser
- Black permanent marker
- Ruler

Instructions
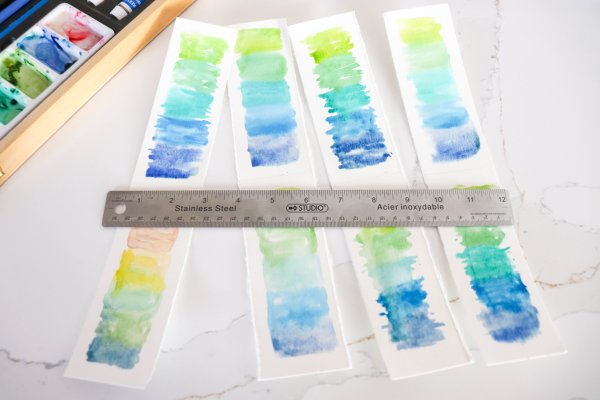
1. Use the pencil and ruler to mark out eight sections on the watercolor paper. Each bookmark will be about 2″ x 6″.
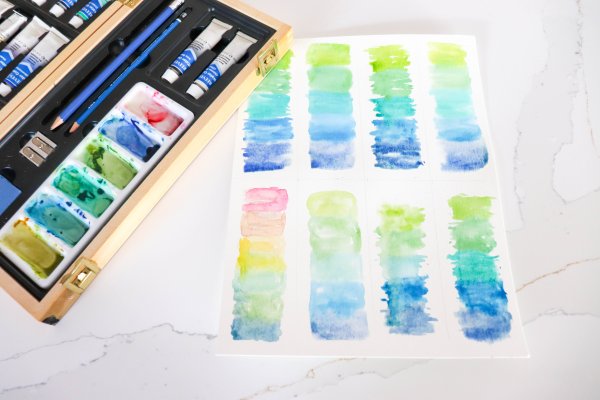
2. Create a gradient of colors on each section of paper using the paint. Using more water will blur the colors and allow them blend with each other.
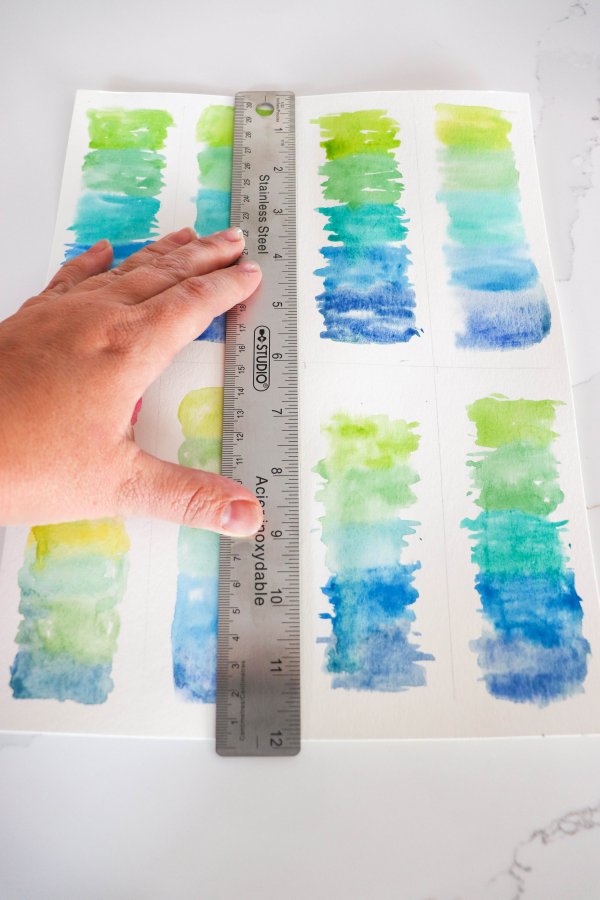
3. When the paint is dry, use the ruler to carefully tear the bookmarks apart. Place the ruler on the paper, hold it firmly, and pull the paper towards you to tear each strip of paper.
Scissors or a paper cutter could be used as well, but we love the textured look that tearing gives these bookmarks.
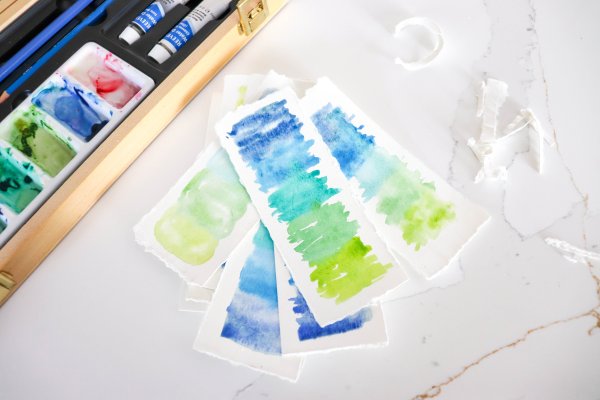
Use a lot of watercolor paint to achieve a vibrant color for this project. If the piece of paper curls or warps, try pressing it under some heavy books to flatten it once dry.
Practice sketching different leaves and flowers onto scrap paper before applying your favorite one to a bookmark.
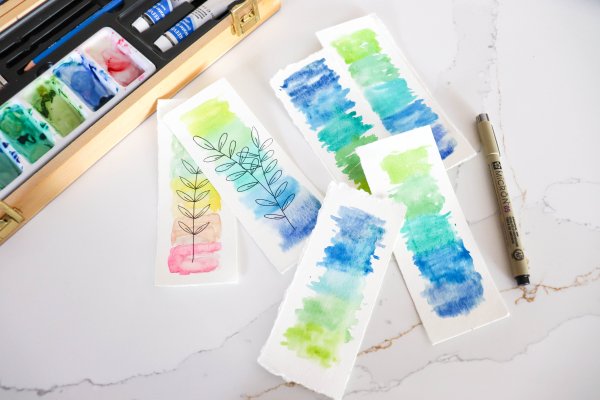
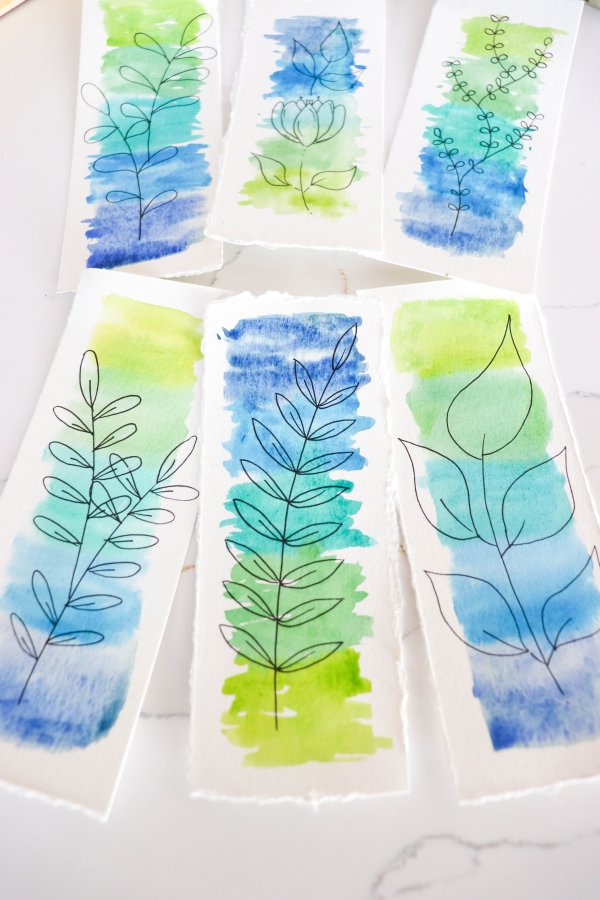
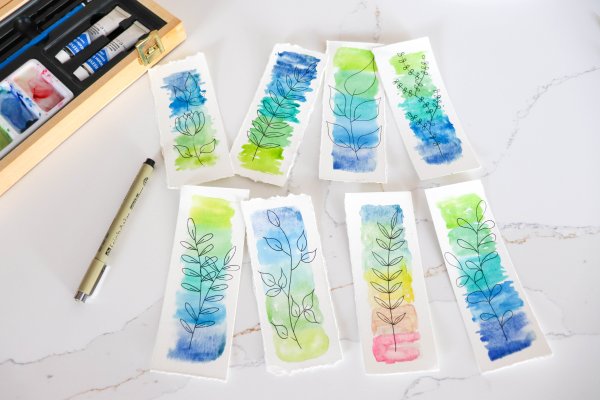
4. Use a permanent marker to sketch leafy, floral designs onto each bookmark.
Be sure to check out this Hocus Pocus bookmark craft and this Chinese New Year bookmark printable for more crafting ideas for the book lovers in your life!

I love how easy it is to personalize this project! Different paint colors can be used, of course, or sketchy leaf designs — it would be fun to see what a group of kids can come up with!
More of My Crafting Essentials
- We love using these Apple Barrel acrylic paints to add bright color to all of our projects.
- These paint brushes are ideal for most craft surfaces and a great price!
- This art supplies kit is our favorite because it has everything we needed to get started.
- This rolling storage cart helps to keep our craft supplies organized.
Frequently Asked Questions
What kind of paper works best for watercolor bookmarks?
Watercolor paper (around 140lb) is ideal because it can handle water without warping too much. Thick cardstock can work in a pinch, but regular printer paper will crinkle and rip.
How do you keep watercolor paper from curling?
Once your bookmarks are dry, press them under a stack of heavy books for a few hours.
Can kids do this watercolor bookmark craft?
Absolutely! This is a great beginner-friendly project for kids. Younger ones might need help with tearing or sketching, but the painting part is wonderfully forgiving.
What can I use instead of a permanent marker?
You can use a fine-tip black pen, gel pen, or even a paint marker. Just make sure it’s waterproof so it doesn’t smudge over your beautiful watercolor designs.
How do you make watercolor colors more vibrant?
Use more pigment and less water for bold colors. Layering once the first coat dries can also really make those colors pop.
This art project is perfect for the classroom or at home! It would make a great boredom buster for the summer months too.
Check out some of our other nature crafts for more ideas!

If you love these watercolor bookmarks, please help me share them on Facebook or Pinterest so that others can enjoy them too.

Watercolor Bookmarks
Materials
- 9 "x12" 140lb watercolor paper
- Watercolor paints
- Paint palette
- Paint brush
- Pencil and eraser
- Black permanent marker
- Ruler
Instructions
- Use the pencil and ruler to mark out eight sections on the watercolor paper. Each bookmark will be about 2" x 6".
- Create a gradient of colors on each section of paper using the paint. Using more water will blur the colors and allow them blend with each other.
- When the paint is dry, use the ruler to carefully tear the bookmarks apart. Place the ruler on the paper, hold it firmly, and pull the paper towards you to tear each strip of paper.
- Use a permanent marker to sketch leafy, floral designs onto each bookmark.
Notes
- Heavy cardstock paper may be used as an alternative to watercolor paper. It’s important to use thick, heavy paper for this project, as the water tends to warp and tear traditional printer paper.
- Scissors or a paper cutter could be used to cut the bookmarks, but we love the textured look that tearing gives these bookmarks.
- Use a lot of watercolor paint to achieve a vibrant color for this project.
- If the piece of paper curls or warps, try pressing it under some heavy books to flatten it once dry.
- Practice sketching different leaves and flowers onto scrap paper before applying your favorite one to a bookmark.

How did you *create* gradient colours with a brush or sponge, finger?
I used a paint brush with the watercolors – adding more water helps to blend the colors.