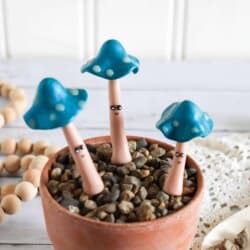
DIY Polymer Clay Mushrooms
These DIY polymer clay mushrooms are fun to create and make the cutest little plant accessories that you have ever seen!
Yield: 3
Materials
- parchment paper
- baking sheet
- polymer clay in tan blue, white and black
- clay cutting and shaping tools
- toothpicks
- black sharpie fine tip marker
- white glue
- white paint
- mod podge
- paint brush
Instructions
- 1. Begin by forming the clay into soft, malleable balls.
- 9. Roll tiny black balls of clay for eyes.
- 13. Paint white dots onto the back eyes. Tip: I use a toothpick dipped in paint to get the tiny white dots.
- 16. Balance the mushroom cap on the stem and place it in your favortie plant pot as a fun accent. Tip: you may also glue the cap to the stem if desired.