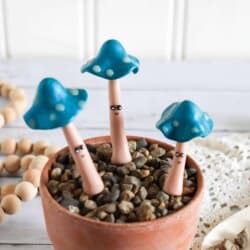
DIY Polymer Clay Mushrooms
These DIY polymer clay mushrooms are fun to create and make the cutest little plant accessories that you have ever seen!
Yield: 3
Materials
- parchment paper
- baking sheet
- polymer clay in tan blue, white and black
- clay cutting and shaping tools
- toothpicks
- black sharpie fine tip marker
- white glue
- white paint
- mod podge
- paint brush
Instructions
- 1. Begin by forming the clay into soft, malleable balls.
- 2. Roll the tan clay into 3 cm balls.
- 3. Form the balls into long cylindrical shapes that are tapered at the top.
- 4. Curve the stems if desired. Create a hole in the base using a toothpick.
- 5. Roll the blue clay into balls that are about 4cm thick. Roll many tiny white balls that are about 1/2 cm in diameter.
- 6. Press and roll the blue balls into a flat circular shape.
- 7. Press the tiny white balls into the mushroom caps.
- 8. Use the end of a stylus to press the blue circle into a mushroom cap shape.
- 9. Roll tiny black balls of clay for eyes.
- 10. Bake the clay as directed on the package. For me this was 20 minutes at 220 degrees.
- 11. When the clay has cooled, glue the black balls to the stems for eyes.
- 12. Add mouths to the stems using a black sharpie marker.
- 13. Paint white dots onto the back eyes. Tip: I use a toothpick dipped in paint to get the tiny white dots.
- 14. Seal the clay with mod podge.
- 15. Insert a toothpick into the base to create a plant pick.
- 16. Balance the mushroom cap on the stem and place it in your favortie plant pot as a fun accent. Tip: you may also glue the cap to the stem if desired.
Video
[adthrive-in-post-video-player video-id="UzrV9YDj" upload-date="2021-04-07T00:00:00.000Z" name="DIY Clay Mushrooms" description="These DIY polymer clay mushrooms are fun to create and make the cutest little plant accessories that you have ever seen! Follow the easy step by step photo tutorial..."]
