Beaker Muppet Costume Tutorial
Create your own iconic Beaker Muppet costume with this step-by-step tutorial! Perfect for Halloween or cosplay enthusiasts.
We love this Beaker Muppet Costume! A person cannot help but laugh when looking at this mask. Seriously, it cracks me up every time! There is just something about the hapless Beeker character from the Muppets that’s hilarious.
I loved creating this costume, everything came together so smoothly that it was super easy to make. Let me show you how to create your very own Beaker muppet costume…
Too busy to make this right away? Pin it for later! Pin this post to your favorite board on Pinterest and it will be there when you’re ready!
Honestly!! How freaking funny is this mask?! When I finished making it, I brought it with me to school to pick up the boys so that when the bell rang I stuck it on my head to surprise Isaiah. (Yes, I AM that Mom!)
He was absolutely thrilled to see it all done and ready for him to wear because he wanted a turn to walk around in it. It was a hit with his friends at school too so total Mom win!
This post contains affiliate links.
Materials
- 1 piece of thin cardboard 14″x24″
- Peach colored felt/fleece material 12″x26″
- Orange “hair” materiall6″x26″
- 1 piece red felt material 8.5×11″
- 1 piece orange felt material 8.5×11″
- 2 styrofoam balls 3″ in diameter
- 1 styrofoam oval 4.5″ in diameter
- Scissors
- Hot glue gun and lots of glue
**for an adult sized costume, add 4″ to the length of the cardboard, felt and orange hair to make the final circumference of the mask larger.
How to make a Beaker Muppet costume
1. Cut the cardboard to size. Cut a mouth shape in the center toward the bottom.
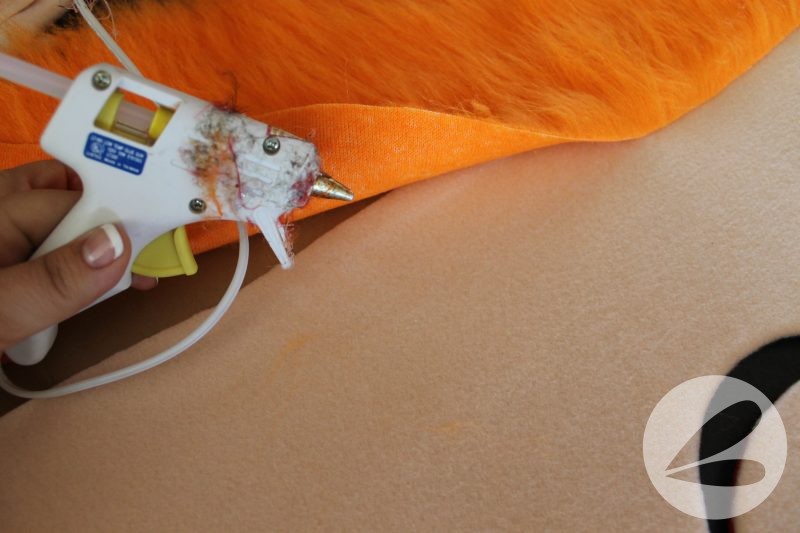
2. Glue the peach fabric to the cardboard, wrapping it slightly around three edges. Leave a couple inches at the top of the cardboard free for gluing on the hair.
3. Carefully cut the mouth out of the fabric and glue to the inside of the cardboard.
4. Cut red felt into a mouth shape and glue to the inside of the mouth.
5. Glue the orange hair to the top of the head. It will overlap and be taller than the cardboard.
6. Wrap the styrofoam oval in orange felt and glue to the face. Draw pupils on the round styrofoam balls and glue them above the nose.
7. Finally create a cylinder with the cardboard and glue (or velcro) the ends together.
Simple right? Finding the orange hair for this Beeker muppet costume was the hardest part of putting this costume together because I had to search everywhere. I found it in the craft section at Fabricland $70/metre!! Good thing that it was on sale…
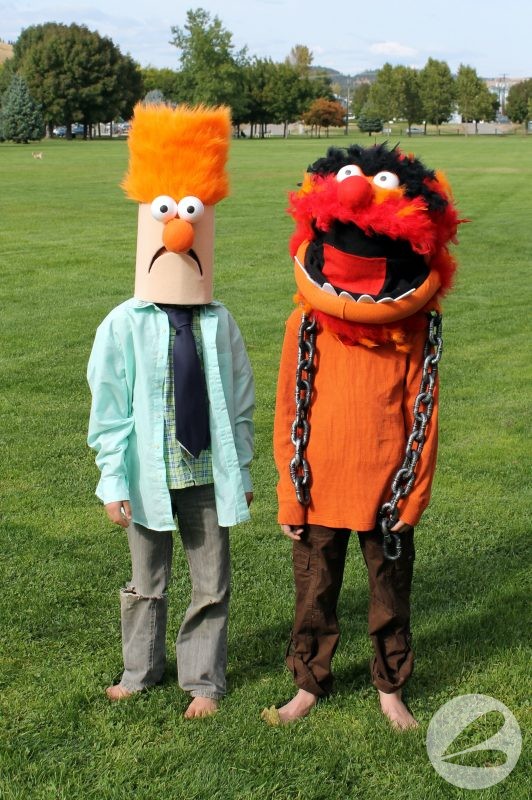
We paired the Beaker mask with a plaid t-shirt, solid blue tie and mint dress shirt to complete our Beaker muppet costume look. I just love how he turned out because it is seriously priceless! I can just picture the boys playing all sorts of pranks on each other and their friends with this mask!
Be sure to check out this epic Animal Muppet Costume too! We always head to the same park for our annual Halloween costume photo shoots…. needless to say, we get some strange looks.
This post contains affiliate links.
Some of our crafting essentials for Halloween
- We love using these Apple Barrel Acrylic Paints to add bright color to all of our projects.
- These paint brushes are ideal for most craft surfaces and a great price!
- This art supplies kit is our favorite because it has everything we needed to get started.
- This rolling storage cart helps to keep our craft supplies organized.
So what are your plans for Halloween costumes this year? If you like this project please help me share by posting to Facebook or Pinterest!
Beaker Muppet Costume
Materials
- 1 piece of thin cardboard 14″x24″
- Peach colored felt/fleece material 12″x26″
- Orange “hair” material 6″x26″ affiliate link
- 1 piece red felt material 8.5×11″
- 1 piece orange felt material 8.5×11″
- 2 styrofoam balls 3″ in diameter
- 1 styrofoam oval 4.5″ in diameter
- Scissors
- Hot glue gun and lots of glue
Instructions
- Cut the cardboard to size. Cut a mouth shape in the center toward the bottom.
- Glue the peach fabric to the cardboard, wrapping it slightly around three edges. Leave a couple inches at the top of the cardboard free for gluing on the hair.
- Carefully cut the mouth out of the fabric and glue to the inside of the cardboard.
- Cut red felt into a mouth shape and glue to the inside of the mouth.
- Glue the orange hair to the top of the head. It will overlap and be taller than the cardboard.
- Wrap the styrofoam oval in orange felt and glue to the face. Draw pupils on the round styrofoam balls and glue them above the nose.
- Finally create a cylinder with the cardboard and glue (or velcro) the ends together.


Hi
Love this mask! Where did you put the eye holes to see out of? (Or did he see through the mouth? (Confuses as you said to put red felt over mouth?)
Thank you!
The wearer looks through the mouth of the mask. The red felt is placed on the inner “lip” of the mouth (not covering the entire mouth) hope that helps :)
How does the back of the mask look?
Hmmm there is a ridge down the length where its glued together but its hardly noticeable :)