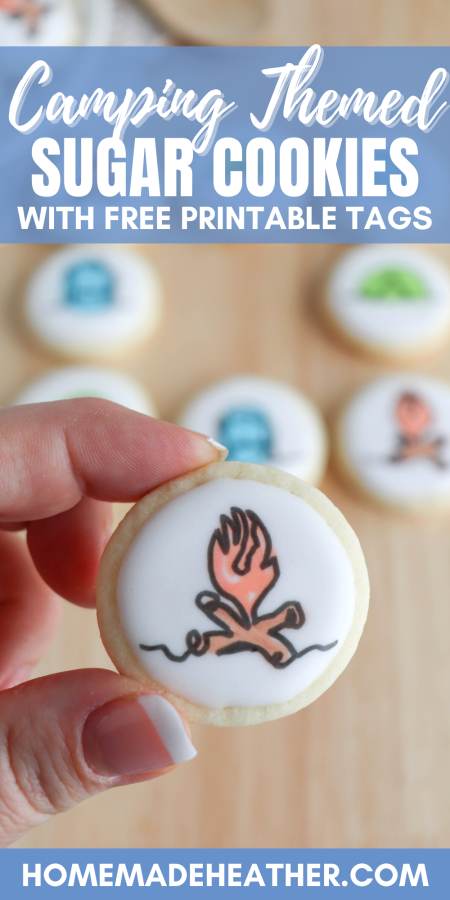
Camping Sugar Cookies with Printable Gift Tags
Turn your kitchen into a campsite with these fun camping sugar cookies—easy to make, fun to decorate, and perfect to gift with a printable tag!
These camping sugar cookies are quick, easy, and fun to make with royal icing and a food writer! Grab the free printable tag below to make a darling gift for the camping lover in your life.
These classic sugar cookies are perfect to make for a camping party or to bring to your next event! I’m a huge fan of creating treats for every occasion, especially delicious ones like these.
Okay, friend — get ready to channel your inner Happy Camper because we’re making the cutest camping sugar cookies ever! These tasty little bites are like edible art projects — only with frosting instead of finger paint.
Too busy to make this right away? Pin it for later! Pin this post to your favorite board on Pinterest and it will be there when you’re ready!
Whether you’re prepping for a Cub Scout event, a birthday bash, or just feel like celebrating the great outdoors from your kitchen, these cookies are where it’s at.
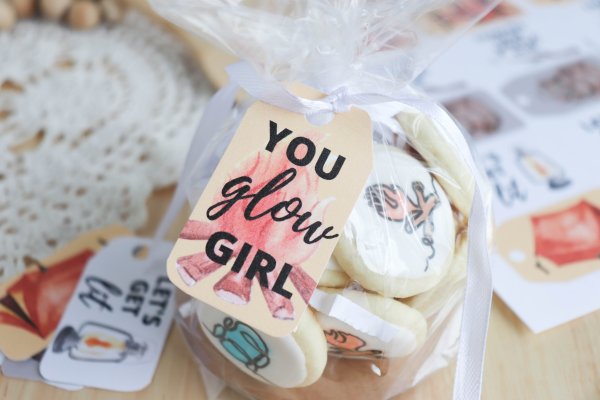
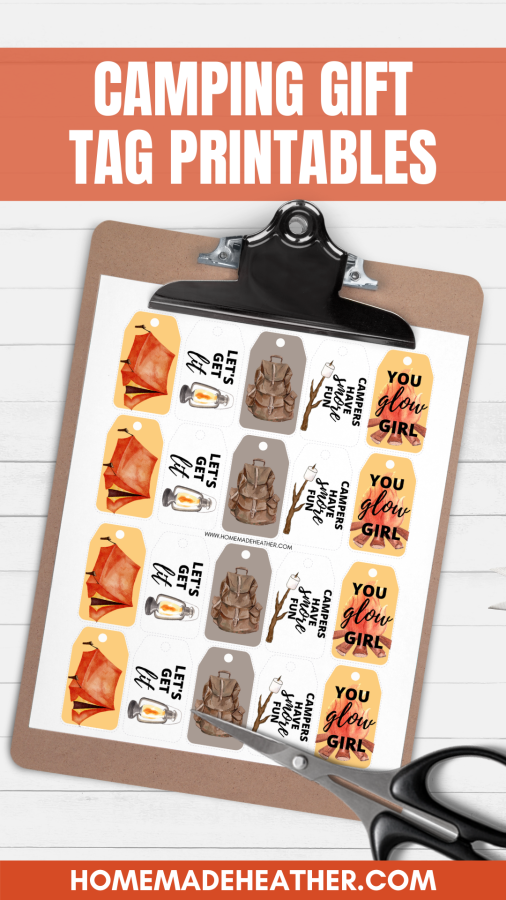
I’ve included a free printable gift tag so you can share your cookie creations with your favorite nature lovers. Just tie up a batch with twine, slap on the tag, and boom — you’re the cookie MVP of the campground. Let’s make baking fun again!
Why You’ll Love This Recipe
These camping cookies are a total crowd-pleaser and surprisingly easy to make — no fancy piping skills needed. The classic cookie dough is soft, buttery, and super forgiving, so even if your tent ends up looking more like a triangle of Tootsie Rolls, it’ll still taste amazing.
Decorating is a blast for kids, teens, and grownups alike (even those who “don’t bake”). Plus, the royal icing gives you a smooth, glossy finish to draw fun designs on. These cookies are perfect for gifting, parties, or just making memories in the kitchen with your little camper.
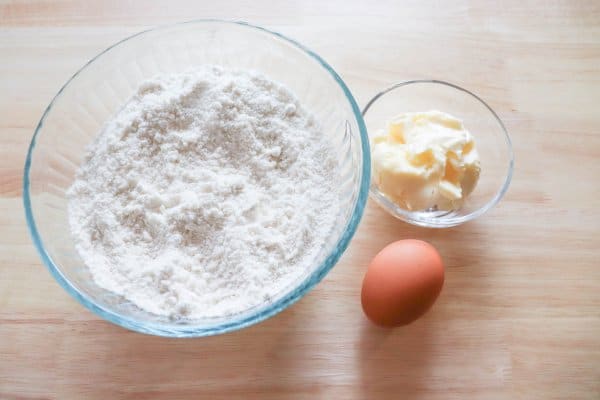
Sugar cookie dough is super versatile and easy to make with only a few ingredients from the grocery store. You will need simple ingredients like butter, granulated sugar, and all-purpose flour.

I seriously love, love, love these camping-themed cookies! They are super easy to make and create – I promise!
Check out more fun & easy Summer Sugar Cookie Ideas!
Make sure to set aside enough time to decorate the cookies. You may even want to spread it out over a few days. When adding food writer details, it’s important to wait until the layer of flooded icing is completely dry, otherwise the icing may crack and the colors will bleed.
Before you get started, make sure that you have everything that you need to make and decorate these cookies. I found our cookie cutters and icing bottles at Michaels, but you can also order them from Amazon below.
This post contains affiliate links.
Sugar Cookie Supplies
- KitchenAid Stand Mixer
- Baking sheets
- Parchment paper
- Rolling pin
- Mixing bowls
- Measuring cups and spoons
- Cookie cutters
- Icing bottles
- Food Writer Pen
- Wire cooling rack
- Cookie scribe or toothpick
This is my grandma’s classic sugar cookie recipe – time tested and delicious. The only thing that I have changed over the years is swapping out shortening for butter.
The Best Sugar Cookie Recipe
Ingredients
- White sugar – This is what makes your cookies sweet and delicious.
- Butter, room temperature – Makes the cookies soft, rich, and totally irresistible.
- Egg – The glue that holds the cookie dough together.
- Milk – Adds just enough moisture to keep the dough soft.
- Vanilla extract – A splash of flavor that smells like baking at Grandma’s.
- All-purpose flour – The sturdy base of our cookies.
- Baking soda – Lifts the cookies just enough to keep them light.
- Salt – A little salt goes a long way in balancing all the sweetness.
Tip: If you’re short on time, pre-made Pillsbury refrigerated sugar cookie dough can be used to create these cookies as well. Simply add 1/4 cup of flour to the dough, combine well, and roll as directed. I love time-saving mom hacks like this!
Instructions
1. Line a baking sheet with parchment paper and preheat your oven to 350°F.
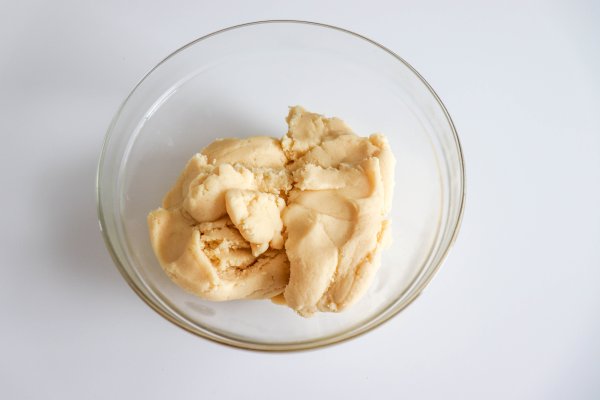
2. In a large bowl with an electric mixer or stand mixer with paddle attachment, combine dry ingredients. Add the butter, egg, milk, and vanilla. Mix on medium speed until a soft dough forms.
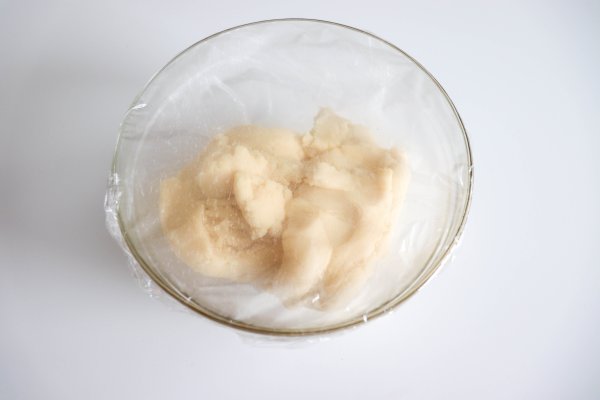
3. Chill the dough in the refrigerator for at least one hour. This helps prevent the dough from spreading when baked, so your cookies keep their shape.
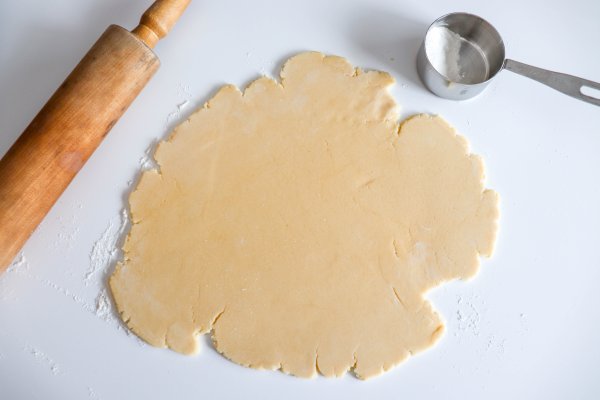
4. Dust your surface with flour and use a rolling pin to roll the dough to about 1/4″ thick.
5. Use cookie cutters to cut shapes from the dough. Place the cookies on the prepared baking sheet.
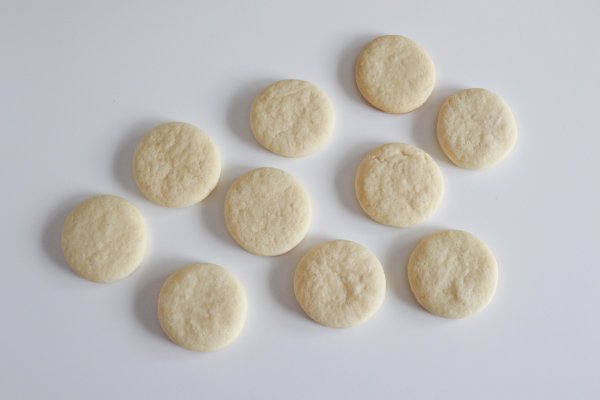
6. Bake until the cookies are lightly brown around the edges, about 7 minutes.
7. Place the cookies on a wire rack to cool.
This recipe will make about 70 2″ circle-shaped cookies.
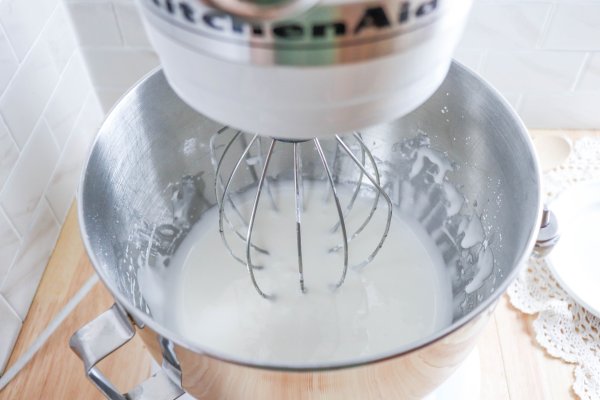
Use my easy royal icing recipe to make the best icing for these cookies! You will need green, blue, orange, brown, and white royal icing that has been tinted with food coloring.
Royal Icing Tips
- If the icing is too thick, add more water one drop at a time.
- If the icing is too soft, add more powdered sugar one teaspoon at a time.
- Icing can be stored at room temperature in an airtight container for up to two weeks.
- To use, mix the royal icing with a hand mixer so that it becomes smooth and shiny again.
- Flood consistency is reached when a spoonful dropped onto a flat surface takes 10 – 15 seconds to become completely smooth.
These instructions will show you how to decorate camping cookies like these ones. The sky is the limit though, so have fun with this process!
You can decorate each cookie with all sorts of patterns and designs. I have also made flower cookies and plant cookies using this technique.
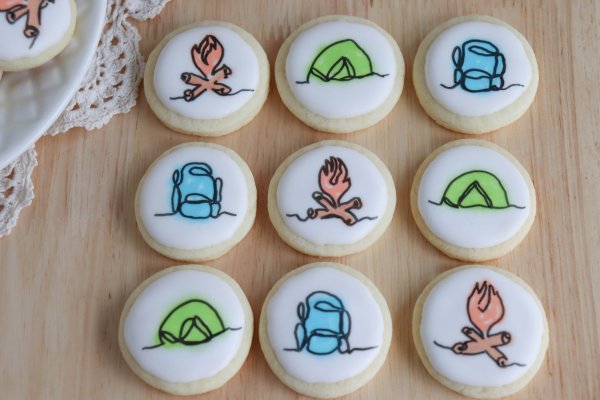
How to Decorate Camping Sugar Cookies
Additional Supplies
- Black food writer marker
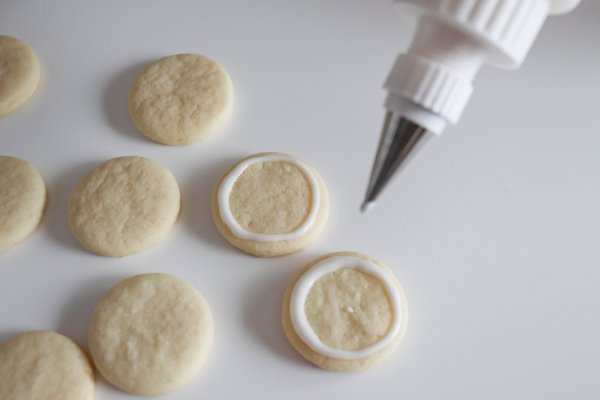
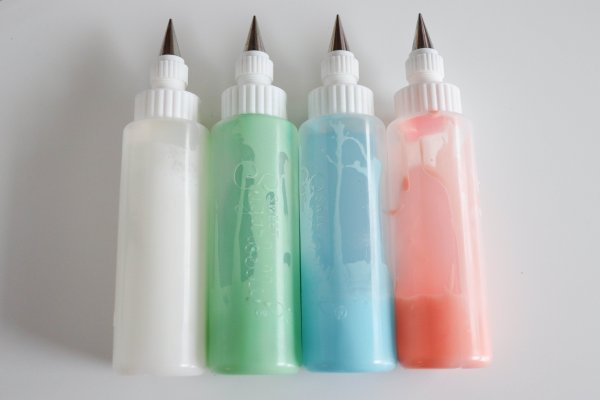
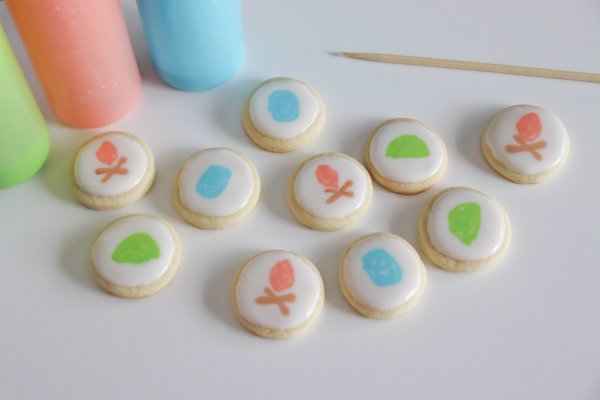
1. Outline each shape with a line of white royal icing.
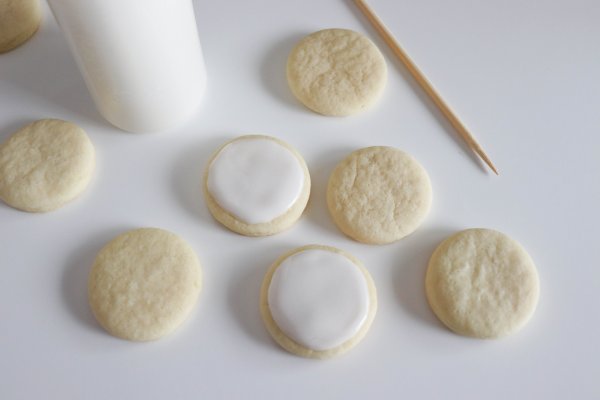
2. Flood the center with icing and use a scribe or toothpick to smooth it out.
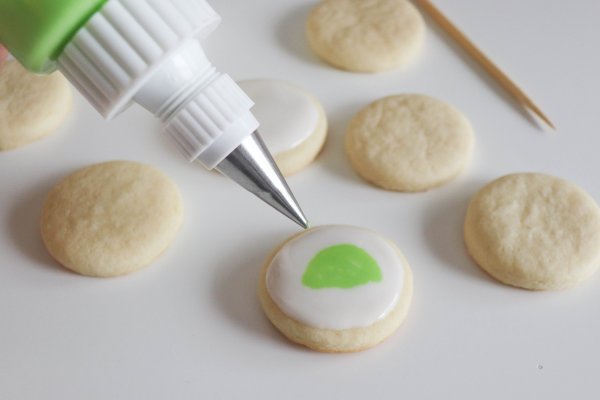
3. Use the colored icing to create freeform camping shapes in the white icing before it dries.
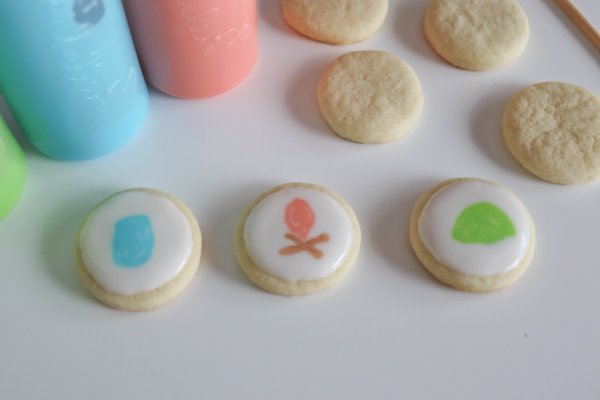
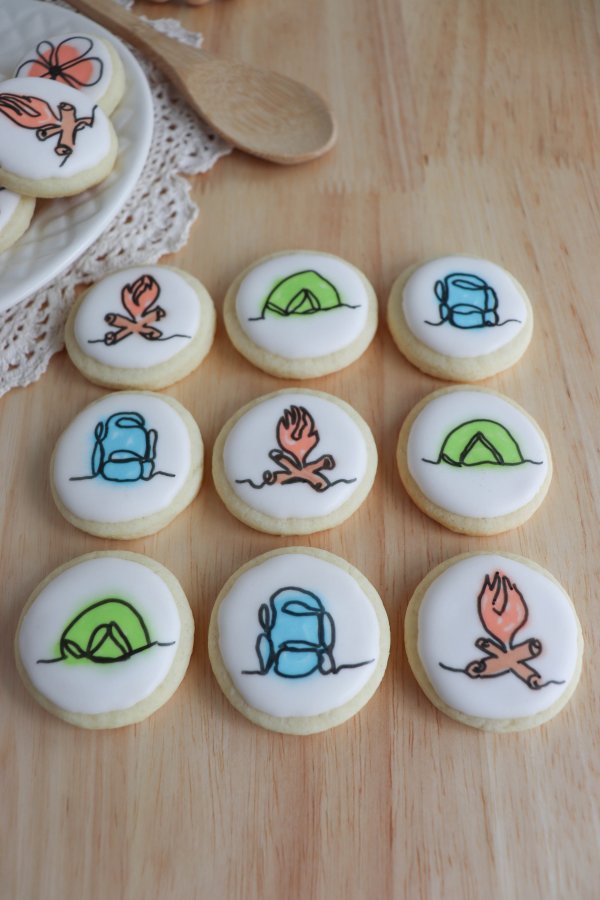
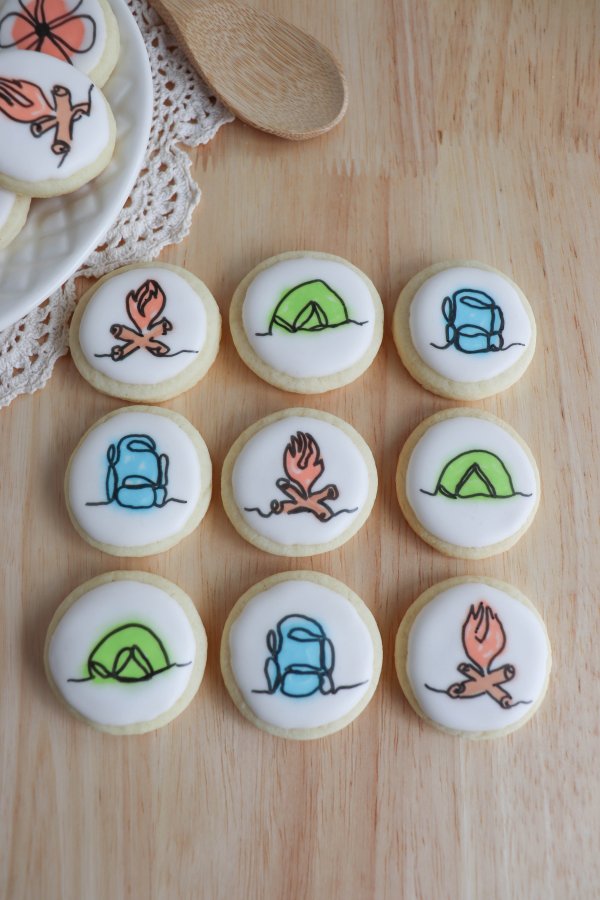
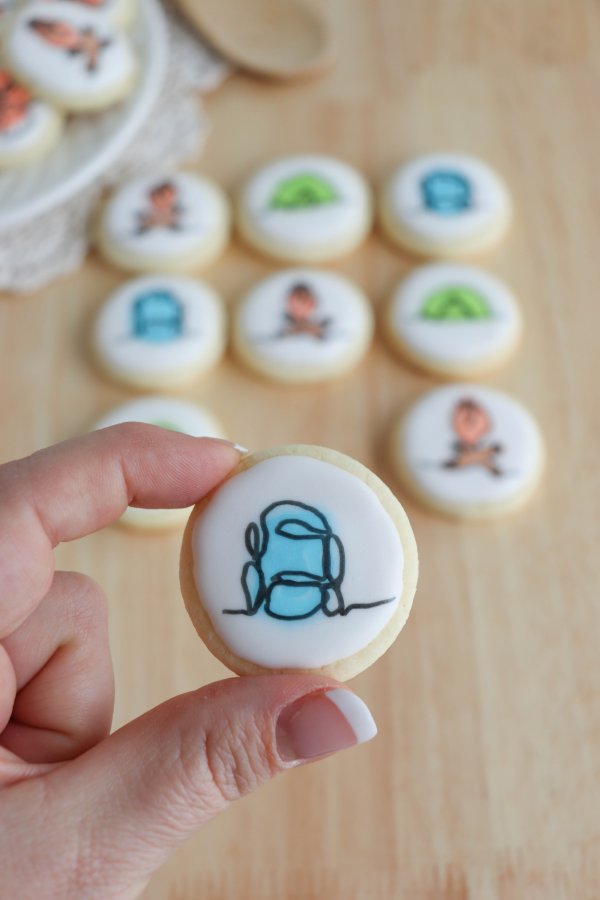
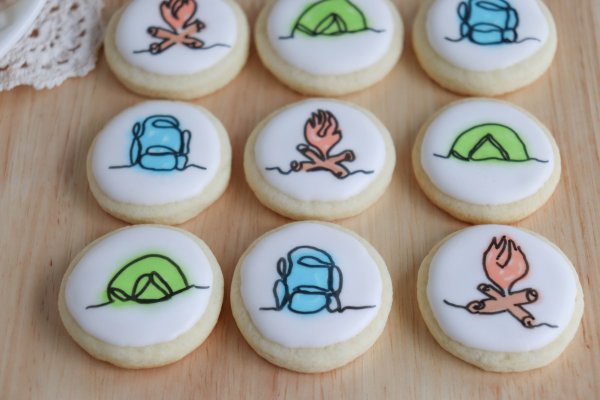
4. I used blue for a backpack, green in the shape of a triangle for a tent, and brown logs with orange for a fire.
5. Allow the royal icing to dry completely — at least two hours. The pressure of the marker will break through the icing if the cookies are not dry enough.
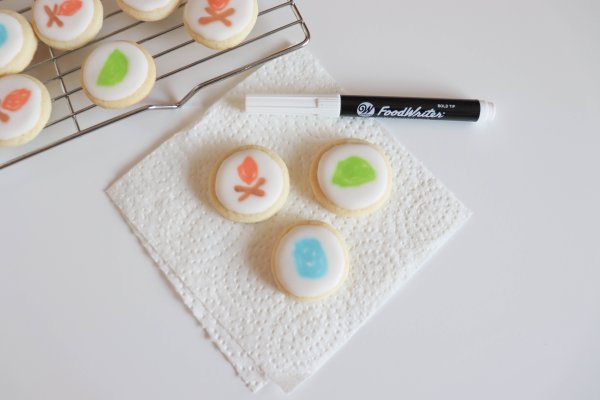
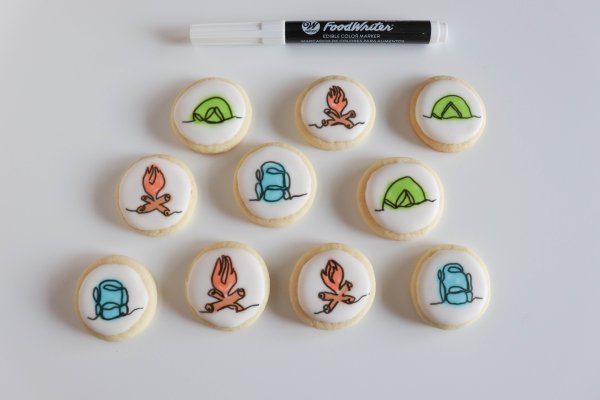
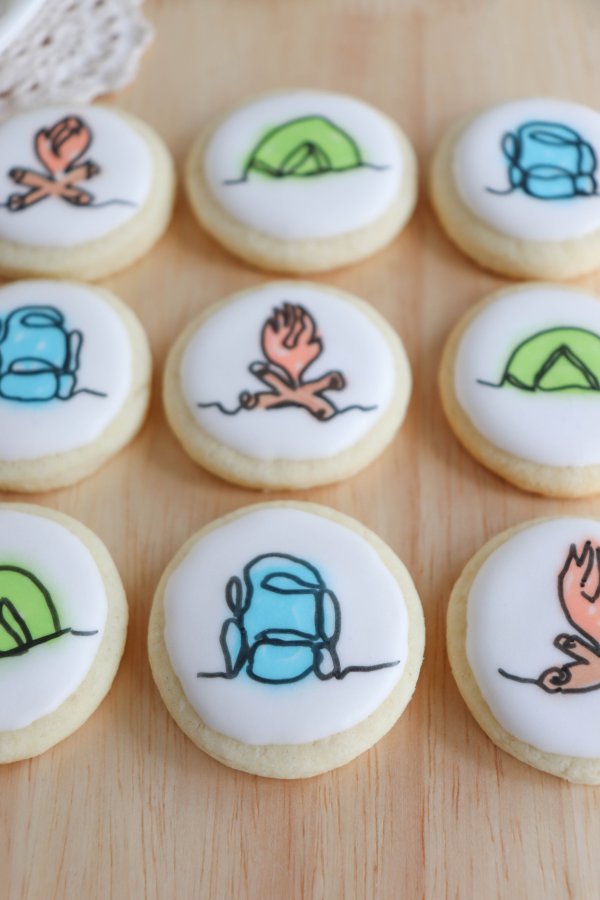
6. Use the black food marker to draw camping designs onto the cookies. Watch the video tutorial to see how I did this!

These sketchy camping cookies turned out to be so fun! These are far easier to create than most sugar cookies because you don’t need to use a lot of detailed piping work.
Tips and Tricks
- For even rolling, place guide sticks (or two chopsticks) on each side of your dough while rolling to keep thickness consistent.
- Use a zip-top bag with the corner snipped off if you don’t have icing bottles.
- Let the royal icing dry completely before using the marker — trust me.
- Store unused icing in an airtight container at room temperature for up to two weeks.
- Keep a damp paper towel over your icing tips while decorating to stop them from crusting over.
- If your food writer starts to drag, draw on a piece of parchment first to “wake it up” before using it on cookies.
- Add fun extras like mini marshmallows, gummy bear pieces, or pretzel sticks for 3D designs.
- Keep toothpicks or a cookie scribe handy to pop air bubbles and smooth the icing.
Allow the icing to harden before packaging or storing the cookies. These look amazing wrapped in cellophane and tied up with a bit of twine.
Add my free printable gift tag and voila! These easy camping sugar cookies make a delicious treat!
Frequently Asked Questions
How do I keep royal icing from bleeding?
Make sure the base icing layer is fully dry before adding more colors or using the food writer.
Can I make these cookies ahead of time?
Yes! These camping sugar cookies freeze beautifully. Just store undecorated cookies in an airtight container for up to 3 months.
What food coloring should I use for royal icing?
Use gel-based food coloring for the most vibrant colors without watering down your icing.
Be sure to check out all of the fun sugar cookie ideas on the blog!
This post contains affiliate links.
Some of My Baking Essentials
- I love using this non-stick bakeware for all of my baking.
- These silicone mitts are perfect for grasping hot pans and baking dishes.
- This Henckel Knife is my favorite for slicing and dicing in the kitchen.
- These parchment paper bags are perfect for packaging and these large Rubbermaid food storage containers are great for storing baking in the freezer.
Enter your name and email below to get an instant download of the files! You are then registered for my weekly email Newsletter that is full of fun recipes, easy crafts, and free printables.
File Usage
- All digital files on Homemade Heather are for personal use only.
- Please direct others to the original website link when sharing.
- Digital reselling, resharing, or distribution is prohibited and NOT allowed.
These sketchy little cookies are seriously so much fun to make — whether you’re prepping for a camping birthday party, a backyard BBQ, or just want something sweet and themed.
If you love these camping sugar cookies, please give them a five-star review and help me share them on Facebook or Pinterest so that others can enjoy them too!
Be sure to check out our other Sugar Cookie Recipes!

Camping Sugar Cookies
Ingredients
- 1 cup white sugar
- ½ cup butter room temperature
- 1 large egg
- 4 Tbsp milk
- 1 tsp vanilla extract
- 2 cups all purpose flour
- 1 tsp baking soda
- ¼ tsp salt
Instructions
- Line cookie sheets with parchment paper.
- In a large bowl with an electric mixer or stand mixer with paddle attachment, combine dry ingredients. Add butter, egg, milk and extract. Mix on medium speed until a soft dough forms.
- Chill the dough in the refrigerator for at least one hour. This helps to prevent the dough from spreading when baked.
- Preheat the oven to 350 degrees F.
- Dust your surface with flour and use a rolling pin to roll the dough to 1/4" thickness on the floured surface.
- Use cookie cutters to cut shapes from the dough. Place the cookies on the prepared baking sheet.
- Bake until the cookies are lightly brown around the edges, about 7 minutes.
- Place the cookies on a wire rack to cool before decorating royal icing.
Video
Notes
- Use the step-by-step instructions in the blog post to decorate each cookie.
- For even rolling, place guide sticks (or two chopsticks) on each side of your dough while rolling to keep thickness consistent.
- Use a zip-top bag with the corner snipped off if you don’t have icing bottles.
- Let the royal icing dry completely before using the marker — trust me.
- Store unused icing in an airtight container at room temperature for up to two weeks.
- Keep a damp paper towel over your icing tips while decorating to stop them from crusting over.
- If your food writer starts to drag, draw on a piece of parchment first to “wake it up” before using it on cookies.
- Add fun extras like mini marshmallows, gummy bear pieces, or pretzel sticks for 3D designs.
- Keep toothpicks or a cookie scribe handy to pop air bubbles and smooth the icing.
Nutrition
