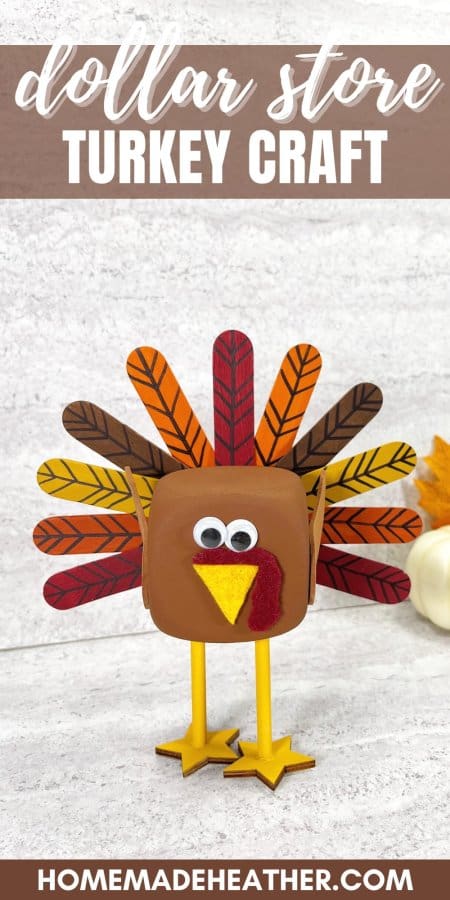
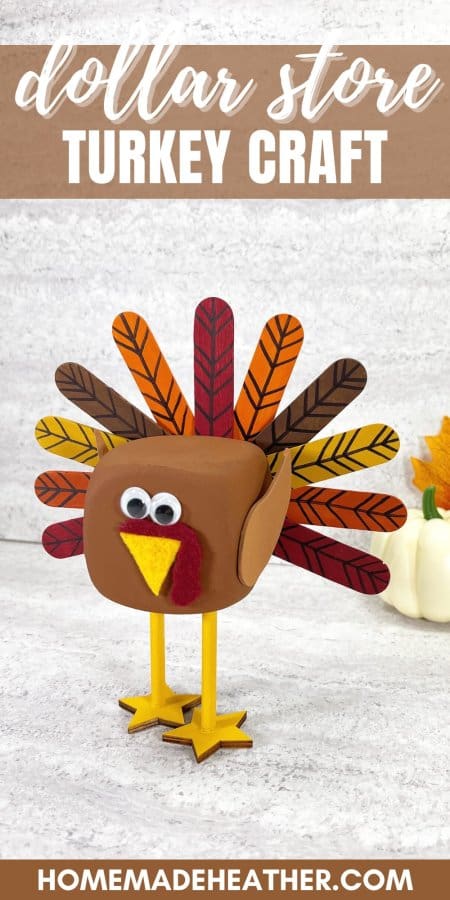
Dollar Store Turkey Craft with Free Printable Template
Create a budget-friendly Thanksgiving masterpiece with this Dollar Store Turkey Craft using a free printable template. Affordable and fun for all!
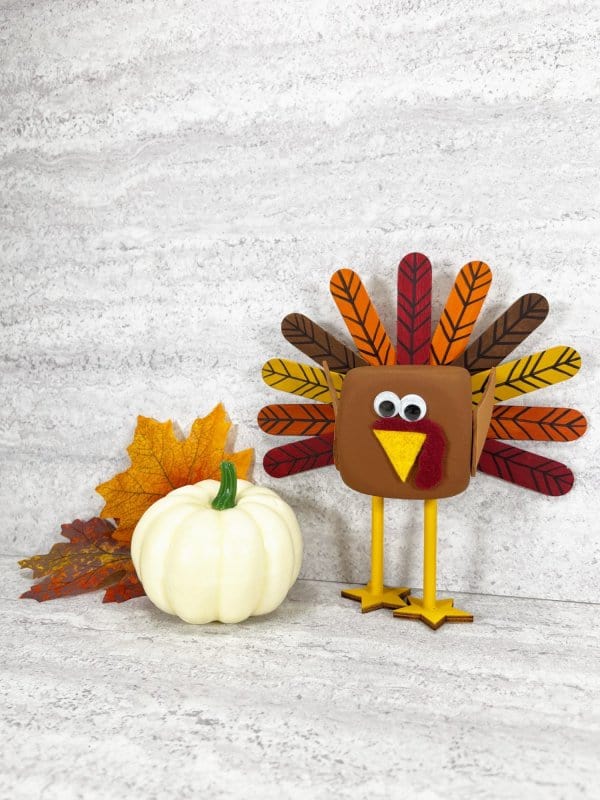
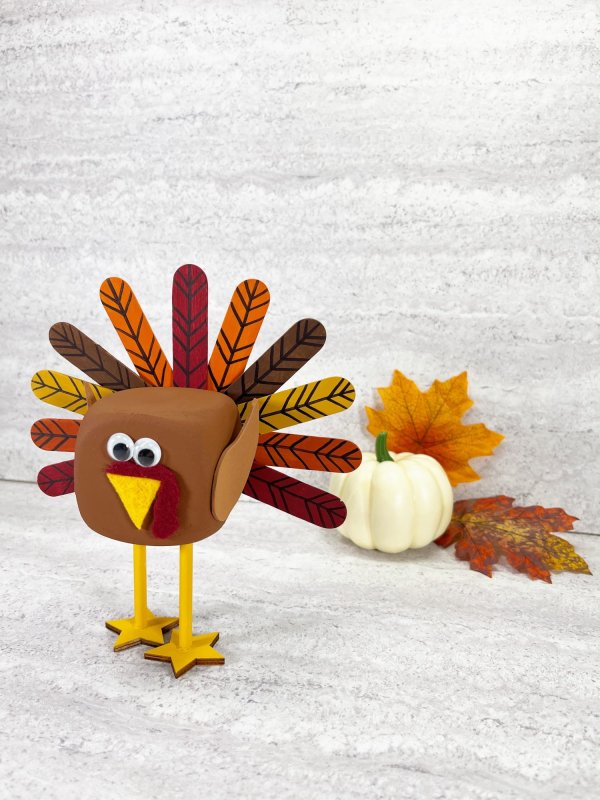
Get the whole family involved in making this fun turkey craft! These cute turkeys are the perfect addition to your decor this holiday season. A simple dollar store foam dice and some jumbo craft sticks are transformed with paint and wiggle eyes into the cutest turkey craft.
Too busy to make this right away? Pin it for later! Pin this post to your favorite board on Pinterest and it will be there when you’re ready!
Back when I still had little kids, I always had so much fun making seasonal crafts with them. It was the perfect way to spend time together, making memories. This simple project can be made by kids of all ages and any skill level. It is the perfect Thanksgiving craft to do together as a family.

Young children can practice their fine motor skills and hand-eye coordination while cutting out shapes. Older children can help with cutting craft sticks for the turkey’s feathers. In the end, you will have a wonderful addition to your Thanksgiving Day decor.
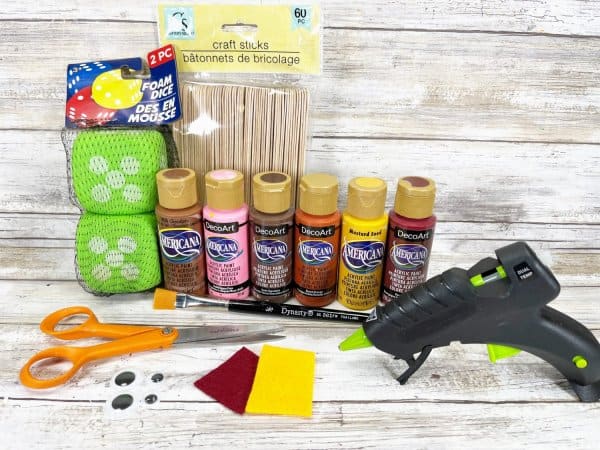
Supplies:
- Foam Dice – Dollar Store
- Jumbo Craft Sticks – Dollar Store
- Wiggle Eyes – Dollar Store
- Wooden Dowels, 6” – Dollar Store
- Wooden Stars – Dollar Store
- Craft Felt or Craft Foam – Brown, Burgundy, Gold
- Craft Paint – Medium Brown, Dark Brown, Burgundy, Yellow, Gold, Bright Orange, Dark Orange
- Glue Gun and Glue Sticks – Dollar Store
- Strong Adhesive like E6000
- Paintbrush
- Scissors
- Ruler
- Pencil
- Permanent Marker, Black
Instructions:
1. Gather all supplies. Remove the foam dice from the packaging. For the turkey’s body, first apply a base coat of medium brown acrylic craft paint to the foam dice. Let paint dry and apply a second coat, if necessary.

2. Base coat the front, back, and sides of jumbo craft sticks with acrylic craft paint as follows: burgundy (2), yellow (1), gold (1), bright orange (1), dark orange (1), and dark brown (1). Let paint dry and apply a second coat, if necessary. These will become the turkey feathers.

3. Measure and cut each jumbo craft stick in half with scissors.
4. Add feather markings to each half craft stick using a permanent black marker. Drawn a line down the center and then diagonal lines drawn into the center line.

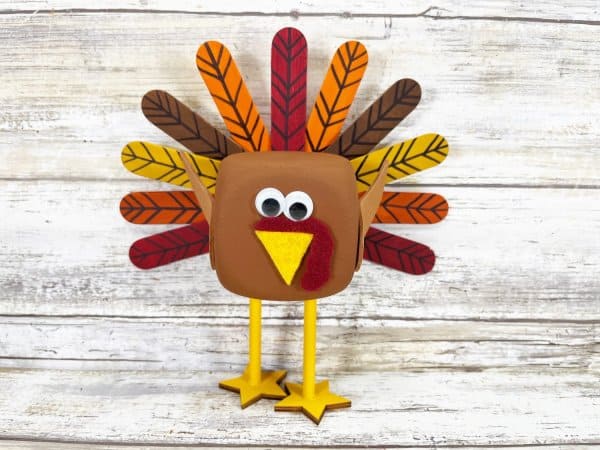
5. Lay out the half jumbo craft sticks with the burgundy in the center and on the ends. Then dry fit the rest of the feathers in between. Refer to the photo for placement. Attach the half jumbo craft sticks to the back of the turkey with a glue gun and glue sticks. You could also use liquid craft glue, but it will take longer to dry.

6. Using the free printable template, download, print, and cut out the foam dice turkey patterns. With a black marker, trace the turkey beak onto gold craft felt and the turkey waddle onto burgundy craft felt. Cut out the beak and waddle with scissors. Add a face to the turkey by attaching two googly eyes with a glue gun and glue sticks. Glue the felt waddle and beak directly under the wiggle eyes.

7. Base coat one 6” wooden dowel and two wooden stars with gold acrylic craft paint. Let dry and apply a second coat, if necessary.
Then cut the wooden dowel in half. Attach the flat end of each dowel half to the center of each star with a strong adhesive, like E6000. Let glue set according to package directions.

8. Push the pencil point into the bottom of the foam dice twice. Add a small amount of glue to the end of the wooden dowel and insert into the hole created with the pencil. Repeat for the second leg.

9. Stand the turkey up and adjust the legs before the glue dries.

10. Trace the turkey wing pattern onto brown craft felt twice with a marker. Cut out the turkey wings with scissors. You could also use craft foam, colored card stock, or construction paper for this project.

11. To finish, attach a wing to the right and left hand side of the turkey, using a glue gun and glue sticks.
Tips and Tricks:
- Instead of using the craft sticks to make the tail feathers, trace your child’s hand onto white paper. The hand prints can then be colored or painted, cut out, and attached to the turkey body.
- Foam dice are a great base for making all kinds of different animals and characters. This scarecrow** is another great example. Get creative!
- Your favorite thrift store is a great place to find inexpensive items to repurpose for all kinds of fun crafts.
- Shopping at your local dollar store is a great way to save money on seasonal decorations, serving platters, and fun activity and craft supplies. Even better, shop clearance sales at the end of the season and stock up for next year.
This is a fun activity to create with the kiddos in just about 30 minutes, with limited supplies. Have everyone join in on the Thanksgiving fun by making their own turkey to use as the perfect place card for the Thanksgiving table.
I would love to hear about some of your family’s favorite Thanksgiving activities. And check out these 20+ turkey craft ideas and these Thanksgiving activity printables for even more ideas.
Enter your name and email below to get an instant download of the files! You are then registered for my weekly email Newsletter that is full of fun recipes, easy crafts, and free printables.
File Usage
- All digital files on Homemade Heather are for personal use only.
- Please direct others to the original website link when sharing.
- Digital reselling, resharing, or distribution is prohibited and NOT allowed.
If you love this Thanksgiving Turkey Craft, please give it a five-star review and share it on facebook and pinterest for others to enjoy.

Thanksgiving Turkey Craft
Materials
- Foam Dice – Dollar Store
- Jumbo Craft Sticks – Dollar Store
- Wiggle Eyes – Dollar Store
- Wooden Dowels 6” – Dollar Store
- Wooden Stars – Dollar Store
- Craft Felt or Craft Foam – Brown Burgundy, Gold
- Craft Paint – Medium Brown Dark Brown, Burgundy, Yellow, Gold, Bright Orange, Dark Orange
- Glue Gun and Glue Sticks – Dollar Store
- Strong Adhesive like E6000
- Paintbrush
- Scissors
- Ruler
- Pencil
- Permanent Marker Black
Instructions
- 1. Gather all supplies. Remove the foam dice from the packaging. For the turkey's body, first apply a base coat of medium brown acrylic craft paint to the foam dice. Let paint dry and apply a second coat, if necessary.
- 2. Base coat the front, back, and sides of jumbo craft sticks with acrylic craft paint as follows: burgundy (2), yellow (1), gold (1), bright orange (1), dark orange (1), and dark brown (1). Let paint dry and apply a second coat, if necessary. These will become the turkey feathers.
- 3. Measure and cut each jumbo craft stick in half with scissors.
- 4. Add feather markings to each half craft stick using a permanent black marker. Drawn a line down the center and then diagonal lines drawn into the center line.
- 5. Lay out the half jumbo craft sticks with the burgundy in the center and on the ends. Then dry fit the rest of the feathers in between. Refer to the photo for placement. Attach the half jumbo craft sticks to the back of the turkey with a glue gun and glue sticks. You could also use liquid craft glue, but it will take longer to dry.
- 6. Using the free printable template, download, print, and cut out the foam dice turkey patterns. With a black marker, trace the turkey beak onto gold craft felt and the turkey waddle onto burgundy craft felt. Cut out the beak and waddle with scissors. Add a face to the turkey by attaching two googly eyes with a glue gun and glue sticks. Glue the felt waddle and beak directly under the wiggle eyes.
7. Base coat one 6” wooden dowel and two wooden stars with gold acrylic craft paint. Let dry and apply a second coat, if necessary. - Then cut the wooden dowel in half. Attach the flat end of each dowel half to the center of each star with a strong adhesive, like E6000. Let glue set according to package directions.
- 8. Push the pencil point into the bottom of the foam dice twice. Add a small amount of glue to the end of the wooden dowel and insert into the hole created with the pencil. Repeat for the second leg.
- 9. Stand the turkey up and adjust the legs before the glue dries.
- 10. Trace the turkey wing pattern onto brown craft felt twice with a marker. Cut out the turkey wings with scissors. You could also use craft foam, colored card stock, or construction paper for this project.
- 11. To finish, attach a wing to the right and left hand side of the turkey, using a glue gun and glue sticks.
