Free & Easy Crochet Flower Pattern
This easy crochet flower pattern is simple to follow with step-by-step photo instructions. The finished easy crochet flowers are absolutely beautiful!

Looking for a way to use up small amounts of yarn, left over from other projects? Why not whip up some beautiful crochet flowers?
Too busy to make this right away? Pin it for later! Pin this post to your favorite board on Pinterest and it will be there when you’re ready!
This easy crochet flower pattern uses basic stitches, very little yarn, and comes together in no time. Check out the easy crochet pattern, including step-by-step photo instructions, below.
Where can I use a crochet flower?
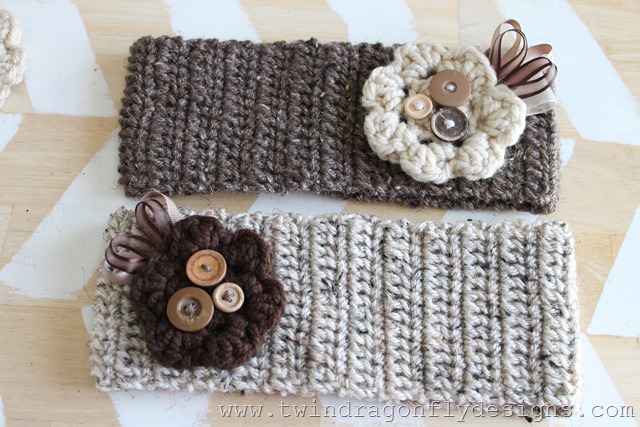
These simple flowers provide the perfect embellishment to hats, bags, headbands, and jackets. You can even use them as hair accessories, by attaching hair clips to the back of the flower, instead of pins.
This post contains affiliate links.
Supplies:
Crochet Abbreviations:
- CH – Chain
- SL ST – Slip Stitch
- ST – Stitch
- SC – Single Crochet stitch
- HDC – Half Double Crochet stitch
- DC – Double Crochet stitch
- INC – Increase
This will quickly become one of your favorite free crochet flower patterns! It makes the most darling little flowers that are fun to whip up.
This free crochet pattern uses basic crochet stitches that even a beginner can follow. Be sure to check out my Learn to Crochet Series, where you can follow the step-by-step video tutorial that’s great for visual learners.
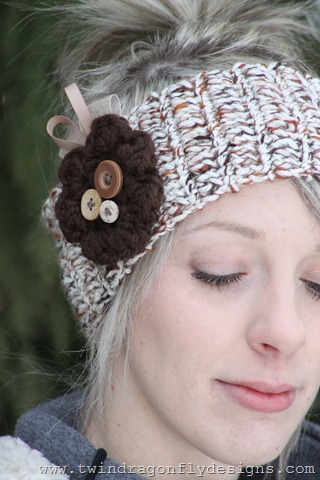
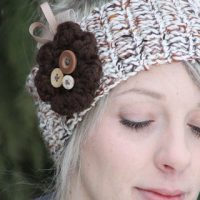
My sister stopped by for a visit the other day, so I quickly pulled her outside for an impromptu photoshoot to showcase these crochet headbands. A simple crochet flower adds the perfect pop of texture and interest to each one!
Be sure to check out my Crochet Headband Pattern to make this complete look.

This fun pattern needs less than a skein of yarn and is an easy way to use up some of your yarn stash!
You could also use worsted weight yarn or cotton yarn, just adjust the hook size accordingly. I love Vanna’s Choice. This type of yarn comes in some of my favorite colors.
Because I have taken photos of each step, I haven’t used common crochet abbreviations like sl st. My hope is that the step-by-step visuals make the flower crochet pattern clear and easy to understand.
Crochet flower variations:
- Make the center of the flower a different color than the petals. You could even make each of the petals different colors!
- Try different yarn weights and hook sizes.
- Add more petals.
Crochet flower free pattern:
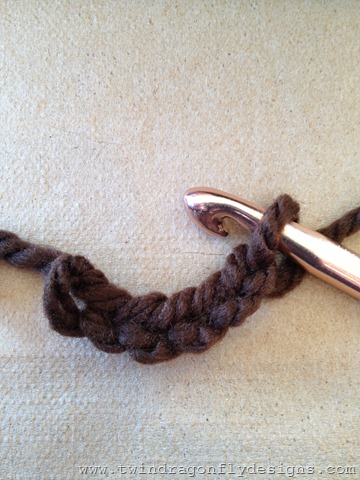
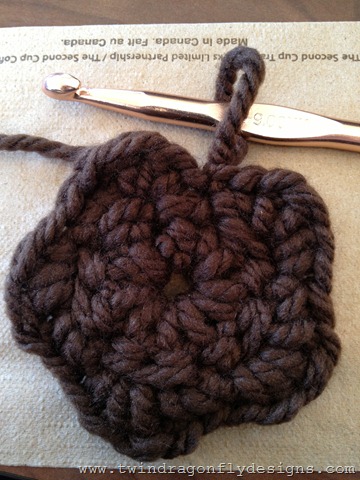
1. Chain 6.
2. Slip stitch into the first chain to create a magic ring.

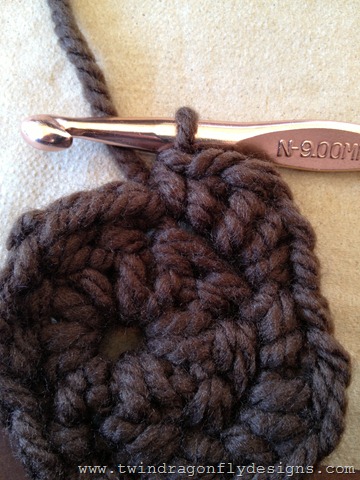
3. Chain 2.
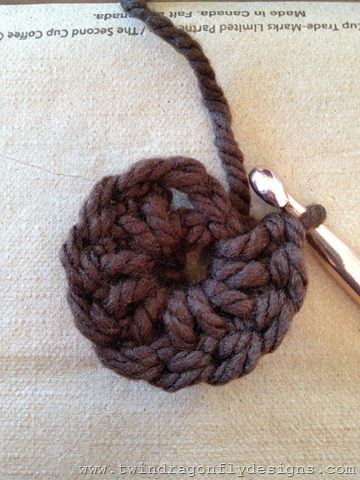
4. Double crochet 10 stitches into the circle. Slip stitch to join your last double crochet into the space left by the first chain 2.
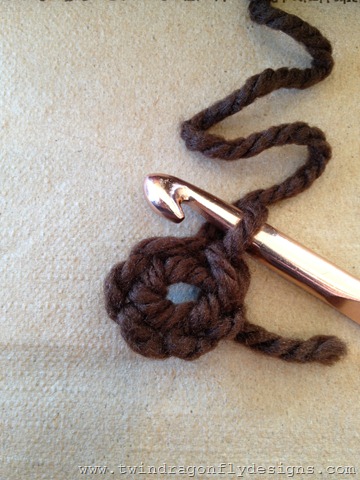
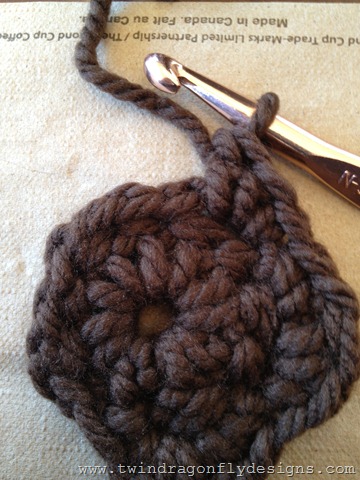
5. Chain 3.
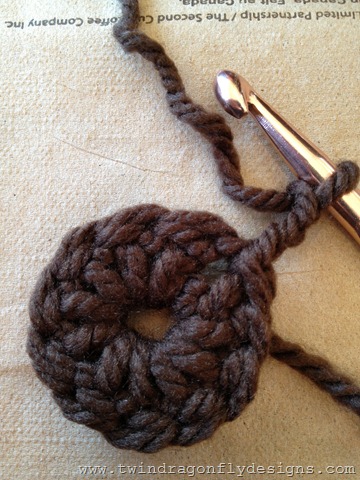
6. Slip stitch into the second stitch from the chain. This will create a little loop.
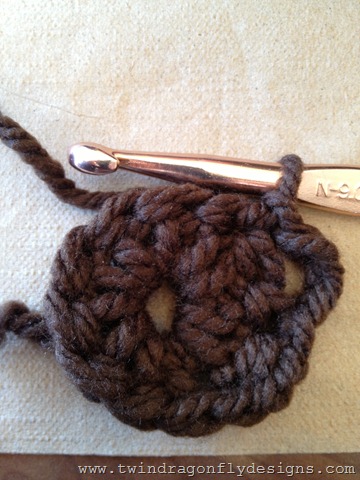
7. Repeat (chain 3, slip stitch into the second stitch) all the way around. This should leave you with five loops.
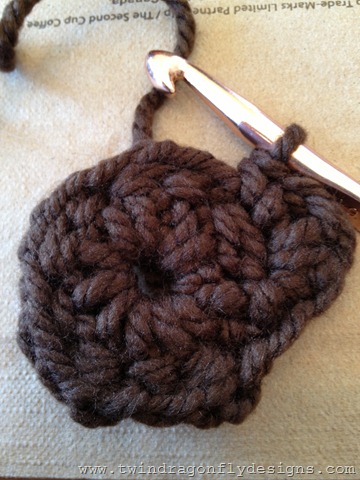
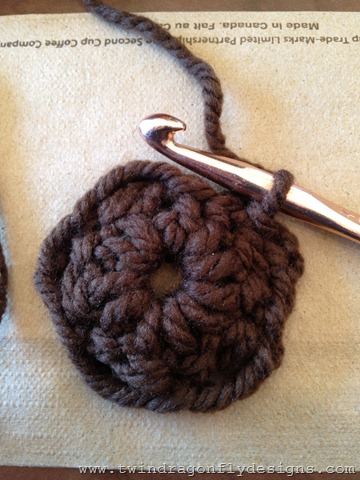
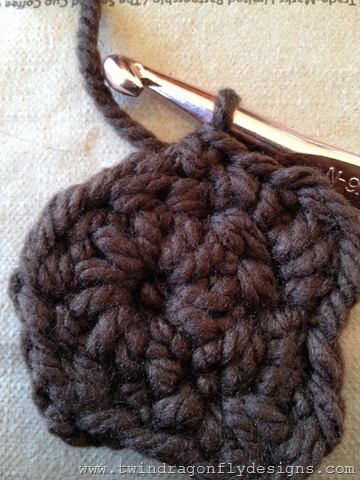
8. Into each loop, crochet this pattern: single crochet, half double crochet, double crochet, half double crochet, single crochet.
This is what the first petal will look like:
Single crochet.

Half double crochet.
Double crochet

Half double crochet.
Single crochet.
9. When you have finished crocheting the petal pattern into each loop, you will be left with 5 petals. Slip stitch to join, tie off the yarn and use a tapestry needle to sew in any loose ends.
Adding ribbon and buttons is the fun part! I like to thread the buttons with yarn and attach them and the ribbon to the little crochet flowers with a hot glue gun .
Then I add a safety pin to the back of the finished crochet flower so that it can be attached to almost anything!

Tips and Tricks:
- When choosing crochet projects, always check the skill level needed, to be sure it’s a good fit for you.
- Crochet hook size can make a real difference in the size of your finished product. If you tend to crochet quite tightly, it may be beneficial to go up a size. If your stitches tend to be loose, go down a size.
- Only have worsted weight yarn, but the pattern calls for bulky yarn? No problem! Just use two strands, held together.
- For easy washing, choose a cotton yarn or make one with worsted weight yarn for a different look.
Please remember when using any of my crochet patterns, that they are for personal use and not to be resold. I hope you get as much joy out of creating these easy crochet flowers as I do!
If you loved this easy crochet pattern, please help me share it on Facebook or Pinterest so that others can enjoy it too!
Crochet Flower Pattern
Materials
- 9 mm N crochet hook
- Yarn needle
- Stitch marker
- Chunky Yarn
- Scissors
Instructions
- 1. Chain 6.
- 2. Slip stitch into the first chain to create a magic ring.
- 3. Chain 2.
- 4. Double crochet 10 stitches into the circle. Slip stitch to join your last double crochet into the space left by the first chain 2.
- 5. Chain 3.
- 6. Slip stitch into the second stitch from the chain. This will create a little loop.
- 7. Repeat (chain 3, slip stitch into the second stitch) all the way around. This should leave you with five loops.
- 8. Into each loop, crochet this pattern: single crochet, half double crochet, double crochet, half double crochet, single crochet.
- 9. When you have finished crocheting the petal pattern into each loop, you will be left with 5 petals. Slip stitch to join, tie off the yarn and use a tapestry needle to sew in any loose ends.

Thanks for sharing this flower tutorial and your crochet talent! Just what I need for my new fall slouchy hat:) Keep on crocheting!
The pattern is great but, with the yarn and hook choice given, the flowers are much much larger than the ones on your hats. Very deceiving.
I agree! I am using a 9mm hook, with chunky yarn, and my flower doesn’t look anything like the one in the photo.
I am wondering if you are using a smaller hook, and/or your stitch pattern in the loop of the flower is not sc, hdc, dc, hdc, sc, but something different?
The pattern is correct, I would try creating this with a standard size yarn like Vannas Choice to start with. Let me know how it goes <3
Thanks, again a simple but great pattern which actually delivers what it shows in the picture! I am so sick of seeing great ideas to try but with patterns that don’t really work. The simple ones are the best and this is a good ‘un.
I’ll be adding this to the headband and knocking a few out for Christmas stall. Big thanks.
Great to hear! Happy crocheting :)
I’m going to give it a roll…. I hope it turns out good for me …
Good luck, let me know how it goes!
Hi – Just wanted to thank you so much for this beautiful flower tutorial. I just love it! And the ear warmer pattern! I’m going to make these for a friend. The colors you’ve used are gorgeous! Thank you again –
Amy
You’re very welcome! Please let me know how it turns out <3
Thank you Heather for sharing. I crochet dozens of hats and scarves for veterans, homeless, and school kids. I am seeing more and more kids wearing ear warmer/headbands so I thought I would start making some for next winter. I am not very good at following patterns – a friend has made flowers that I have added to some of my hats – but your instructions sound easy to follow. I can’t wait to add buttons from my collection.
That’s amazing! These ear warmers have always been a hit here – I hope that you find the pattern easy <3