How to Make a Yarn Bowl With Polymer Clay

I can’t wait to show you how to create this DIY yarn bowl made with polymer clay.
We had a lot of fun with #projectcrochet a few months ago. We gave away a lovely yarn bowl that my grandma made out of pottery. That’s what inspired this bowl! I’ve been busy making more of these crochet headbands and crochet flowers so a yarn bowl has totally come in handy!
This tutorial was originally posted at 733.

A yarn bowl is the perfect spot to keep your yarn while working on a crochet project. They will usually have an opening where you can slide the working end of your yarn while the skein stays safely in the bowl. This bowl is one that you can make at home with just a few simple supplies.

This post contains affiliate links.
You will need:
- 7-8 oz of polymer clay (try experimenting with a variety of colour combinations and/or patterns)
- wax paper
- cutting tool (a butter knife would work)
- rolling pin
- an oven safe bowl
How to make a yarn bowl:

To create a striped bowl like the one pictured follow these steps. Lay out a sheet of wax paper to work on, this will help to prevent sticking. Roll 7-8 long ropes of clay {using 1 oz of clay each} about 1/4″ in diameter.
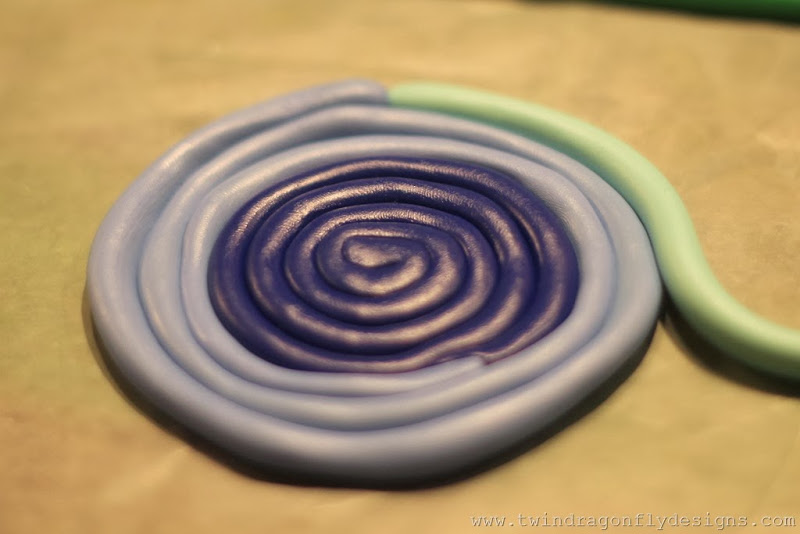
Starting in the centre, coil the ropes around each other.

Continue until all of the ropes have been coiled around each other.

Use a rolling pin to blend the colours together and flatten the clay into a round shape about 10″ in diameter.
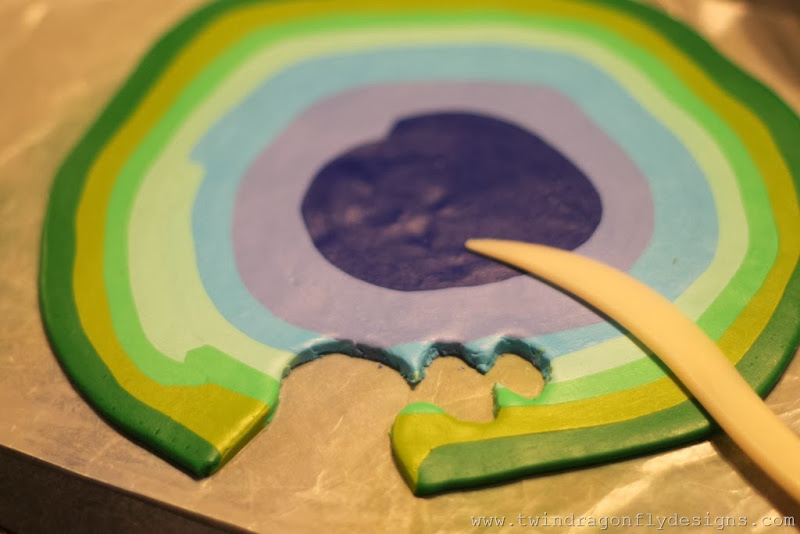
Use a cutting tool to create a hooked shape for the yarn to rest in.

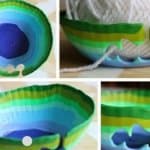
Finally mold the clay over the outside of an oven safe bowl and place on a cookie sheet.
Pro Tip: do not press the clay to the bowl but drape it over and you may want to spray the bowl with non-stick cooking spray to prevent the clay from sticking after baking.

Bake at 275 for 30 minutes or as directed on the package of clay. Once cool, carefully peel your DIY yarn bowl off of the oven safe bowl.

Totally fun and easy right?! This was my first polymer clay yarn bowl but I can see where the possibilities would be endless! If you make one I would LOVE to see it!
GRAB my Learn to Crochet EBOOK
[mv_create key=”100″ layout=”hero” title=”More Crochet Projects” type=”list”]
DIY YARN BOWL WITH POLYMER CLAY
I can’t wait to show you how to create this DIY yarn bowl made with polymer clay.
Yield: 1
Materials
- 7-8 oz of polymer clay try experimenting with a variety of colour combinations and/or patterns
- wax paper
- cutting tool a butter knife would work
- rolling pin
- an oven safe bowl
Instructions
- 1. To create a striped bowl like the one pictured follow these steps. Lay out a sheet of wax paper to work on, this will help to prevent sticking. Roll 7-8 long ropes of clay {using 1 oz of clay each} about 1/4″ in diameter.
- 2. Starting in the centre, coil the ropes around each other.
- 3. Continue until all of the ropes have been coiled around each other.
- 4. Use a rolling pin to blend the colours together and flatten the clay into a round shape about 10″ in diameter.
- 5. Use a cutting tool to create a hooked shape for the yarn to rest in.
- 6. Finally mold the clay over the outside of an oven safe bowl and place on a cookie sheet.
- 7. Bake at 275 for 30 minutes or as directed on the package of clay. Once cool, carefully peel your DIY yarn bowl off of the oven safe bowl.

Wow!!! Awesome…
Hi. I made a bowl,but I can’t seem to get it of after I baked it!
Oh dear! I have updated the post with a few tips.
Thank you so much. I will try again.
You spray with nonstick spray after it has baked or before?
Thanks, Paula
Before :)
My first two bowls were failures they were full of breaks and cracks. Not little cracks but structural failures. It’s a new day so willlet you know how it turns out
Oh no! Hope that you have success!