Plant Pot Bee Craft
This cute plant pot bee craft is adorably simple to make. With a few mini pots, acrylic paint and craft scraps, you can create these darling bees!

It’s been a while, so today, I decided it was time to have a crafty morning. After looking through my stash, I found some extra terracotta pots.
An earthy orange colour, they are mostly associated with flower pots, but there are infinite uses for a simple terracotta clay pot. They are the perfect crafting material.

Too busy to make this right away? Pin it for later! Pin this post to your favorite board on Pinterest and it will be there when you’re ready!
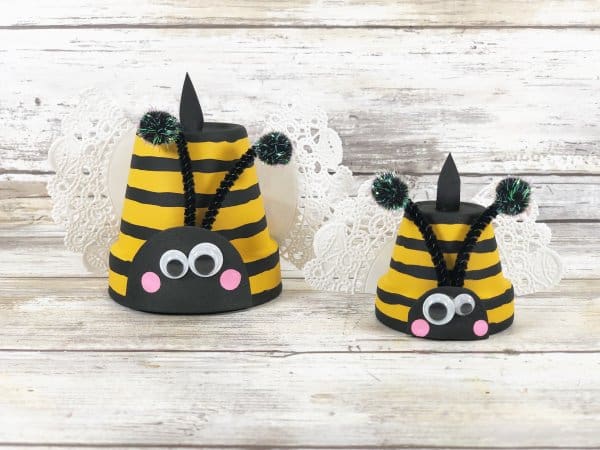
Cute clay bumble bees!
With a fun clay pot craft in mind, I got to work! Aren’t these bees adorable? Cheery and bright, this is a great project to do with little ones.

This easy tutorial with step-by-step instructions makes it simple too. What better way to spend time getting creative?

The following contains affiliate links.
Supplies needed:
- Dollar Store Terracotta Clay Pots – 2.5” and 1.5” in diameter
- Acrylic Paint – Yellow, Black, Pink
- Craft Foam – Black
- Googly Eyes, Four
- Pom Poms – Black, Four
- Chenille Stem – Black, One
- Small White Paper Doilies, Two
- Glue Gun and Glue Sticks
- Scissors
- Paintbrush
- Pencil with New Eraser
Side note – I love, love, love that hot glue gun. A rechargeable glue gun with no chord has been so freaking convenient when crafting lately!

All of my craft supplies were found at Dollarama! You can order similar materials from Amazon using the links above.
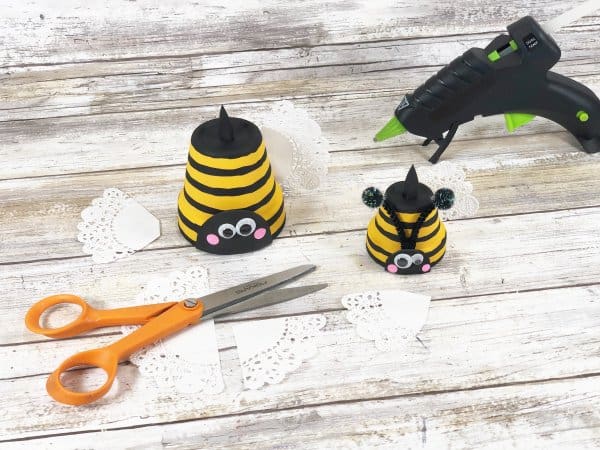
How to create a clay pot bee:

1. Gather all materials and then remove the packaging and labels.
2. Basecoat both clay pots with yellow acrylic craft paint. Let the paint dry and then apply a second coat, if necessary.

3. Paint horizontal stripes with black paint from the top to the bottom of each clay pot. Set aside to dry. Apply a second coat, if necessary.

4. Cut a larger and smaller half circle from black craft foam. Attach two wiggle eyes to each Bee head with a glue gun and glue sticks.
5. Add polka dot cheeks by dipping a new pencil eraser into pink acrylic craft paint. Set aside to dry.
6. Use the glue gun to attach Bee heads to bases of clay pots.
TIP: You can use liquid craft glue instead of hot glue for this project, but you will have to wait for it to dry.

7. Cut a 12” chenille stem in half and fold both sections in half. Attach a black tinsel pom pom to the cut end of both sets of antennae with a glue gun and glue sticks.
8. Glue the folded end to the back of the Mama and Baby Bee heads.

9. Cut two long skinny triangles from black craft foam and secure in the drainage hole in the bottom of the pot with a glue gun and glue sticks.
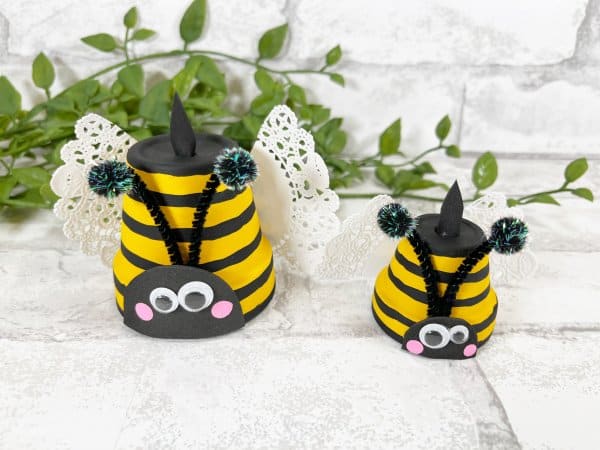
10. Cut small white paper doilies in quarters and attach two to the back of Mama and Baby Bee using a glue gun and glue sticks.
Tips and tricks:
- You don’t have to buy new pots for these crafts. Give a new look to old clay pots instead.
- The end of the season is the perfect time to pick up some pots, either at home improvement, gardening, or craft stores. They are usually clearing out their leftover terracotta pots, meaning you get a great deal.
- Using spray paint is a great way to get quick, even coverage on your pots.
- A decoupage medium, like Mod Podge, does a great job of sealing your DIY project and prolonging its life.
Where to use clay pot crafts:
- Use various sizes of pots to build a terracotta pot diy lighthouse. Their stackable design makes them perfect for a tower.
- That stackability comes in handy for making a Christmas tree too.
- If you’ve got a green thumb, create an indoor garden. Plant your favourite flowers or an herb garden. Or beautify your front door with a tiered planter full of greenery to welcome guests.
- Little fairy houses are lots of fun to make.
- Making a bird feeder is a great gift for the bird lovers in your life.
- Tiny clay pots make cute clay pot wind chimes. Paint them a nice bright colour, make patterns, or leave them simple to suit your taste.

Get creative and put your own unique touch on these cute pots. I’d love to see your creations!
More clay pot ideas:
- Clay pot frog craft
- How to make a clay plant pot
- Clay pot turtle craft
- Pumpkin clay pot craft
- Clay pot bee craft
This post contains affiliate links.
Some of my crafting must haves:
- We love using these Apple Barrel Acrylic Paints to add bright color to all of our projects.
- These paint brushes are ideal for most craft surfaces and a great price!
- This art supplies kit is our favorite because it has everything we needed to get started.
- This rolling storage cart helps to keep our craft supplies organized.
If you love this clay pot bee craft, please give it a five star review and help me share it on Facebook and Pinterest so that others can enjoy it too!
Plant Pot Bee Craft
Materials
- Dollar Store Terracotta Clay Pots – 2.5” and 1.5” in diameter
- Acrylic Paint – Yellow Black, Pink
- Craft Foam Black
- Googly Eyes Four
- Pom Poms Black Tinsel, Four
- Chenille Stem Black, One
- Small White Paper Doilies Two
- Glue Gun and Glue Sticks
- Scissors
- Paintbrush
- Pencil with New Eraser
Instructions
- 1. Gather all materials and then remove the packaging and labels.
- 2. Basecoat both clay pots with yellow acrylic craft paint. Let the paint dry and then apply a second coat, if necessary.
- 3. Paint horizontal stripes with black paint from the top to the bottom of each clay pot. Set aside to dry. Apply a second coat, if necessary.
- 4. Cut a larger and smaller half circle from black craft foam. Attach two wiggle eyes to each Bee head with a glue gun and glue sticks.
- 5. Add polka dot cheeks by dipping a new pencil eraser into pink acrylic craft paint. Set aside to dry.
- 6. Use the glue gun to attach Bee heads to bases of clay pots.
- 7. Cut a 12” chenille stem in half and fold both sections in half. Attach a black tinsel pom pom to the cut end of both sets of antennae with a glue gun and glue sticks.
- 8. Glue the folded end to the back of the Mama and Baby Bee heads.
- 9. Cut two long skinny triangles from black craft foam and secure in the drainage hole in the bottom of the pot with a glue gun and glue sticks.
- 10. Cut small white paper doilies in quarters and attach two to the back of Mama and Baby Bee using a glue gun and glue sticks.

Adorable! Haven’t made it, but I would laminate the doily to keep it crisp and water proof!
Very creative project!
Thanks so much!