Adam & Barbara Maitland Beetlejuice Costume Tutorial
These DIY Adam & Barbara Maitland Costumes are so freaking awesome for Halloween! Follow the detailed step-by-step tutorial to make these epic Beetlejuice costumes this year.

Every year my kids challenge me to create unique DIY costumes and this year was no exception! In the past we’ve made a Plague Doctor, Functioning Demogorgon Mask, Beeker Costume, Mario & Luigi Go Kart Costumes and a whole family of Angry Bird Costumes!
Be sure to check out our Family Beetlejuice Costume, Bob the Shrunken Head Guy and Sandworm costumes too!
Too busy to make this right away? Pin it for later! Pin this post to your favorite board on Pinterest and it will be there when you’re ready!

When planning for Halloween we love to binge watch our favorite, cult classic spooky movies. Beetlejuice is, of course, at the top of the list! It rivals only Hocus Pocus in our books.

Need a refresher?!
Beetlejuice coles notes:
- Beetlejuice is a 1988 dark comedy directed by Tim Burton and produced by Warner Bros.
- The Maitlands are a married couple that suddenly pass away and are trapped in their house.
- A new family moves in and the couple tries desperately to scare them off.
- They transform themselves with these scary faces but still have no luck.
- Finally, they enlist in the aide of a poltergeist named Betelgeuse, played by Michael Keaton.
- Drama ensues, “Beetlejuice” is banished and the Maitlands and family decide to live together peacefully.

I have detailed every step of how to create this epic Beetlejuice Maitland couple costume. It’s easy with this step-by-step tutorial, promise!

This post contains affiliate links.
Supplies that you’ll need to create these costumes:
- Round helmet
- White poster paper 24″ x 36″
- Duct tape
- Scissors
- Knife
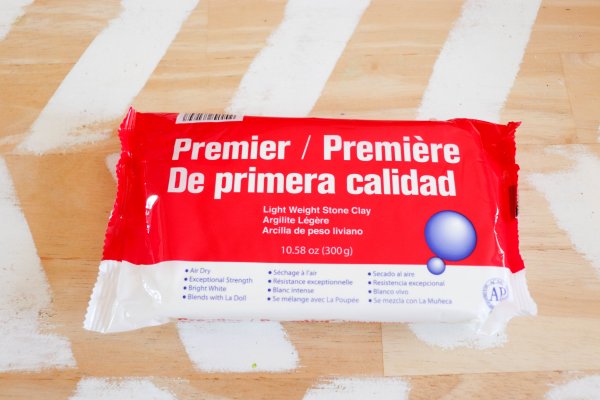
- Air dry clay
- 1″ Styrofoam balls
- Acrylic paint
- Paintbrush
- Mod podge
- Thin black fabric
- Glove
- Spray foam
- Short black wig
- Hot glue gun
- Hot glue
- Stapler
- White glue
- Craft paper or newsprint
- Sun visor
- Cardboard cereal box
- Scraps of cardboard
- Six sponges
- Masking tape
- Square wooden beads
- Long brown curly wig
- Floral dress
- Plaid shirt
- Tan pants
I found most of the craft supplies at our local Dollarama store but have linked similar materials on Amazon.

I have included photos along the way but if you have any questions at all be sure to drop me a message.
DIY Adam Maitland Costume
- Start the base of the mask using a helmet and large 24″ x 36″ sheet of poster paper.

2. Cut two elongated eyes in the poster paper.

3. Wrap the poster paper in a cone shape around the helmet. Use duct tape to fix it into place.

4. Tear craft paper into strips and small pieces. Use a mixture of one part white glue, two parts water to cover the mask in paper mache.

5. Allow the paper mache to dry completely.
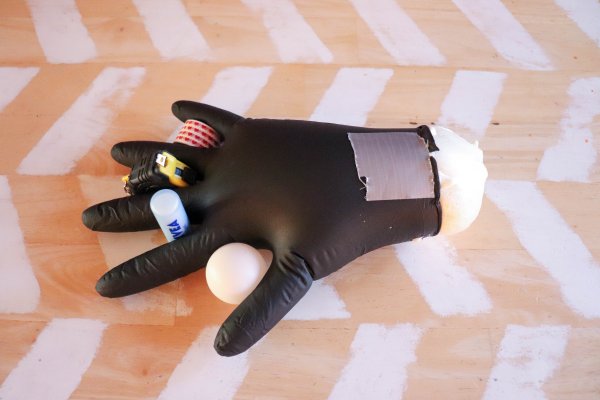
6. Fill the glove with spray foam and allow it to set. Depending on the kind of foam that you use, it may take overnight.
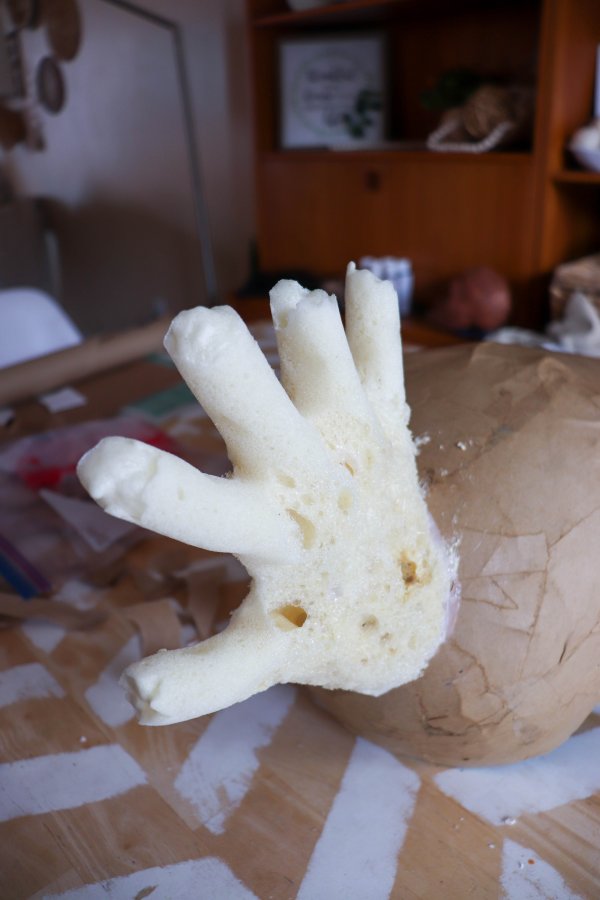
7. Cut the glove from the foam, shape the sides of the hand with a knife and glue it to the back of the helmet.

8. Use the air dry clay to shape three stretch marks on either side of the mask and add an upper ridge line to the tops of the eyes.

9. Paint the entire mask tan using acrylic paint.
Create spooky eyeballs:

10. Carve a hole into the back of ten of the styrofoam balls.

11. Paint the eyeballs using acrylic paint. Seal with mod podge.

12. Make about 75 teeth using the square wooden beads and air dry clay. Paint the teeth white.

13. Glue about 20 teeth to the bottom of the mask and glue the short black wig to the back of the mask.
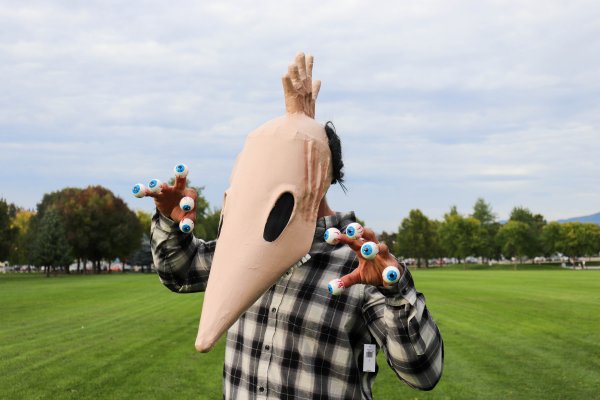
Pair the mask and eyeballs with a plaid shirt and tan pants to complete the look.
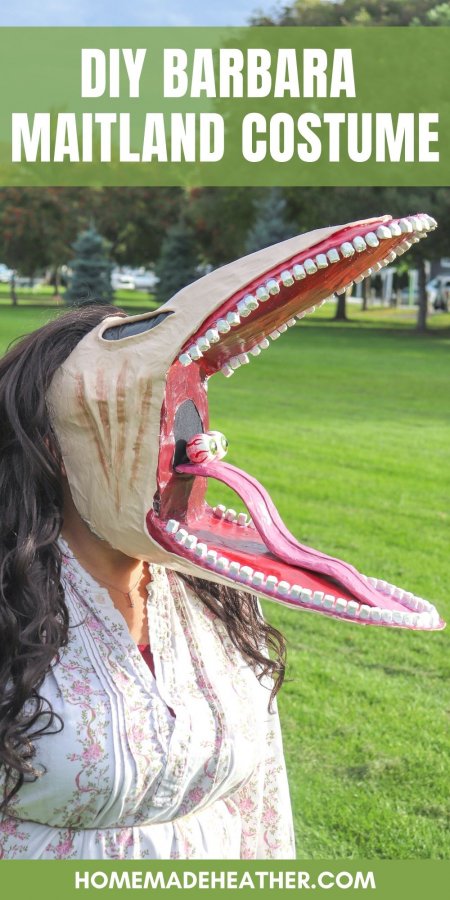
DIY Barbara Maitland Costume

- Start by cutting out two shapes from cereal boxes that are approx 12″ x 18″ with a curve at the top.

2. Shape one of the pieces over the top of the sun visor and tack into place with staples or hot glue.

3. Use two scraps of cardboard to create an elongated jaw along the sides of the visor and tape the second cereal box piece to the bottom.

4. Glue and shape sponges to the inside top and bottom mouth pieces.

5. Cover sponges with masking tape to make a smooth surface.

6. Use scrap cardboard to cover the center of the mouth with a hole cut out for seeing out of.
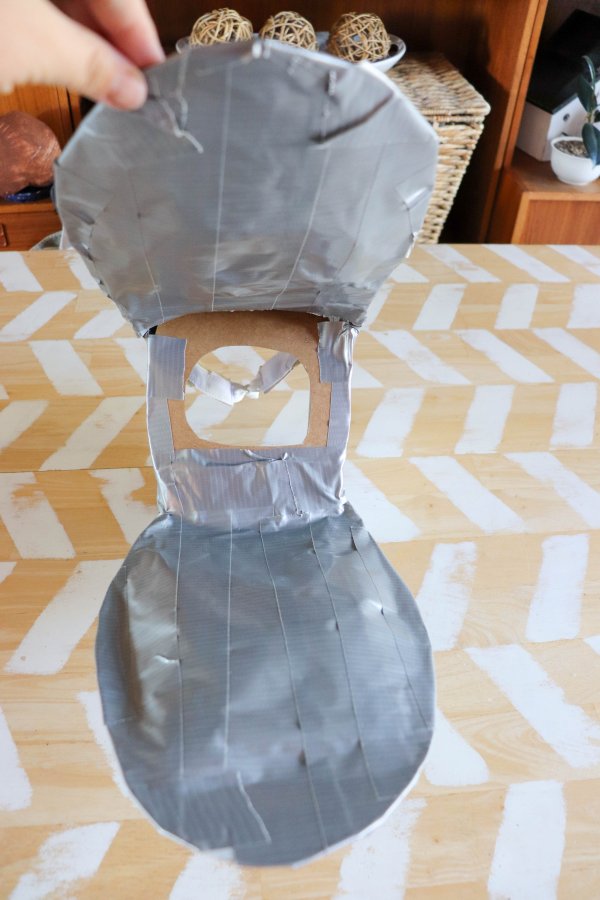
7. Cover the entire mask in duct tape to create a sturdy base.
8. Create a tongue using this same technique (not pictured).

9. Tear craft paper into strips and small pieces. Use a mixture of one part white glue, two parts water to cover the mask in paper mache.
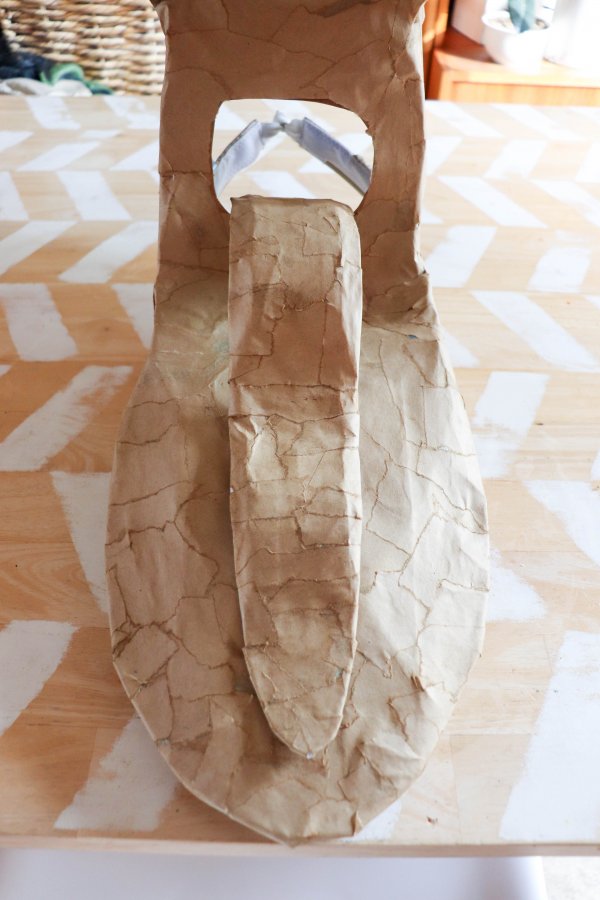
10. Allow the paper mache to dry completely.
11. Use air dry clay to form elongated eyes, stretch marks on the sides of the mask and a ridge around the gum line on the top of the mask.
Paint the mask:

12. Paint the outside of the mask tan using acrylic paint.

13. Then paint the inside of the mouth and tongue pink and red.

14. Paint the inside of the eyes black.
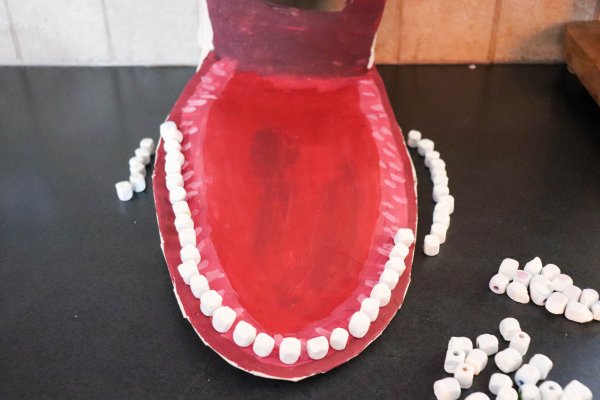
15. Glue the remaining 50 teeth to the inside edges of the mouth.

16. Paint two styrofoam balls to look like eyes. Seal with mod podge if desired.

17. Glue the tongue into place and cover the face hole with black fabric.

Pair the mask with a flowery dress and long brown curly wig for a completed look.
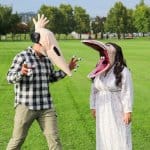
DIY Adam & Barbara Maitland Costumes:

We absolutely love how these costumes turned out and cannot wait to become Adam & Barbara Maitland this Halloween!

Adam Maitland in all of his eye finger glory!

Barbara Maitland is eye popping!

I absolutely love how authentic this mask looks! These creepy masks totally make this Beetlejuice costume over the top.

I found a thrifted nighty to wear as Barbaras dress but almost anything would work! The trick is to find something floral with long sleeves.

My favorite part of each of these costumes is definitely the eyeballs. I love the details of the veins and pupils.

Clearly, gluing on all of these teeth was totally worth it! I added extra hot glue to each side of the teeth to make them extra durable.

The plaid shirt for Adam was found at Old Navy, can you spot the tag that I forgot to pull off for our photo shoot?! lol

Adam Maitland DIY Beetlejuice Costume

Barbara Maitland DIY Beetlejuice Costume
More of our crafting essentials:
- We love using these Apple Barrel Acrylic Paints to add bright color to all of our projects.
- These paint brushes are ideal for most craft surfaces and a great price!
- This art supplies kit is our favorite because it has everything we needed to get started.
- This rolling storage cart helps to keep our craft supplies organized.
Be sure to check out our whole DIY Family Beetlejuice Costume tutorial complete with a shrunken head costume and witch doctor. Ask us how excited we are for Halloween this year!

If you like these DIY Adam & Barbara Maitland costumes, please help us by sharing them on Facebook or Pinterest so that others can enjoy them too!
ADAM & BARBARA MAITLAND BEETLEJUICE COSTUME TUTORIAL
Materials
- Round helmet
- White poster paper 24″ x 36″
- Duct tape
- Scissors
- Knife
- Air dry clay
- 1 ″ Styrofoam balls
- Acrylic paint
- Paintbrush
- Mod podge
- Thin black fabric
- Glove
- Spray foam
- Short black wig
- Hot glue gun
- Hot glue
- Stapler
- White glue
- Craft paper or newsprint
- Sun visor
- Cardboard cereal box
- Scraps of cardboard
- Six sponges
- Masking tape
- Square wooden beads
- Long brown curly wig
- Floral dress
- Plaid shirt
- Tan pants
Instructions
- Start the base of the mask using a helmet and large 24″ x 36″ sheet of poster paper.
- Cut two elongated eyes in the poster paper.
- Wrap the poster paper in a cone shape around the helmet. Use duct tape to fix it into place.
- Tear craft paper into strips and small pieces. Use a mixture of one part white glue, two parts water to cover the mask in paper mache.
- Allow the paper mache to dry completely.
- Fill the glove with spray foam and allow it to set. Depending on the kind of foam that you use, it may take overnight.
- Cut the glove from the foam, shape the sides of the hand with a knife and glue it to the back of the helmet.
- Use the air dry clay to shape three stretch marks on either side of the mask and add an upper ridge line to the tops of the eyes.
- Paint the entire mask tan using acrylic paint.
- Carve a hole into the back of ten of the styrofoam balls.
- Paint the eyeballs using acrylic paint. Seal with mod podge.
- Make about 75 teeth using the square wooden beads and air dry clay. Paint the teeth white.
- Glue about 20 teeth to the bottom of the mask and glue the short black wig to the back of the mask.
BARBARA MAITLAND COSTUME:
- 1. Start by cutting out two shapes from cereal boxes that are approx 12″ x 18″ with a curve at the top.2. Shape one of the pieces over the top of the sun visor and tack into place with staples or hot glue.3. Use two scraps of cardboard to create an elongated jaw along the sides of the visor and tape the second cereal box piece to the bottom.4. Glue and shape sponges to the inside top and bottom mouth pieces.5. Cover sponges with masking tape to make a smooth surface.6. Use scrap cardboard to cover the center of the mouth with a hole cut out for seeing out of.7. Cover the entire mask in duct tape to create a sturdy base.8. Create a tongue using this same technique (not pictured).9. Tear craft paper into strips and small pieces. Use a mixture of one part white glue, two parts water to cover the mask in paper mache.10. Allow the paper mache to dry completely.11. Use air dry clay to form elongated eyes, stretch marks on the sides of the mask and a ridge around the gum line on the top of the mask.12. Paint the outside of the mask tan using acrylic paint.13. Then paint the inside of the mouth and tongue pink and red14. Paint the inside of the eyes black.15. Glue the remaining 50 teeth to the inside edges of the mouth.16. Paint two styrofoam balls to look like eyes. Seal with mod podge if desired.17. Glue the tongue into place and cover the face hole with black fabric.
Video
[mv_create title=”Halloween Costumes” key=”80″ thumbnail=”https://homemadeheather.com/wp-content/uploads/2015/08/Plants-vs-Zombies-Chomper-Zombie-Costume-DIY-Tutorial-040-scaled.jpg” type=”list” layout=”hero”]

Hi Heather! I love these costumes and thank you for a clear tutorial! I just put the poster on my helmet and it appears to stick straight out rather than down (more of an anteater look!). I tried moving the poster cone further down to create the correct angle, but to no luck. Any suggestions? Thanks!
The poster “cone” is angled downwards from the front of the helmet. It may help to trim off a section of the poster board with scissors so that you can get the right angle. I would love to see your finished costumes!! Happy Halloween.
Does the paper mache stay on the helmet? Or can you pry it off to wear it? Do you have to put anything on the helmet before the papermache?
It stays on the helmet, no it sticks very well to the material of the helmet. You then wear the helmet as the “mask”.
hi I was wondering how you created the tongue
wanted to thank you for your directions. I’ve been wanting to do this for years just didn’t know where to start. I managed to pull it off however my teeth kept falling out like a crackhead lol. I ended up just using paper to fill in the gaps. a lot of hot glue burns later it worked!
You are very welcome! I’m so glad that it worked out :)