DIY Buddy the Elf Chocolates

These DIY Buddy the Elf chocolates are seriously fun and easy to make, great for the holidays! This Elf inspired chocolate is the perfect festive treat for Christmas time.
Too busy to make this right away? Pin it for later! Pin this easy recipe to your favorite board on Pinterest and it will be waiting there when you’re ready.
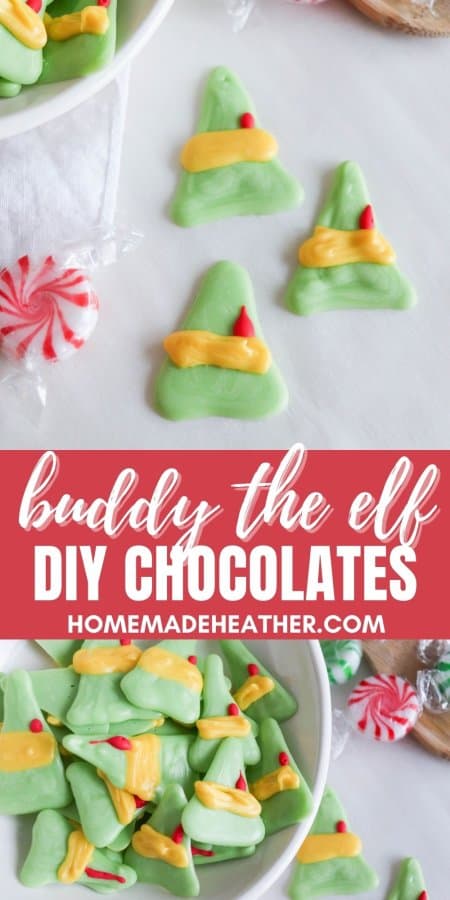
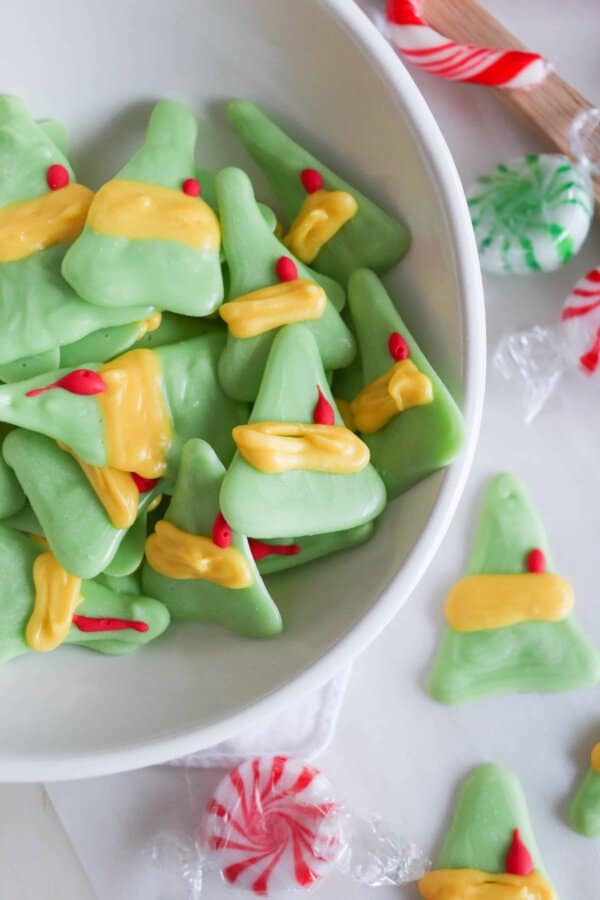
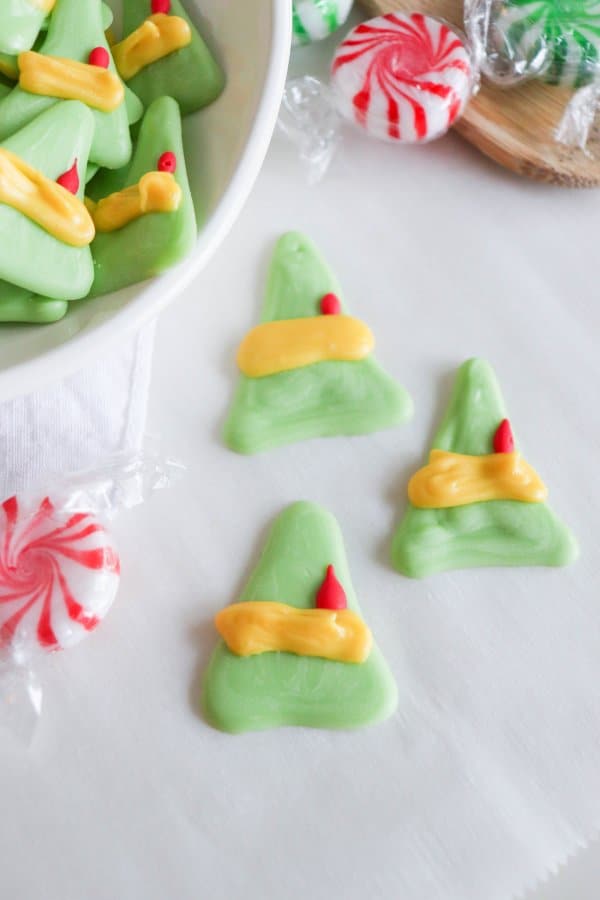
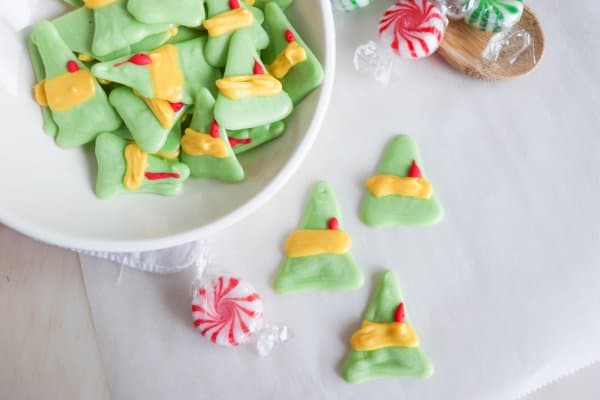
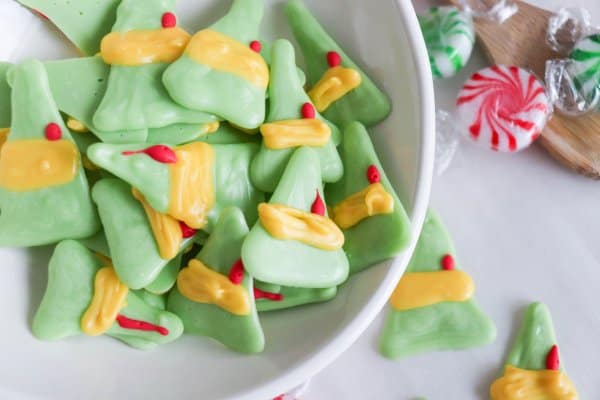
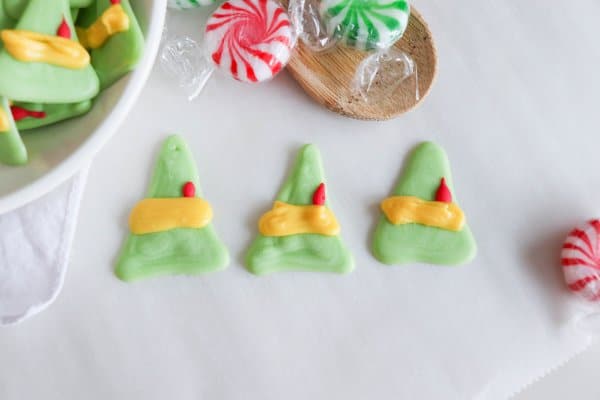
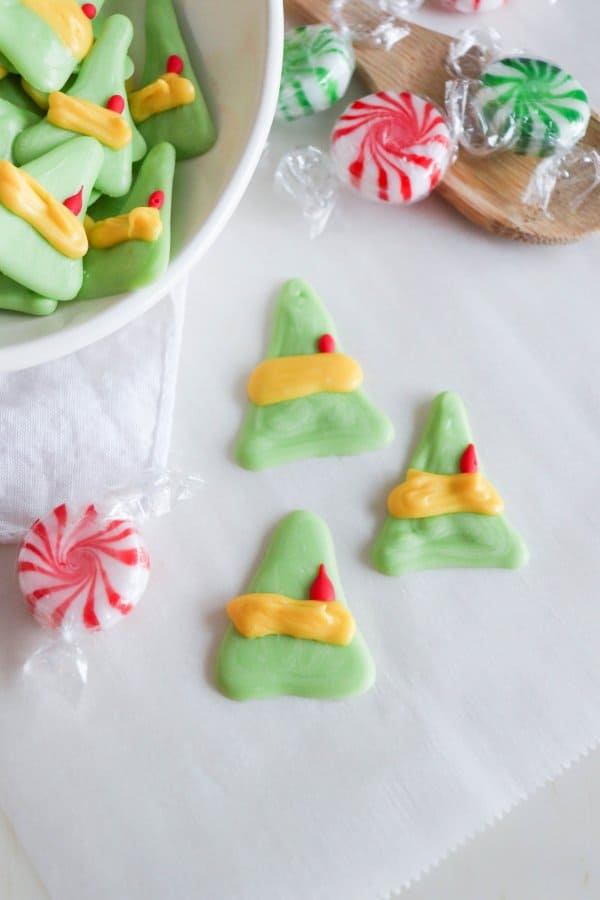
Inspired by the movie, Elf, these chocolates are sure to delight! Easy treats, shaped into fun Buddy the Elf hats, finished off with a red frosting feather.
We love this christmas movie as clearly demonstrated by these Elf Party Ideas, Elf Punch Board Advent and Elf Activity Printables. Be sure to poke around the blog a bit for more fun holiday crafting ideas.
Why use melting chocolate?
Meltable chocolate wafers are super easy to melt in the microwave or double boiler. They have a higher wax content than regular chocolate which makes them more forgiving to work with and less likely to burn.
This holiday chocolate recipe is so much fun for kids of all ages to make and take to holiday parties or events.
I love, love, love how these adorable little Elf chocolates turned out! They would be fun to pack up and wrap with a bit of baker’s twine and gift to friends and family.
How to make this Elf chocolate recipe:
This post contains affiliate links.
Ingredients:
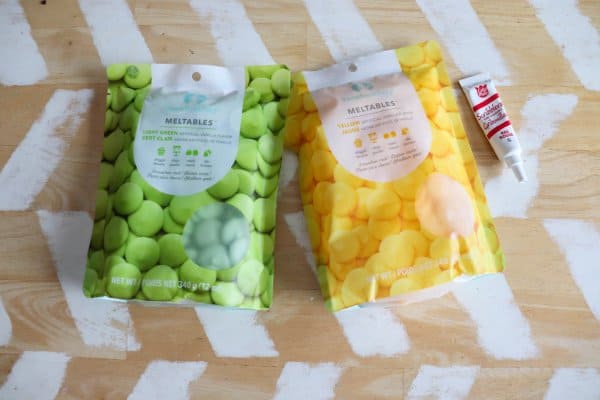
- 4 oz Meltable green chocolate candy melts
- 1 oz Meltable yellow chocolate candy melts
- Red icing
Directions:
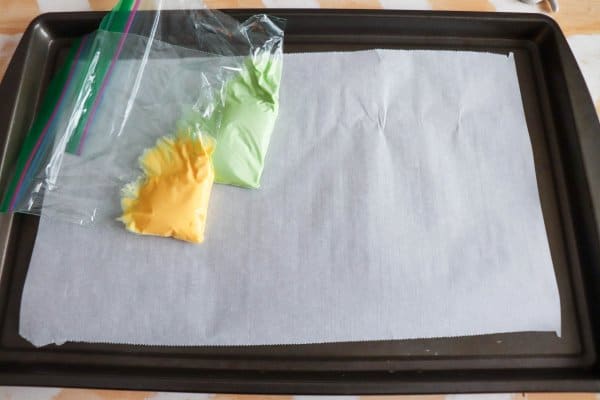
- Line a baking sheet with parchment paper.
2. In a medium bowl, melt the green chocolate wafers in the microwave at 15 second intervals, stirring in between until the chocolate is completely smooth.
3. In a separate small bowl, melt the yellow chocolate wafers.
4. Pour the chocolate into separate piping bags or sturdy plastic bags.
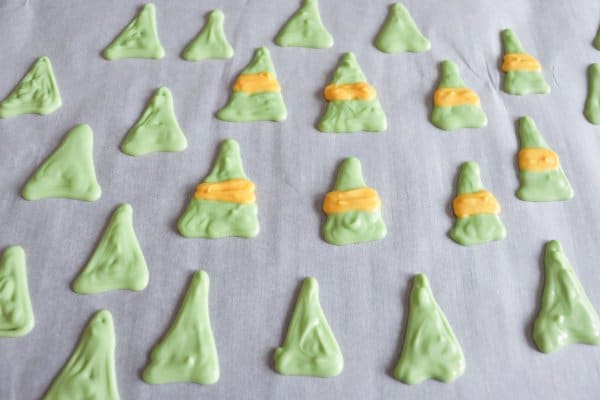
5. Cut the tip from the piping bags and pipe green triangle shapes onto the parchment paper.
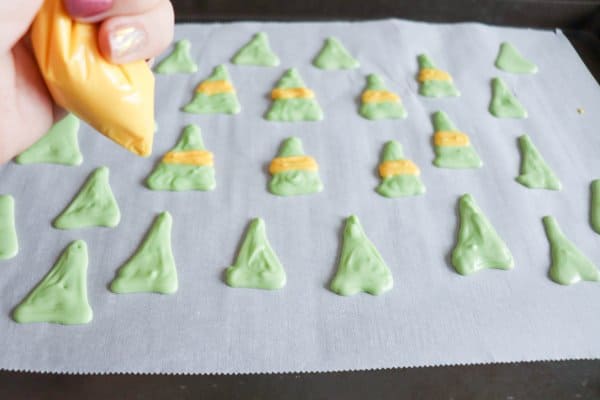
6. Add yellow chocolate stripes to the green hats.
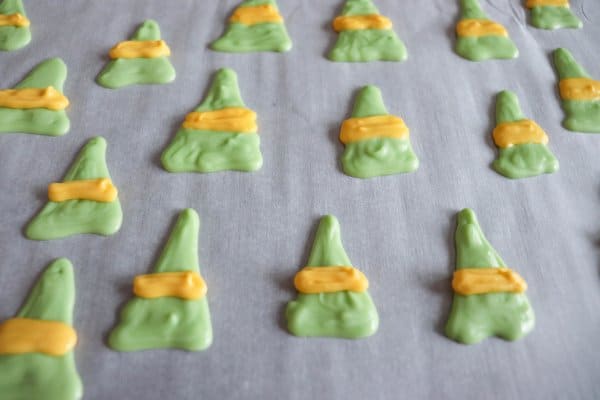
7. Place the chocolate hats in the fridge and allow the chocolate to harden completely.
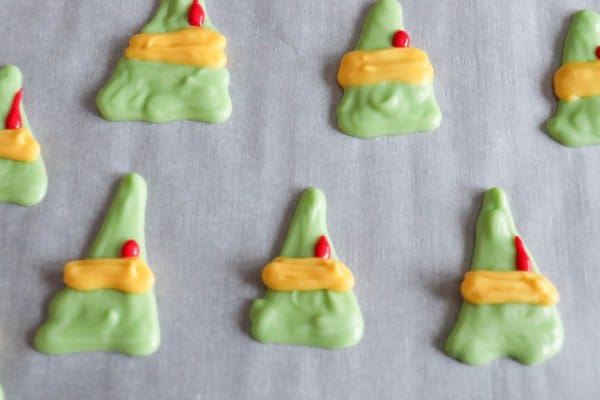
8. Use red frosting to add a feather to each hat. Allow the icing to dry completely before serving.
Tips for making these elf hats:
- Use candy melts for best results, the wafer chocolate melts the best. Add one teaspoon of coconut oil to other chocolate to help it melt and pour better.
- Lay the chocolate covered treat on a parchment lined baking sheet for easy moving and transporting before the chocolate has hardened.
- Place the chocolate in the fridge or freezer to completely cool before serving.
How long do DIY chocolates last?
Store these yummy treats in a large freezer bag or airtight container for up to one month at room temperature. They can also be stored in the fridge to prevent the chocolate from melting or in the freezer for months.
They are a fun addition to a holiday cookie exchange!
This post contains affiliate links.
Some of my kitchen essentials:
- I love using this non-stick bakeware for all of my baking.
- These silicone mitts are perfect for grasping hot pans and baking dishes.
- This Henckel Knife is my favorite for slicing and dicing in the kitchen.
- These parchment paper bags are perfect for packaging and these large Rubbermaid food storage containers are great for storing baking in the freezer.

How darling are these Elf hat chocolates?! I absolutely love how they turned out and can’t wait to serve them to guests at our annual Elf party this year!! This Elf chocolate recipe is not only delicious but totally fun too!
If you love these DIY Buddy the Elf chocolates, please give them a five star review and help me share them on Facebook or Pinterest so that others can enjoy it too!

DIY Buddy the Elf Chocolates
Ingredients
- 4 oz Meltable green chocolate candy melts
- 1 oz Meltable yellow chocolate candy melts
- Red icing
Instructions
- 1. Line a baking sheet with parchment paper.
- 2. In a medium bowl, melt the green chocolate wafers in the microwave at 15 second intervals, stirring in between until the chocolate is completely smooth.
- 3. In a separate small bowl, melt the yellow chocolate wafers.
- 4. Pour the chocolate into separate piping bags or sturdy plastic bags.
- 5. Cut the tip from the piping bags and pipe green triangle shapes onto the parchment paper.
- 6. Add yellow chocolate stripes to the green hats.
- 7. Place the chocolate hats in the fridge and allow the chocolate to harden completely.
- 8. Use red frosting to add a feather to each hat. Allow the icing to dry completely before serving.
Video
Nutrition
