DIY Jack O Lantern Topiary
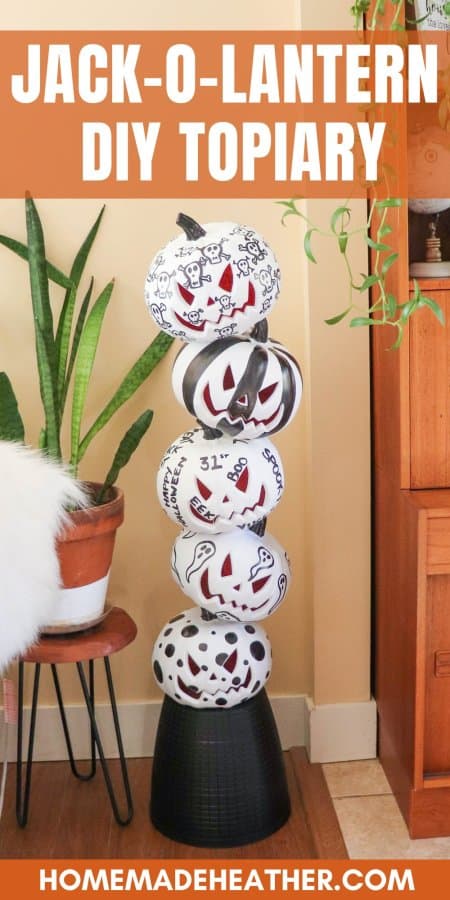
This DIY Jack-O-Lantern Topiary is seriously easy and fun to create for Halloween! With a few dollar store pumpkins, white paint and a black sharpie you can make this too.
Too busy to make this right away?! Pin it for later! Pin this project to your favorite craft board on Pinterest and it’ll be waiting for you when you’re ready.
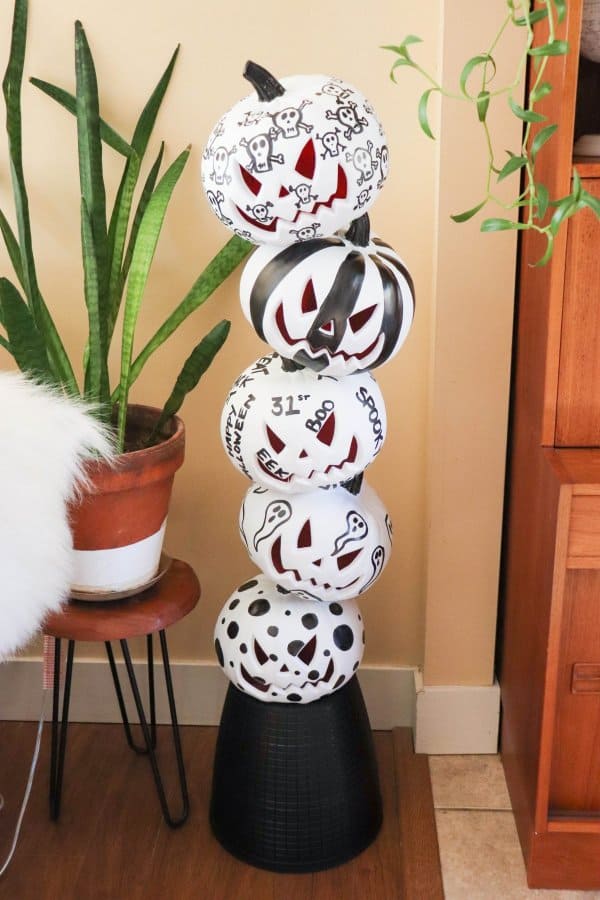
A stack of pumpkins makes a huge statement in any space during the holidays. This Jack O Lantern topiary would look darling on a front porch for fall paired with bright orange mums.
If you love the look of this topiary you should totally check out my DIY Jack-O-Lantern Diffuser too!
Dollar store pumpkins are one of my favorite things to upcycle! Number one, they’re cheap and number two, with a little spray paint the possibilities are endless!
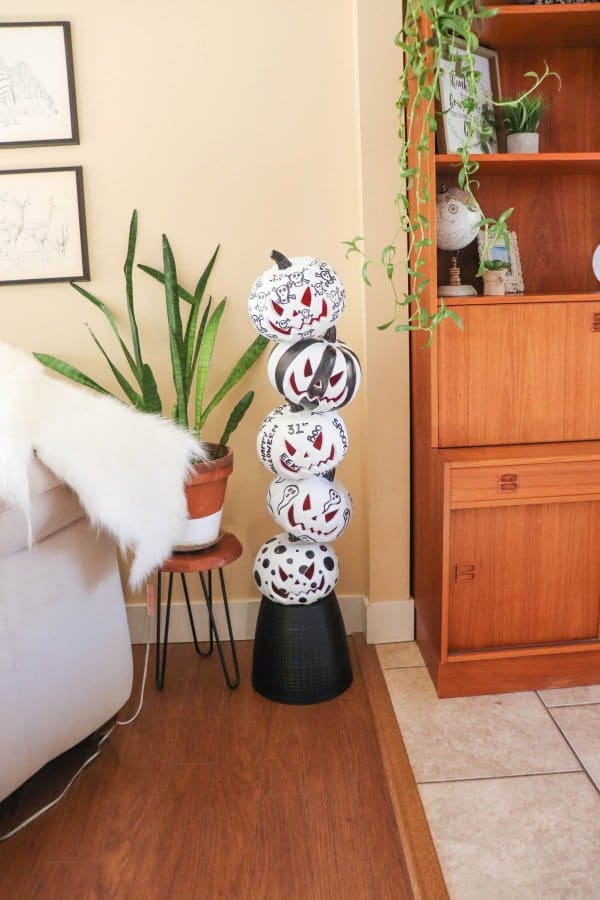
I love customizing seasonal swag to match my decor. Rather than swapping everything out to celebrate Halloween, I like to add pops of holiday embellishments that compliment what I already have going on.
This epic topiary is honestly super simple to create, let me show you how!
This post contains affiliate links.
Supplies:
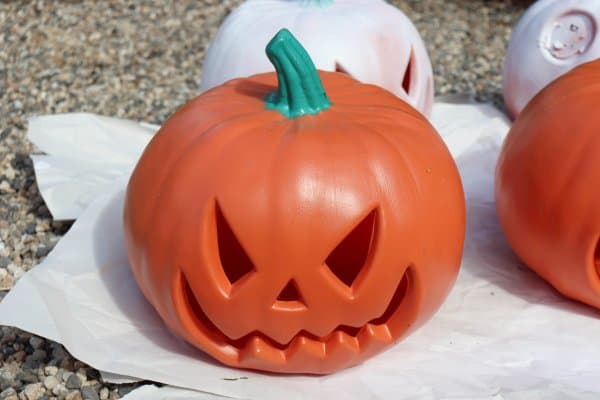
- Plastic Jack-O-Lanterns – I found these ones at Dollaramma for $5 each.
- Rustoleum Flat White Spray Paint – you could use glossy too but I love the flat finish that these pumpkins have. Rustoleum is an awesome paint to use on plastic, check out how it held up on our playground slide!
- Permanent Black Sharpie Markers – I used one with a large tip size.
- Black flower pot – I found this one at the dollarstore.
- Glue gun and sticks – you could also use something like e3000.

How to make a Jack O Lantern Topiary:
Directions:
1. Place the plastic jack o lanterns on a clean, dry surface covered in newspaper or a drop cloth.
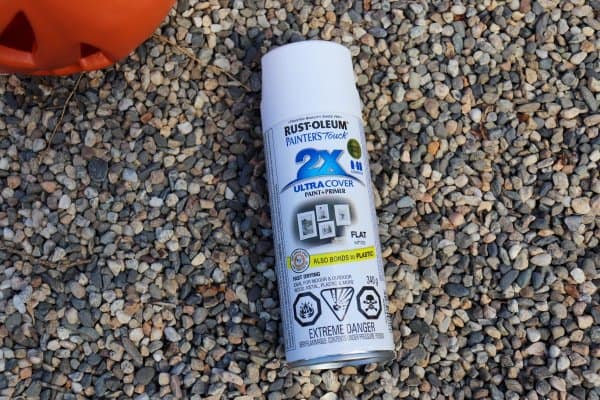
2. Prepare the spray paint by giving it a good shake.
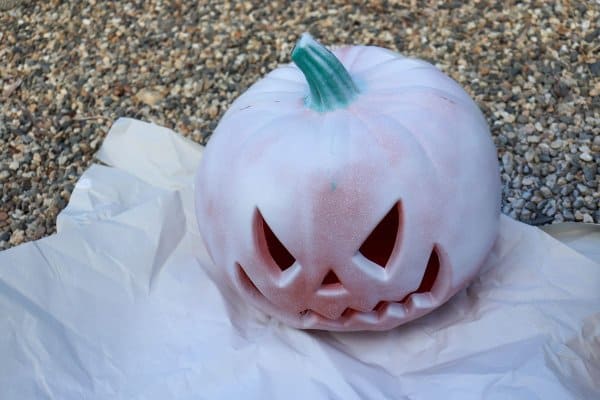
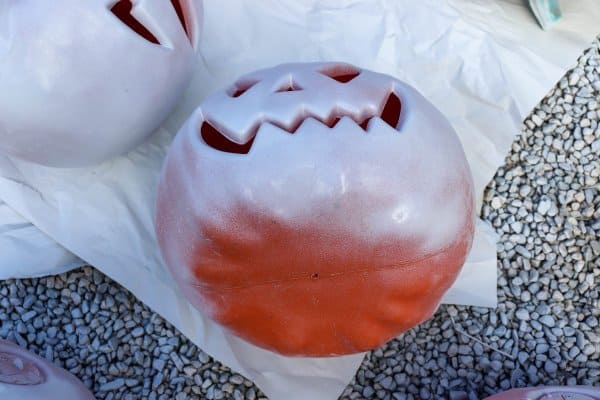
3. Spray paint all of the pumpkins white. Allow the paint to dry between coats. You will need 2-3 coats of paint for good coverage.
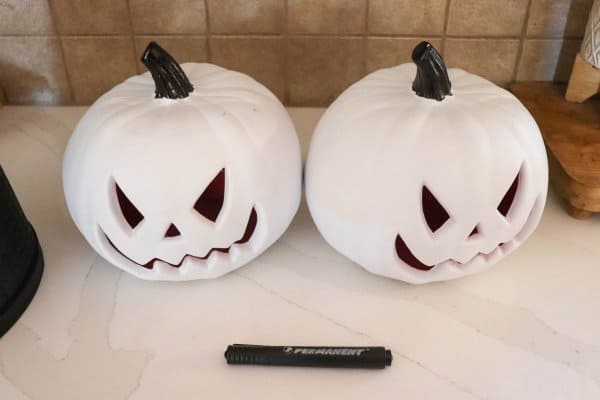
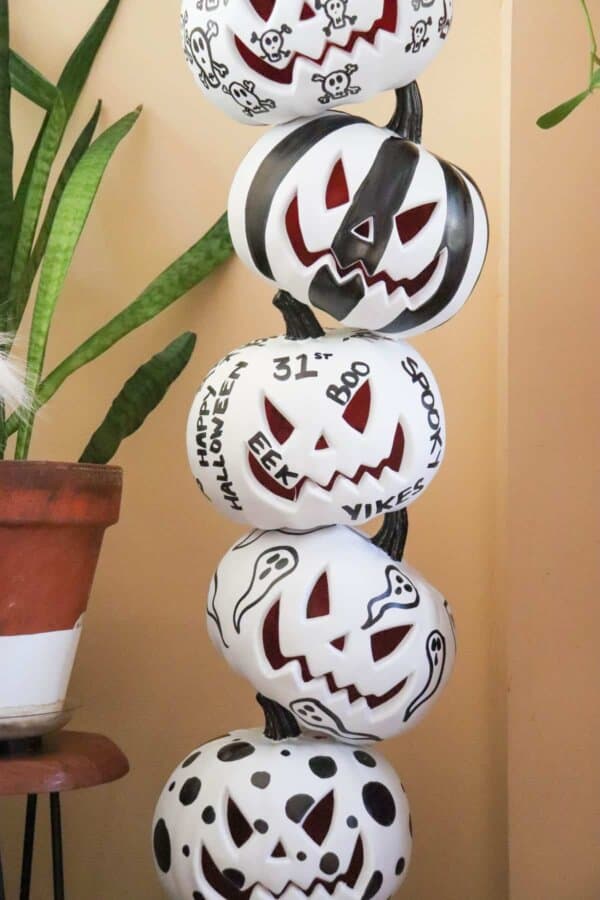
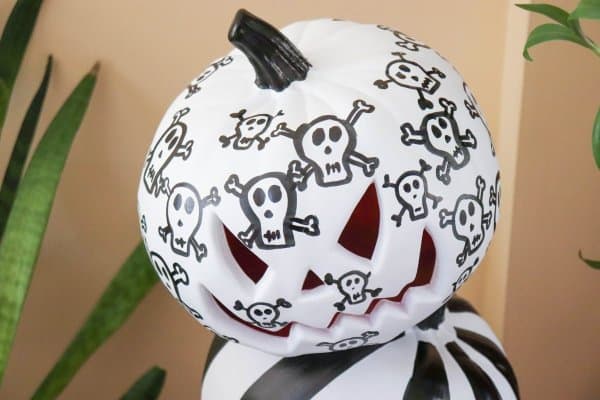
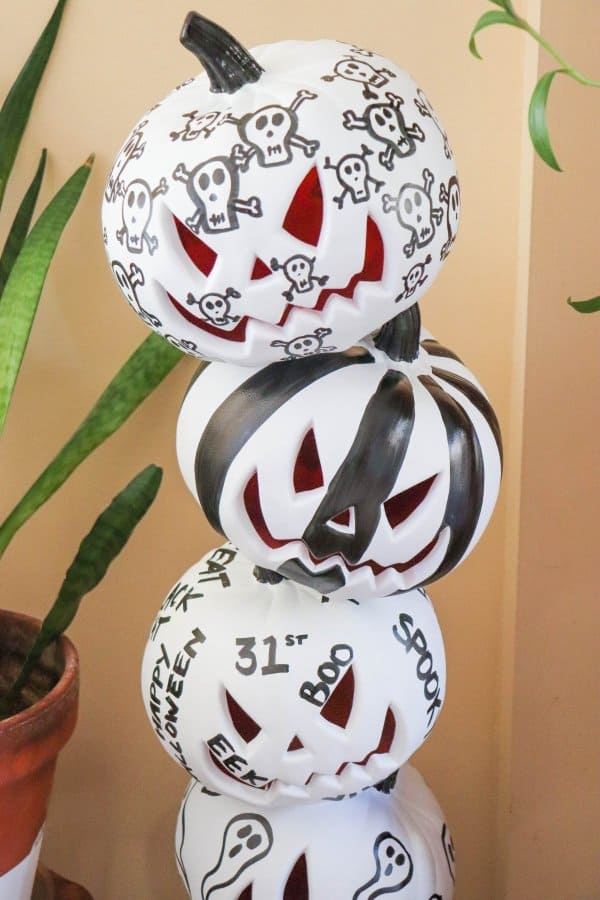
4. Use a permanent black sharpie to color the stems of each pumpkin. Draw festive Halloween designs onto each of the pumpkins.
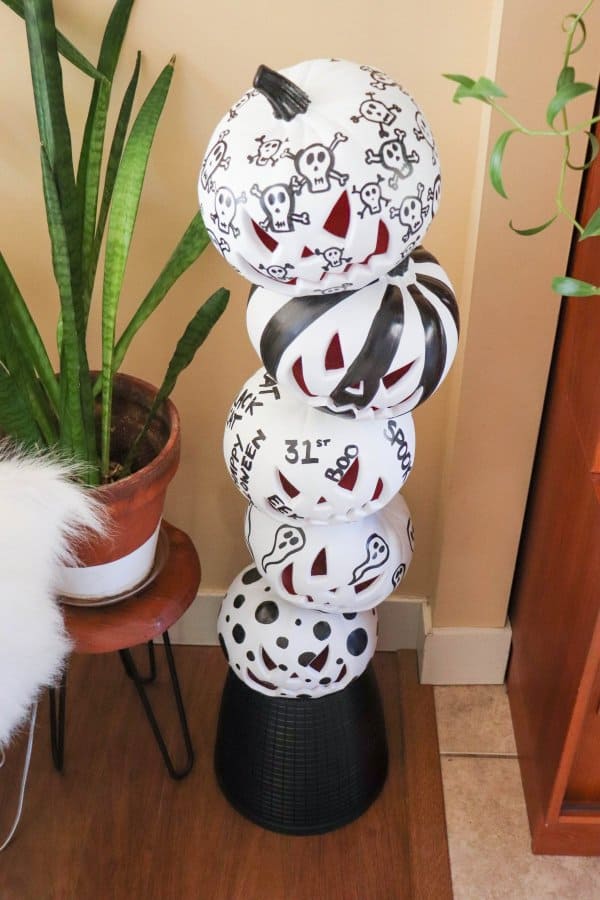
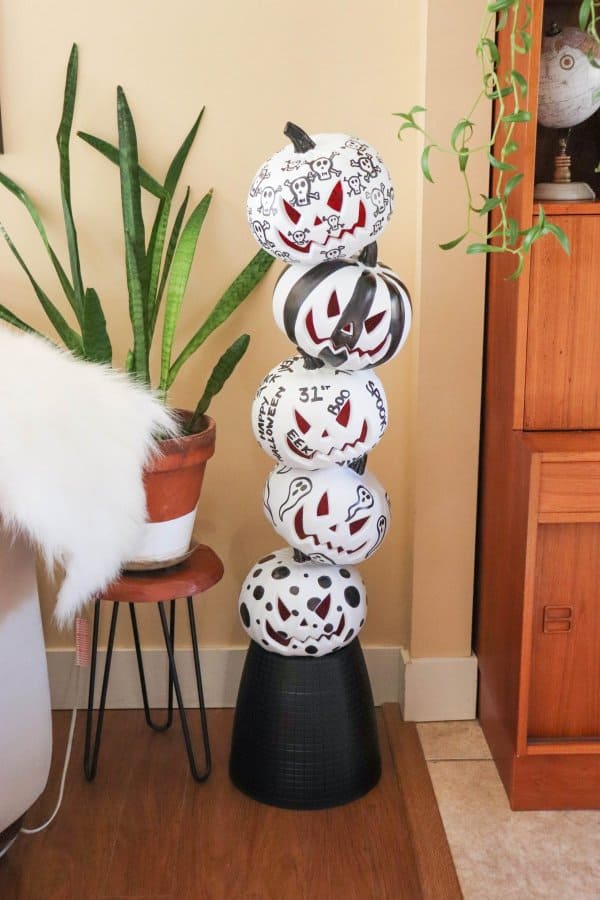
5. Flip the black flower pot over so that it’s upside down. Use the hot glue gun to glue a painted jack-o-lantern to the pot.
6. Stack and glue the remaining pumpkins, one on top of each other.
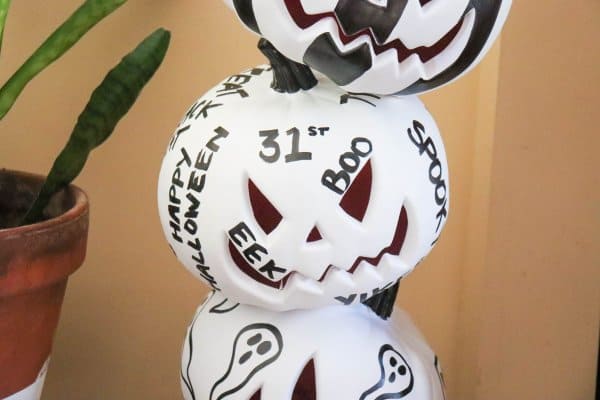
I free-handed all of these designs. You could practise on a scrap sheet of paper before hand if you wanted. I used stripes, polka dots, skulls, ghosts and Halloween sayings.
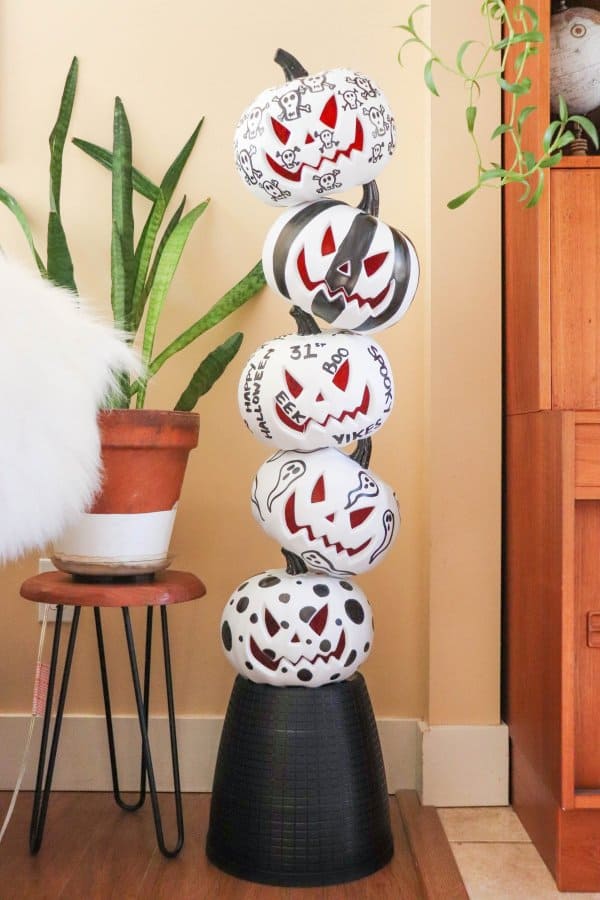
Don’t these pumpkins look awesome all stacked together?! You could totally create two of these to frame the front door for a fun Halloween entry way.
Remember to have fun with this project, the sky is the limit! I would love to see this pumpkin topiary design done up with black paint and a white paint pen.
Crafting around the holidays is my absolute favorite thing to do! If you’re looking for more ideas be sure to check out these….
Pumpkin crafts:
- Pumpkin Snap Lid Craft
- Pumpkin Place Setting
- Wooden Pumpkin Craft
- Jack O Lantern Diffuser
- Chevron Pumpkin Craft
- Jack O Lantern Topiary
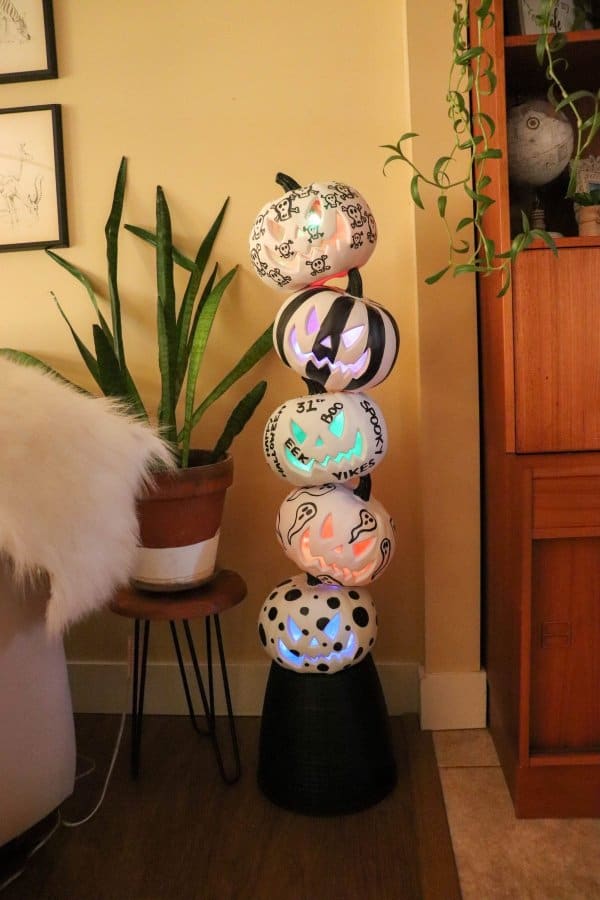
This dollar store pumpkin topiary looks just as fun at night when it’s all lit up! I love the colorful twinkly lights.
If you love this DIY Jack O Lantern Topiary, please help me share it on Facebook or Pinterest so that others can enjoy it too!

DIY Jack O Lantern Topiary
Materials
- Plastic Jack-O-Lanterns – I found these ones at Dollaramma for $5 each.
- Rustoleum Flat White Spray Paint – you could use glossy too but I love the flat finish that these pumpkins have. Rustoleum is an awesome paint to use on plastic check out how it held up on our playground slide!
- Permanent Black Sharpie Markers – I used one with a large tip size.
- Black flower pot – I found this one at the dollarstore.
- Glue gun and sticks – you could also use something like e3000.
Instructions
- 1. Place the plastic jack o lanterns on a clean, dry surface covered in newspaper or a drop cloth.
- 2. Prepare the spray paint by giving it a good shake.
- 3. Spray paint all of the pumpkins white. Allow the paint to dry between coats. You will need 2-3 coats of paint for good coverage.
- 4. Use a permanent black sharpie to color the stems of each pumpkin. Draw festive Halloween designs onto each of the pumpkins.
- 5. Flip the black flower pot over so that it's upside down. Use the hot glue gun to glue a painted jack-o-lantern to the pot.
- 6. Stack and glue the remaining pumpkins, one on top of each other.
