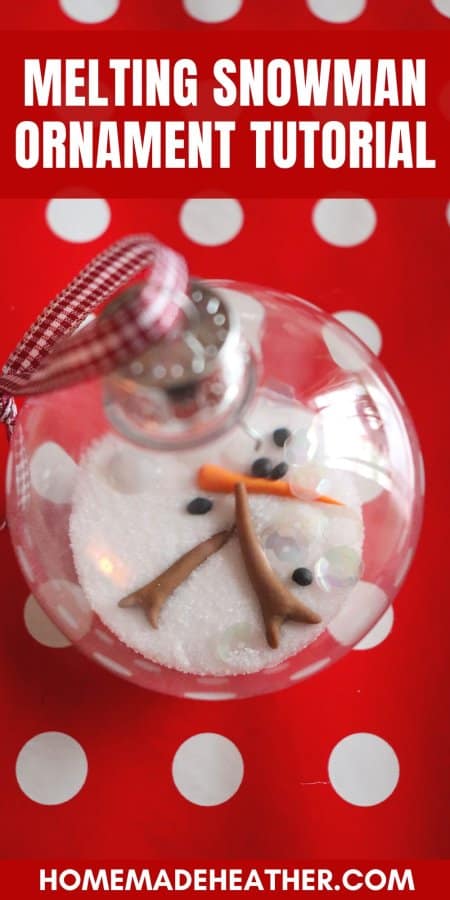
Melting Snowman Ornament Tutorial
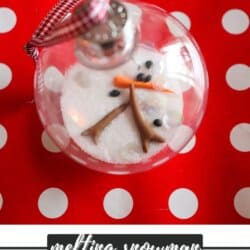
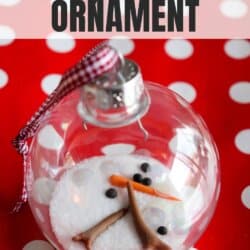
These melting snowman ornaments are absolutely darling and totally easy to create. Follow the step-by-step tutorial to make these DIY Christmas ornaments with the kids!
These snowman ornaments make an awesome craft for the kids to do during the holidays. Melted snowmen are a great idea if you’re looking for a fun kids craft and Christmas decoration.
Too busy to make this right away? Pin it for later! Pin this post to your favorite board on Pinterest and it will be there when you’re ready!

I set up my very first table at a Christmas Craft Fair last weekend. Between hosting a Crafty Christmas Open House last week and the craft fair I would say that selling my crafty goodies was a big success.
We’ve made Alphabet Block Snowmen, DIY snowmen making kits and these Cork Snowman Ornaments too.
Are these snowmen not just darling?! It’s our favorite ornament to create every year.
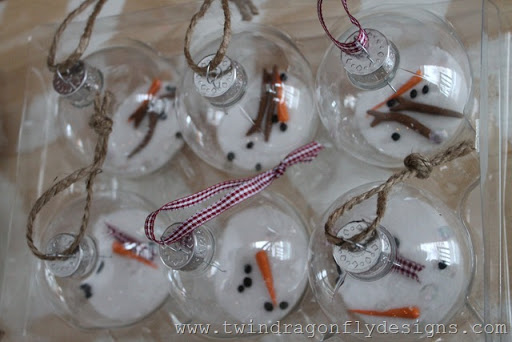
These homemade ornaments are a fun way for kids of all ages to practise fine motor skills. We make them for friends and family every holiday season!
Melted Snowman Ornament Tutorial
This post contains affiliate links.
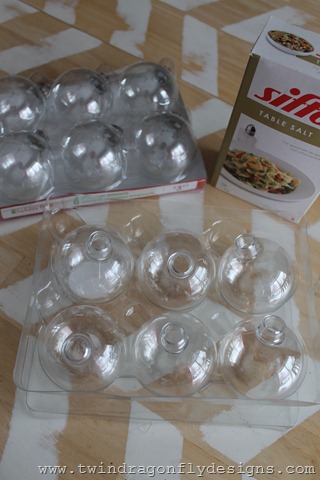
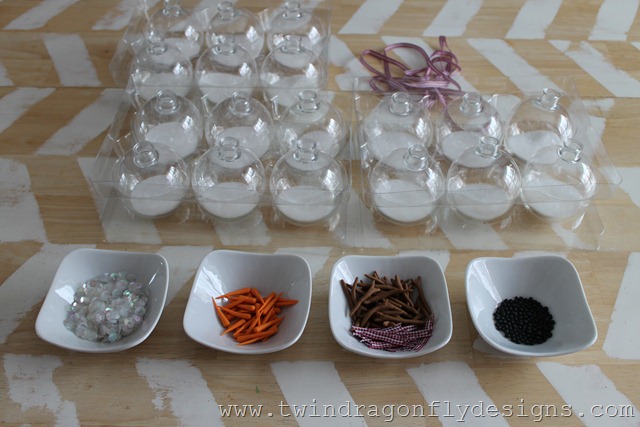
Supplies
- Clear plastic ornaments – these can be found at Walmart or the craft store.
- Table salt or epsom salt – I find that the dollar store is the best place to pick this up although the grocery store will have it too.
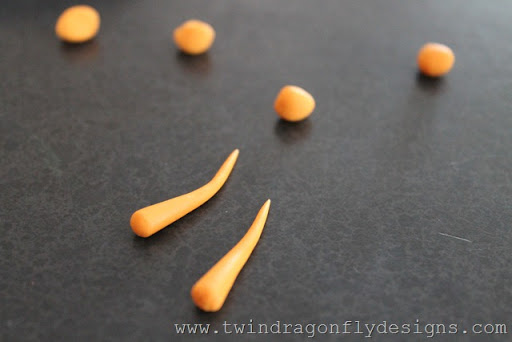
- Orange polymer clay for noses (or card stock or fun foam cut into triangles)
- Black polymer clay for eyes and mouths (or peppercorns or tiny pom poms)
- Brown polymer clay for arms (or sticks or pipe cleaners)
- Ribbon for scarves (or fabric) – dollar tree is my go-to for ribbon.
- Extra ribbon or baker’s twine for hanging the ornaments
Directions
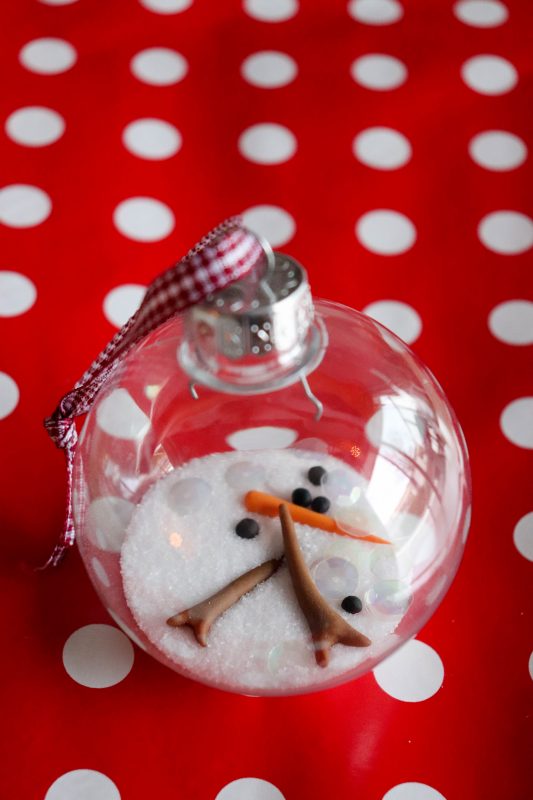
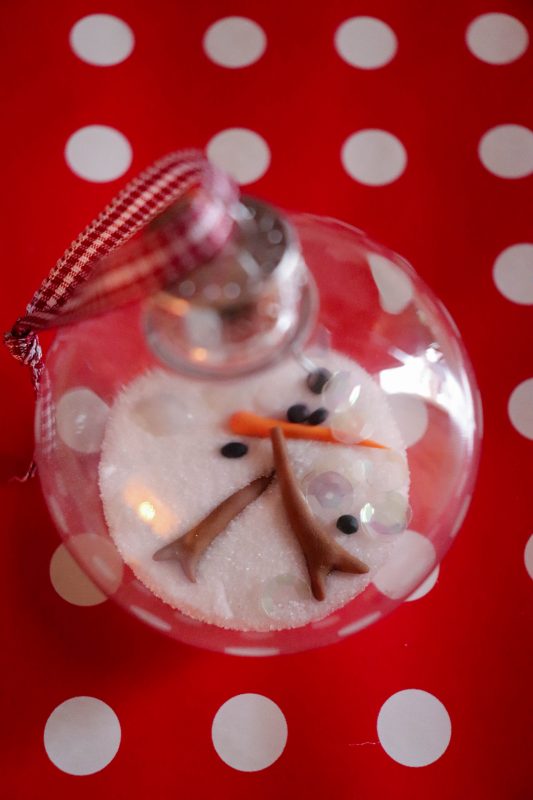
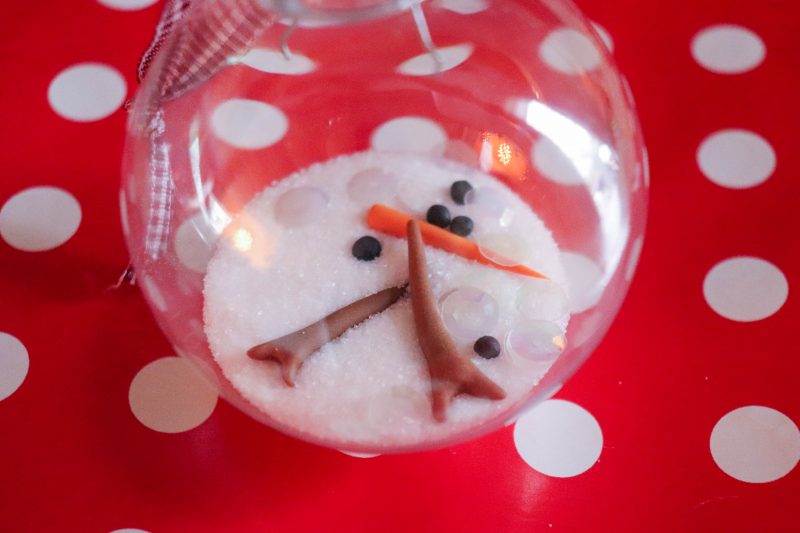
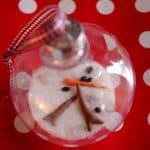
1. Use a pea sized piece of orange polymer clay to form each carrot nose.

2. Use a pea sized piece of brown polymer clay to form each arm.
3. Roll many, many, small black polymer clay circles for eyes and mouths.
4. Bake as directed on the package. Usually 30 minutes at 275°.
5. Fill the inside of the ornament with 2-3 Tbsp of regular table salt or epsom salt.
Here I had set up a filling station for the boys to create their own snowmen. We used larger sequins and white glitter as fake snow as well.
Tip: older children could make their own features out of polymer clay and fill the ornament with salt themselves. I didn’t want to take my chances with twin five year old boys. Assembly line fashion works best for them. And even after instruction some of our snowmen had three noses and ten eyes!!
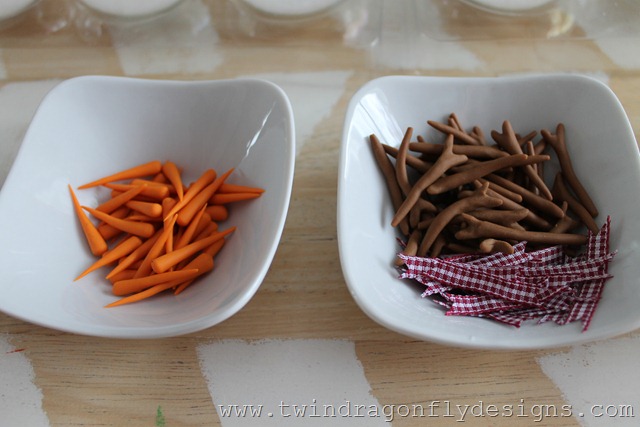
Our noses, stick arms and scarves.
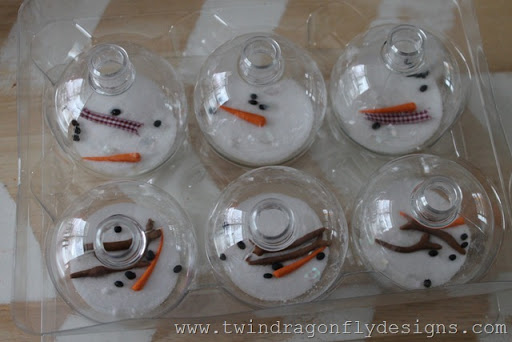
Here are our adorable ornaments all filled.
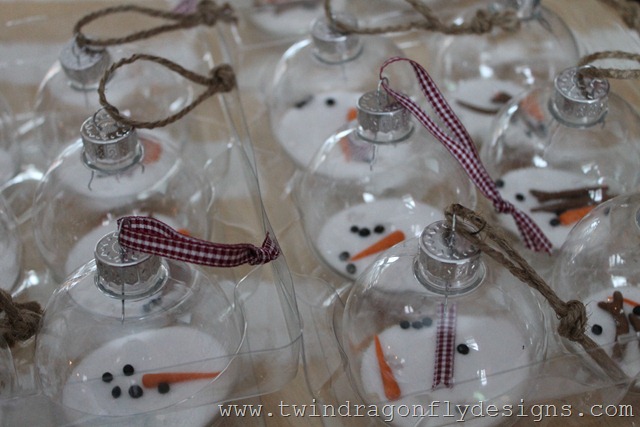
6. Finally, tie with baker’s twine or create a ribbon loop to hang on the Christmas tree.
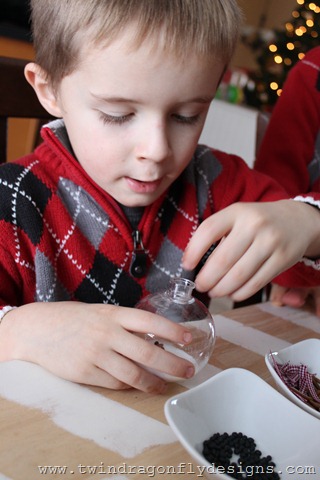
The boys love, love, loved creating these!! I am thinking that these could be a yearly tradition of child labour for craft fairs. *wink*
Different ways you could create snowmen:
- Use pipe cleaner instead of ribbon
- Hot glue the features together (use adult supervision)
- Use acrylic paint to add color to twigs for an orange nose or scarf
- Tiny black pom poms could be used for buttons
How cute is this melting snowman with arms?! These DIY ornaments make a great gift and are a great way to get little kids to create handmade ornaments of their own.
More clear ball ornaments:
- Check out these clear glass ornaments that I made into a darling camping ornament last year.
- These plastic balls make the perfect fillable ornaments for these Gumball Machine Ornaments. Its so much fun to make these pom pom ornaments with a cotton ball or pom pom!
- Clear plastic ornament balls also make great photo ornaments.
- You can create beautiful ornaments with a bit of mod podge (or craft glue) and scrap paper or sheet music. This painted Boho ornament is a simple project with a rustic look.
- We created an entire tree that was Star Wars themed one year and made a painted ball Chewbacca ornament craft that was super fun!
- Of course you could just paint the balls different colors and add a snowman face, Christmas tree or reindeer to each ornament.
Be sure to check out these homemade Christmas ornaments or these snowman Christmas ornaments for more fun ideas!
If you love this melting snowman ornament, please give it a five star review and help me share it on Facebook or Pinterest so that others can enjoy it too!
MELTING SNOWMAN ORNAMENT TUTORIAL
Materials
- Clear ornaments glass or plastic I love that we found the plastic ones because they are safe and super durable for preshoolers.
- Salt for snow or clear glitter
- Orange polymer clay for noses or card stock or fun foam cut into triangles
- Black polymer clay for eyes and mouths or peppercorns or tiny pom poms
- Brown polymer clay for arms or sticks or pipe cleaners
- Ribbon for scarves or fabric
- Extra ribbon or jute for hanging the ornaments
Instructions
- Use a pea sized piece of orange polymer clay to form each carrot nose.
- Use a pea sized piece of brown polymer clay to form each arm.
- Roll many, many, small black polymer clay circles for eyes and mouths.
- Bake as directed on the package. Usually 30 minutes at 275°.
- Fill the clear ornament with 2-3 Tbsp of regular table salt or epsom salt.
- Finally, tie with jute or ribbon to hang on the Christmas tree.
Video

I adore these- we just did an ornament exchange at work yesterday and someone made one!! So fun :)
So cute! Our PTA does a little giftshop for the kids over the holidays, this would be a craft! I’m adding this to the list. Thanks for sharing! <3
How do these handle being dropped or shaken? Wondering if the snow stays on the bottom with the nose, scarf, etc up on top.
Yes the plastic ones do – the snowman parts settle to the top if gently shaken.
If you don’t put too much ‘snow’ in them, you can shake them til the bits come back to the top
Yes! So fun :)
Heather, how did you get the snow… salt or clear glitter to stay in place so you can see the snowman’s parts without them sinking into the snow? I think your ideas are AMAZING. May He bless you for blessing us!
Hi Kathie! We shake the ornament very gently and the snowman parts tend to rise to the top. They should stay there as long as the ornament isn’t tossed around :) Thanks for visiting <3
I added clear drying Elmer’s glue to the epsom salt then used a popsicle stick to put the salt in the ball. Packed it down a little and then let it dry before adding the rest of the body parts. That way the body parts stay on top and dont get lost UNDER the epsom salt
Smart! Thanks for the tip. Part of the fun for the kids is shaking them to find the parts LOL