Carriage House Build (Stage Two)
Framing the future, one beam at a time!
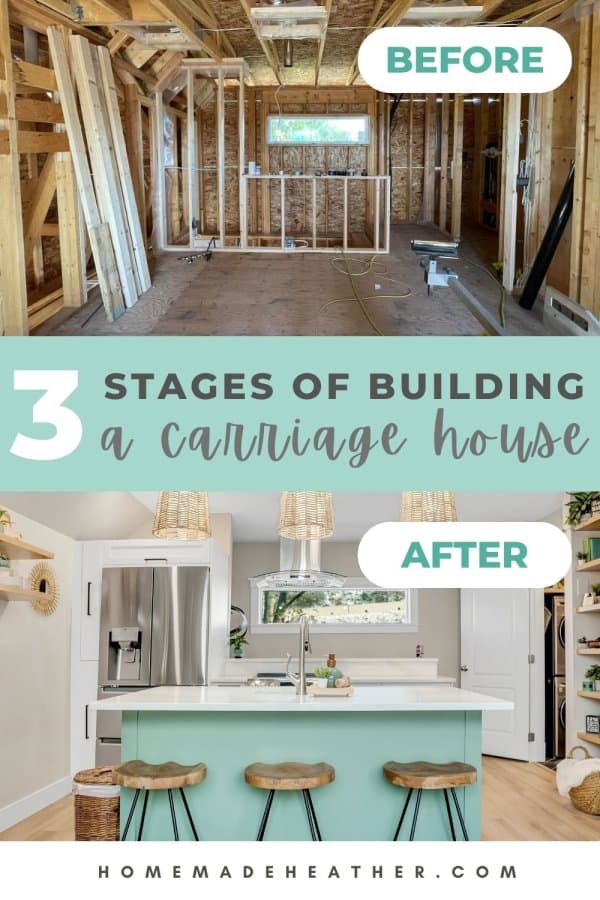
Welcome back to the epic journey of our carriage house build stage two! From the humble origins of extra storage to the ambitious vision of a cozy living space, our project has taken on a life of its own.
Friends, family and the support of our teen boys have become the backbone of this endeavor, turning our dream into a collective adventure.
Too busy to make this right away? Pin it for later! Pin this post to your favorite board on Pinterest and it will be there when you’re ready!
More Carriage House Posts
- Carriage House Stage One (permits & concrete)
- Carriage House Stage Two (you are here)
- Carriage House Stage Three (lock up to occupancy)
- 3 Easy DIY Projects for a Mudroom
- How to Create a Trim Mountain Accent Wall
- How to Create an Easy Trim Accent Wall
- Boho Studio Design & Decor
- How to Airbnb Your Space (Printable Checklist)
What began as a simple storage solution transformed into a grander vision: a cozy living space for Martin and I, a retreat from the hustle and bustle of the main house once our teens spread their wings. In this blog post, we’ll delve into the steps involved in the second stage – from framing to lock-up.
Let’s jump right in, shall we?!
Stage One Recap: Setting the Foundation
In our first stage, we navigated zoning complexities, battled through permit processes, and laid the groundwork for the physical transformation. Read all about the Carriage House Build – Stage One here.
Carriage House Build Stage Two
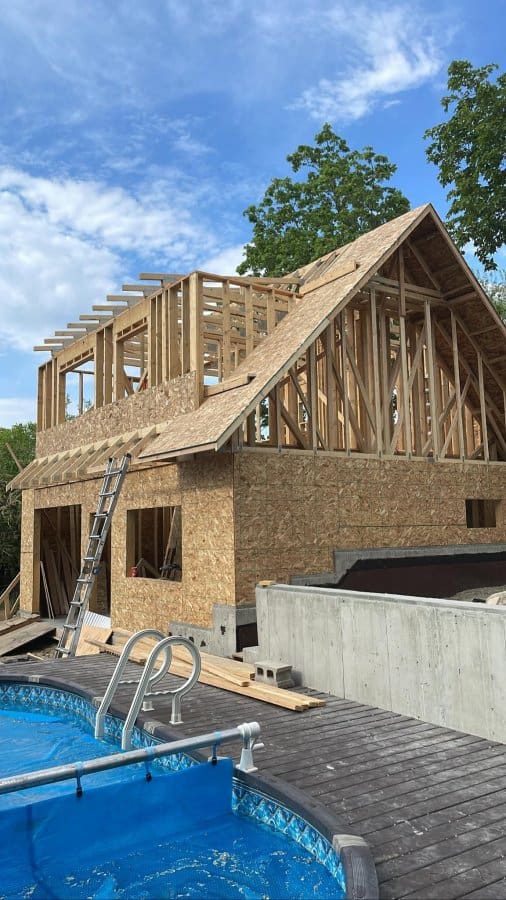
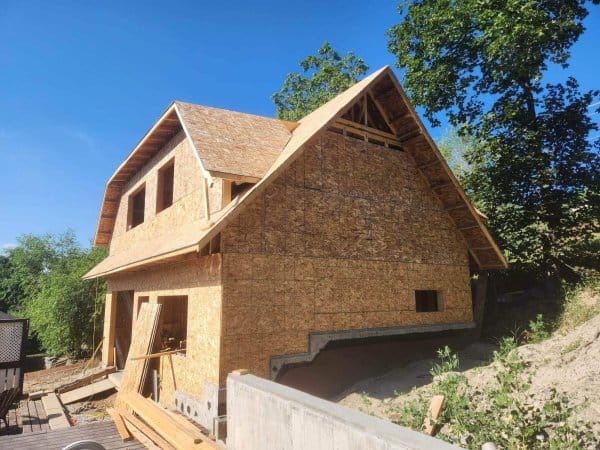
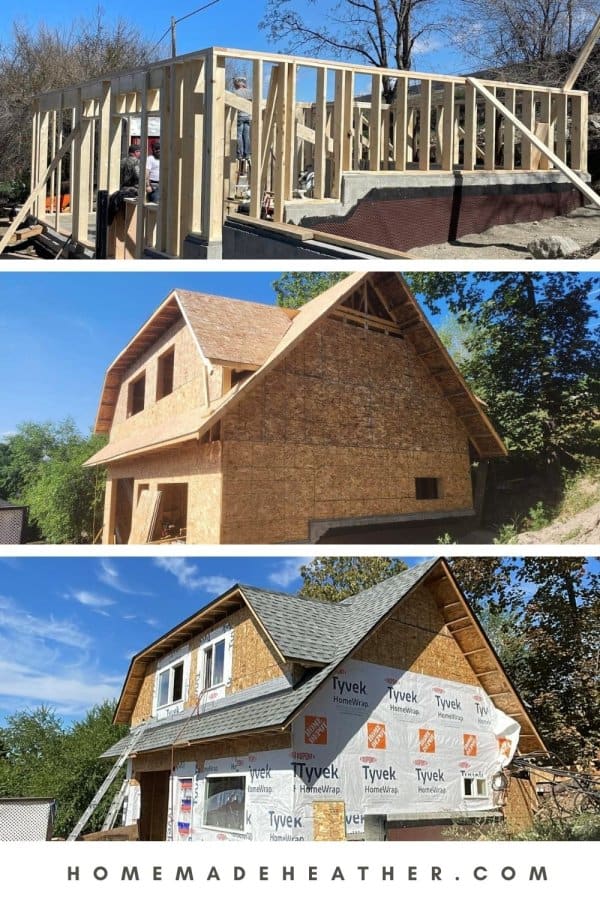
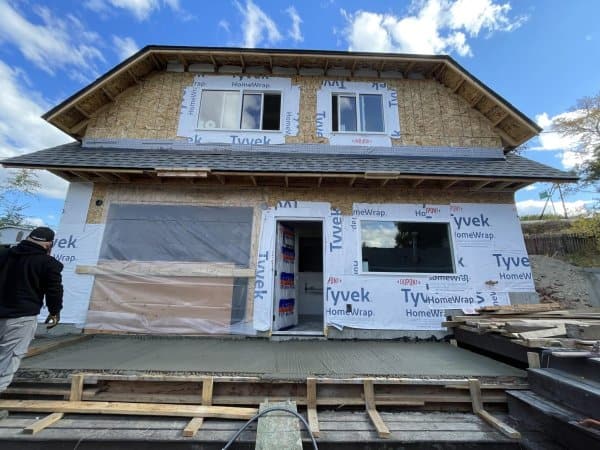
Framing and roofing is where our build really started to take shape. To understand some of the complexities, you have to go back to our original drawings and the zoning bylaws.
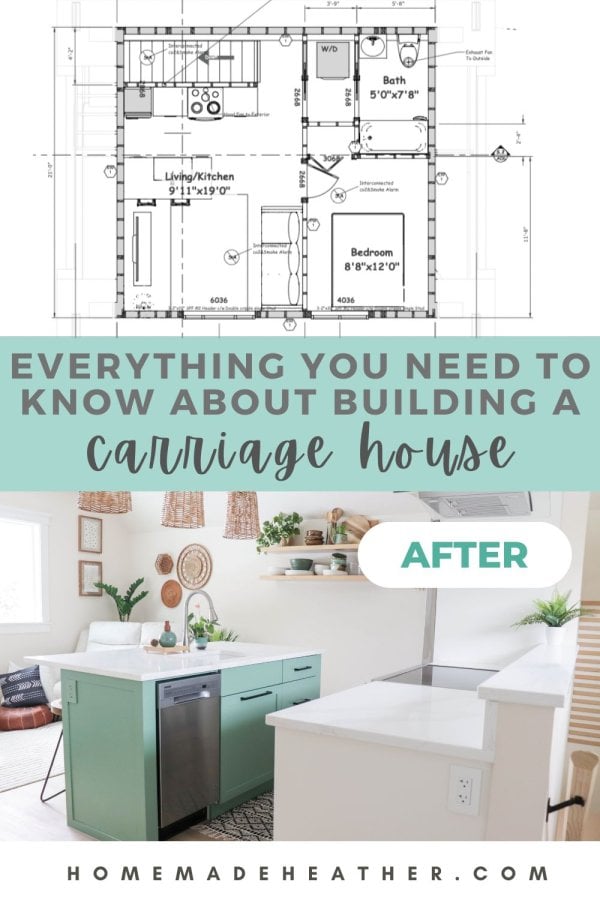
The living space was only allowed to be 75% of the garage space below. With a 21ft x 29ft garage, that left us with a 21ft x 21ft (440 square feet) footprint for the studio above.
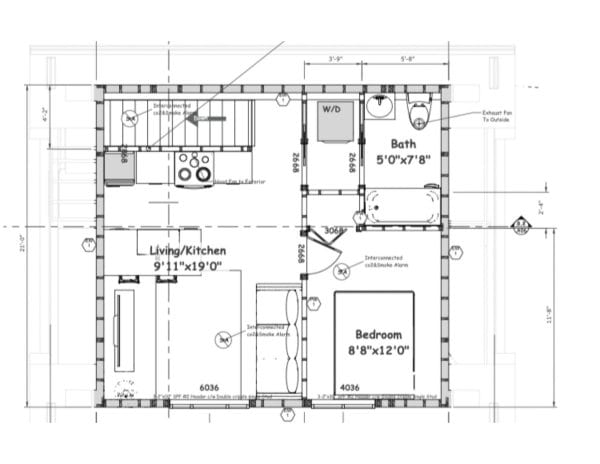
In addition, the carriage house could not be taller than the existing house so a dormer roof system with a 12:12 slope (45 degree pitch) was required. This meant that the interior on the living space would have a slope on both sides of the ceiling to account for the dormers.
We still had some flexibility in the layout at this stage and made a few modifications to the original plans. I love that about building ourselves! Customizing this space to fit our life has been so much fun.
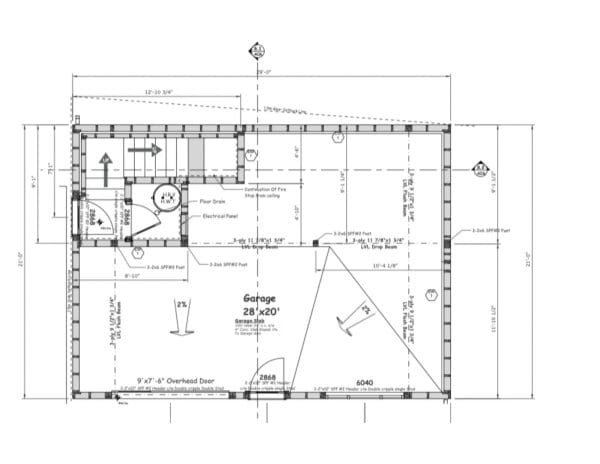
In the garage space
A small window was added to the back of the garage space to add more natural light. We left the space under the stairs open to make room for a hot water tank and extra storage.
This allowed us to extend the original mechanical room (where the electrical panel is situated) to create a mud room with seating and extra storage. An extra fire rated door then needed to be used between the storage space and the garage.
In the living space
We decided to modify the wall between the stairwell and the kitchen, making it a half wall. A narrow window was added above the stairwell to allow for more natural light to enter the living space.
We took space from the laundry room, making it smaller in width, to create a larger landing at the top of the stairs. We also took space from the bedroom closest to create a built in pantry in the laundry room on the wall opposite to the washer & dryer.
When bumping the laundry room wall back, it made for an opportunity to create a built in book shelf in the main living space. Backing was added to all of the walls where our custom floating shelving would soon be installed.
We tried to create a little balance during the summer months with some fun activities and trips planned as a family. So this slowed down the final roofing process a little but we felt like it was worth it!
The deck around the pool was also patched up before summer so that the kids could still enjoy the above ground pool during the hotter months.
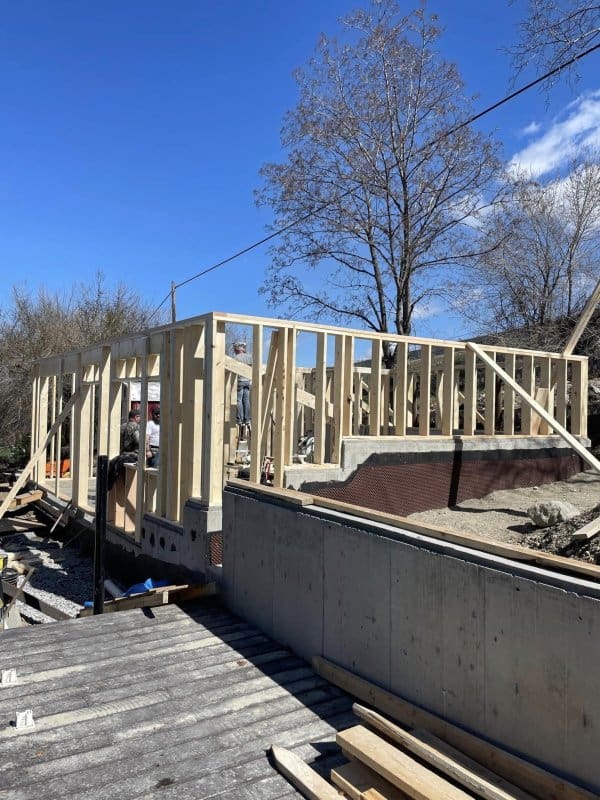
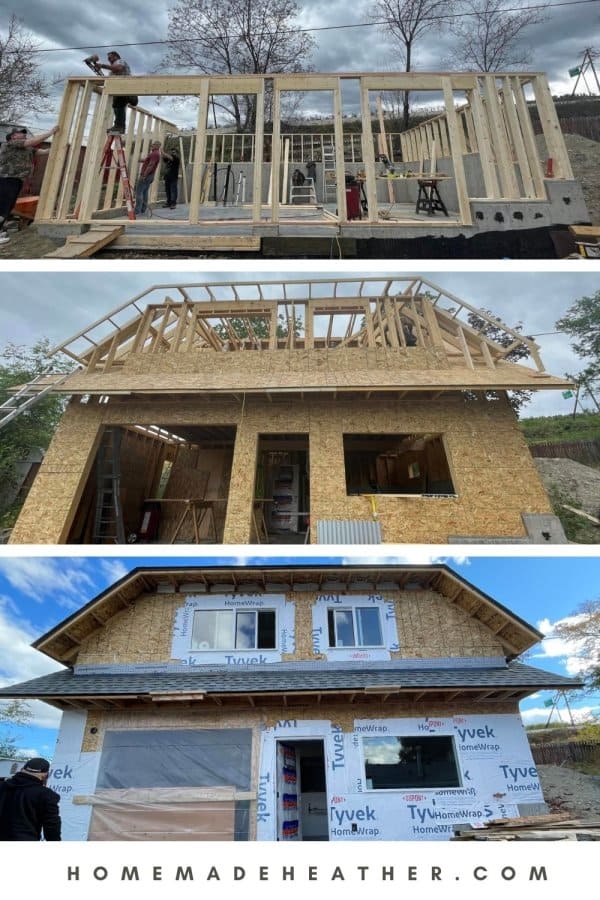
Framing To Lock Up: April to August 2023
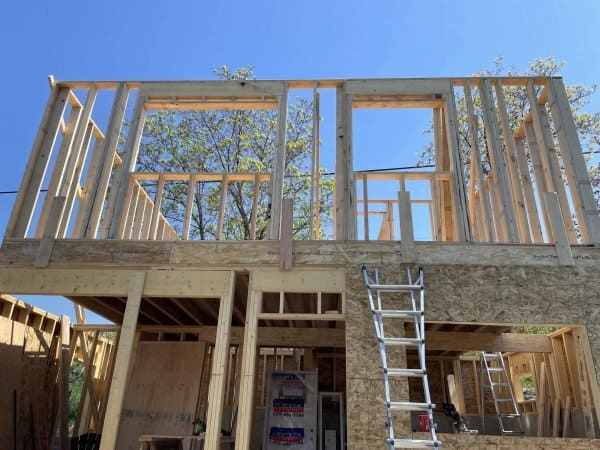
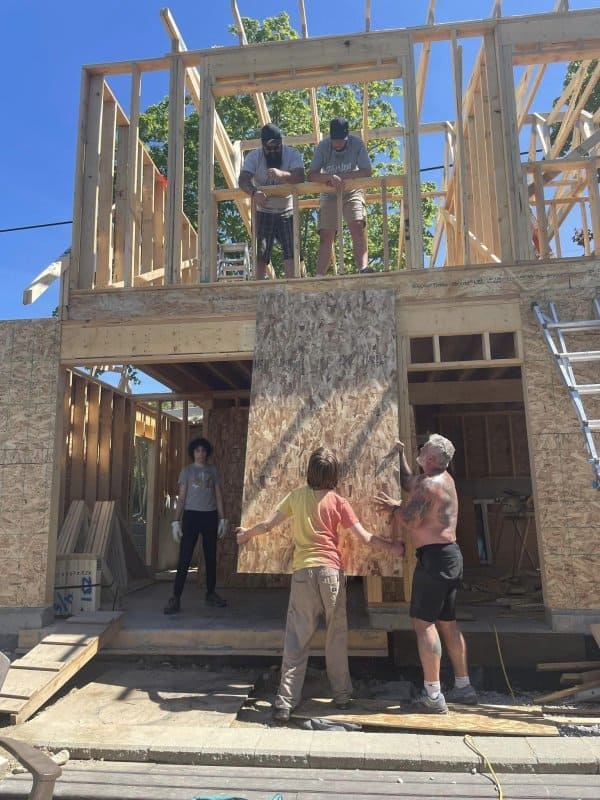
With determination and a dash of DIY spirit, we conquered the challenges of framing the first and second floors. The roof was constructed, sheeted, shingled and fixtures were ordered.
- Framing the Foundation: April 2023 marked the beginning of the second stage – framing our dreams into reality. The structure started taking shape, with the first floor framing, joists, and the second-floor framing having started Trusses, the structural backbone, followed.
- Flooring and Roofing Beginnings: May 2023 brought us closer to locking up our vision. A flooring package from Rona and roof sheeting costs became the next steps in the process.
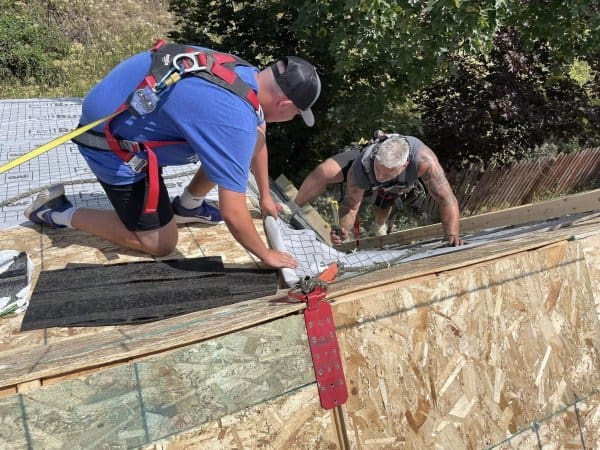
- Doors and Roofing Galore: June 2023 unfolded as a month of significant additions; windows and exterior doors! The summer was spent finishing the challenging roof with a variety of dormers and slopes to contend with.
- Functional Touches: August 2023 saw the project not only take shape but also acquire essential items such as an electrical panel, fixtures, and main power connections brought the total cost to close to $100,000.
- Designing the Details: But that’s not all – our living space started to truly take form in August too with cabinets from Westwood, countertops from StoneQuest, and flooring from Flooring Canada being ordered.
Stage Two Status
To date, we’ve invested $118,689 into this carriage house build. I have extended my line of credit with plans to roll the financing into my current mortgage upon renewal.
With a lot of dedication and hard work I have been able to keep the debt load low and have paid off half of the build costs so far.
We hired out all of the electrical for the entire project which was a significant portion of this stage. The new building codes would have required us to put in a NEW electrical pole to the tune of an additional $10,000.
Luckily, because the permitting office did not catch the error until both our electrician and Fortis were on site with a new mast installed, we were grandfathered in to the old code and only required to use a larger cable.
Our electrician, Mike, has done an amazing job on every aspect of the build and been super flexible and helpful along the way.
Our friend John, once again, provided guidance around the initial framing as it got under way. We relied on many friends, like Loren and James, to assist in a lot of the physical labour required in framing and roofing.
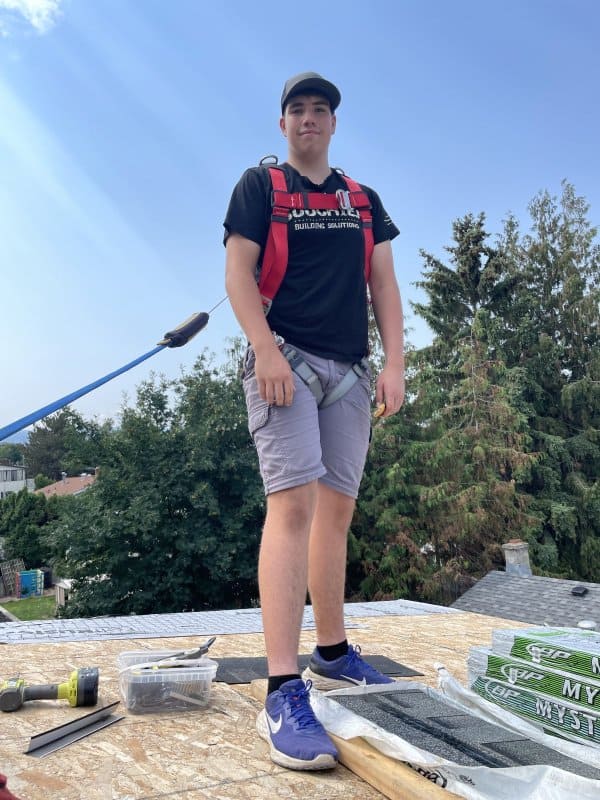
The kids joined in with Jude often strapped in on the roof with his dad. The teens helped to bring every single piece of material for the carriage house from where it was delivered, in the front yard, to where it needed to be used in the back yard. They also made many trips back and forth to the trucks with garbage and waste materials for the dump.
Even Isaiah’s friend Alex, who lives up the street, often came over to offer to help. Once framing of the studio space was complete, he said “Wow! It’s smaller than I thought, where’s the table going to go?” lol
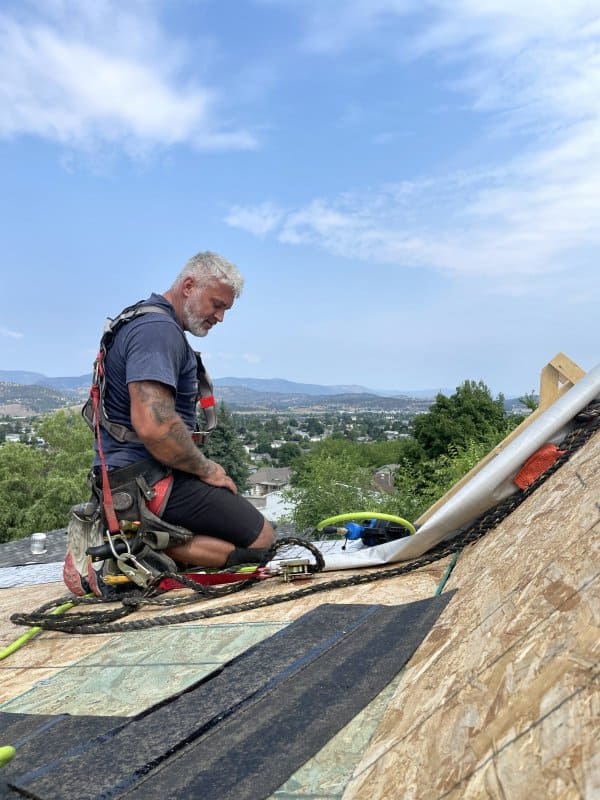
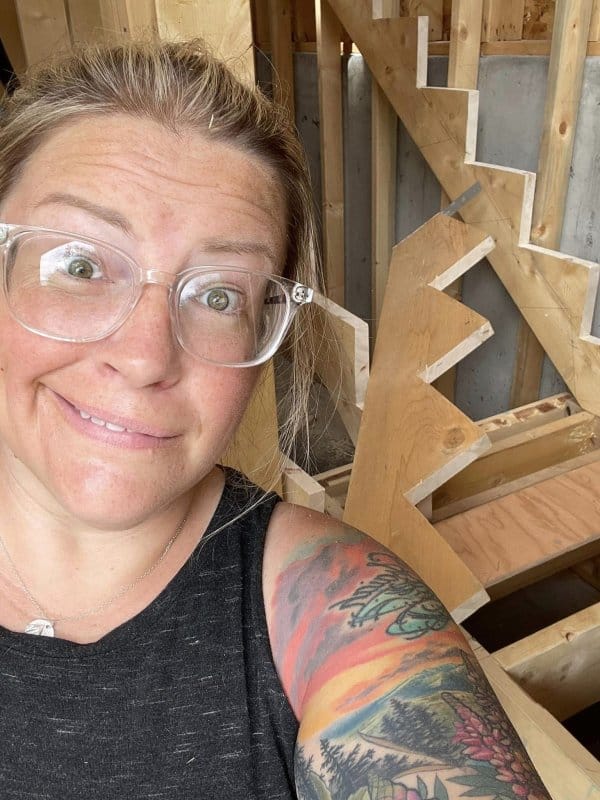
Lock up meant that Martin has worked tirelessly on not only framing and roofing but also completing the plumbing rough in and installing exterior windows and doors. I can tell you that he has enjoyed every step of this project and honestly finishes work every day with an extreme sense of satisfaction. We are very grateful to get to do this together!
Financing the Project: Stage Two Expenses
| Month/Year | Activity | Cost |
|---|---|---|
| April 2023 | Framing First Floor | $3,796 |
| Joists | $2,872 | |
| Framing Second Floor | $1,650 | |
| Truss Package | $7,244 | |
| May 2023 | Flooring & Roof Sheeting | $1,217 |
| June 2023 | Exterior Doors | $3,373 |
| Interior Doors | $797 | |
| Roof Sheeting & Sealing | $1,063 | |
| Roofing Shingles | $2,468 | |
| July 2023 | Electrical Panel | $464 |
| Fridge | $2,208 | |
| Fixtures | $1,000 | |
| Electrical Hook Up to Main | $1,750 | |
| August 2023 | Cabinets Deposit | $5,811 |
| Quartz Counter Deposit | $3,150 | |
| Flooring Deposit | $4,500 | |
| Custom Shelving Deposit | $3,000 | |
| Range Hood | $750 | |
| Stackable Washer Dryer | $2,294 | |
| Apartment Size Dishwasher | $1,014 | |
| Fortis Hook Up | $773 | |
| Plumbing Rough In | $3,148 | |
| Electrical Materials | $1,567 | |
| Electrical Labour | $1,320 | |
| To Date | Total Project Cost | $118,689 |
Stage Two Cost to Date: $118,689
Stay tuned for the final instalment, where finishes and details turn our structure into a home. Find out how long it takes to build a carriage house! The adventure continues, and we’re grateful to share every step with you.
As we reflect on these transformative months, it’s clear that our carriage house is not just a structure; it’s a testament to dreams nurtured, challenges conquered, and the unwavering support of family and friends.
Stay tuned for the final act – the grand reveal of our dream carriage house!
If you enjoyed reading about the carriage house build stage two – from framing to lock up, please share it on Facebook or Pinterest!
