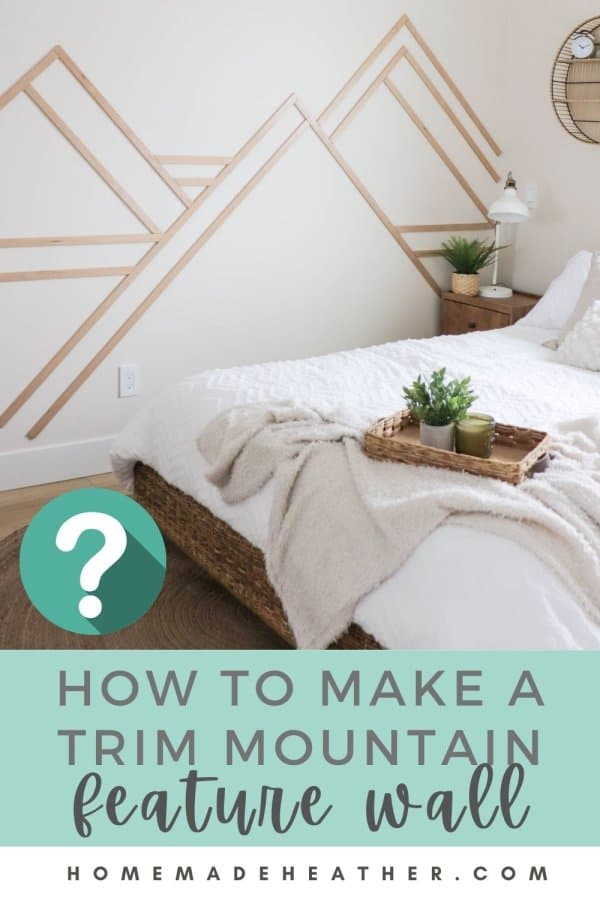
How to Create a Trim Mountain Accent Wall
Transform your space with a trim mountain accent wall. Learn how to create graphic peaks and valleys for an elevated look to any room.

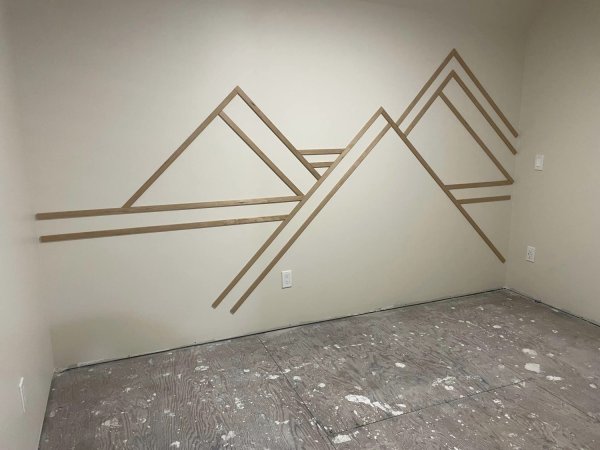
This simple wood trim mountain is the perfect finishing touch to the bedroom in our carriage house. It adds a lovely pop of texture to an otherwise blank, empty wall.
Too busy to make this right away? Pin it for later! Pin this post to your favorite board on Pinterest and it will be there when you’re ready!
Creating an accent feature wall with wood trim is easy! Follow this step by step tutorial to make a trim mountain in your space.
This mountain feature wall is part of a series of posts in our carriage house build. Get all of the details here…
MORE CARRIAGE HOUSE POSTS
- Carriage House Stage One (permits to foundation)
- Carriage House Stage Two (from framing to lock up)
- Carriage House Stage Three (lock up to occupancy)
- DIY Wood Drop Ceiling
- 3 Easy DIY Projects for a Mudroom
- How to Create a Trim Mountain Accent Wall (you are here)
- How to Create an Easy Trim Accent Wall
- Boho Studio Design & Decor
- How to Air BNB Your Space (Printable Checklist)
When browsing through Pinterest for design inspiration for our space, I came across this Mountain Accent Wall by Build It Thrifty. I love the subtle textural look that it gives her space!
Check out all of my Carriage House Inspiration on Pinterest!

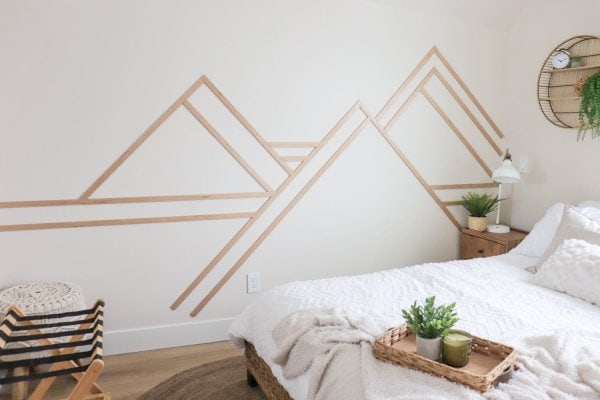
So I decided to take my own spin on the idea with a more neutral color pallet. Our painted cream wall would provide the backdrop to the natural color of the wood trim that I used.
This kind of do-it-yourself accent wall was the perfect solution for this space in our studio bedroom. The roof dormers leave this wall with an angled ceiling that can be awkward to style.
This post contains affiliate links.
Supplies
- 12 pieces of 1″ x 1/4″ birch trim – 6ft lengths were $8 at Home Depot
- Fine grit sanding paper
- Finishing nails
- Ryobi brad nailer – this is the one I have
- Level
- Painters Tape
- Mitre saw (or hand saw)
- Stud Finder
- Wood Filler
- Varathane
- Paint Brush
Instructions
1. Prep the trim with varathane to seal.
2. Sand the trim and reapply sealer if needed.
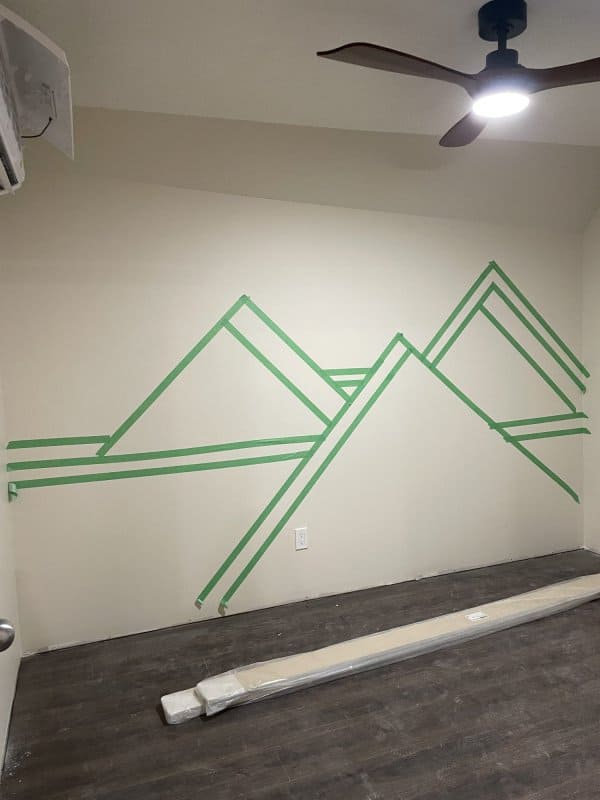
3. Use painters tape to map out the mountains on the wall.
4. Start with the longest horizontal line. Make sure to use a level to get the first horizontal piece just right.
Tip: Starting with a level, horizontal line will ensure that your 45 degree mitre cuts line up perfectly.
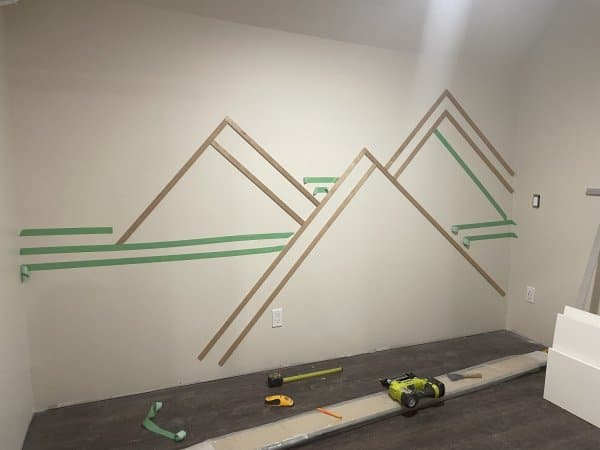
5. Measure and cut the trim to length. Use a stud finder to find the studs and use a finish nailer to nail the trim into them.
Tip: Nailing into the studs helps the trim to stay securely fastened and eliminates gaps between the trim and the wall.
6. Continue with each section of trim, cutting with a mitre saw to create 45 degree angles where needed.
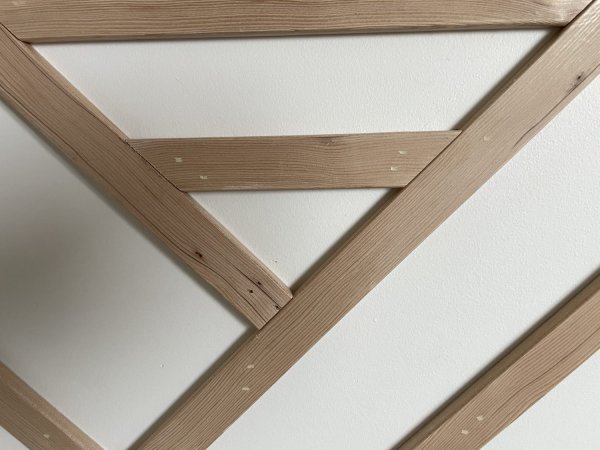
7. Fill the nail holes with wood filler.
Tip: Create a custom fill color by adding acrylic paint to the wood filler.

8. Seal with varathane.

Pro Tips
- If you want to avoid the sealing, sanding and wood fill process you can paint the entire wall all the same color!
- Use a good quality hard wood trim for best results.
- Sealing and sanding isn’t required but gives the trim a smooth, satin finish.
- You *could* glue the trim to the wall instead of nailing it but just because you could, doesn’t mean that you should. It would be much more difficult to remove and repair later.
I just love how the natural wood trim mountain stands out subtly from our painted wall. This accent wall has provided the perfect pop of natural texture to help tie the space together.

This project is great for a beginner because it’s a relatively cheap DIY that doesn’t require a lot of heavy lifting or a table saw. You can do this!!

If you love this trim mountain accent wall, please give it a five star review and share this post on Facebook or Pinterest!

How to Create a Wood Trim Mountain Accent Wall
Materials
- 12 pieces of 1″ x 1/4″ birch trim – 6ft lengths were $8 at Home Depot
- Fine grit sanding paper
- Finishing nails
- Ryobi brad nailer – this is the one I have
- Level
- Painters Tape
- Mitre saw or hand saw
- Stud Finder
- Wood Filler
- Varathane
- Paint Brush
Instructions
- Prep the trim with varathane to seal.
- Sand the trim and reapply sealer if needed.
- Use painters tape to map out the mountains on the wall.
- Start with the longest horizontal line. Make sure to use a level to get the first horizontal piece just right.
- Measure and cut the trim to length.
- Use a stud finder to find the studs and use a finish nailer to nail the trim into them.
- Continue with each section of trim, cutting with a mitre saw to create 45 degree angles where needed.
- Fill the nail holes with wood filler.
- Seal with varathane.
