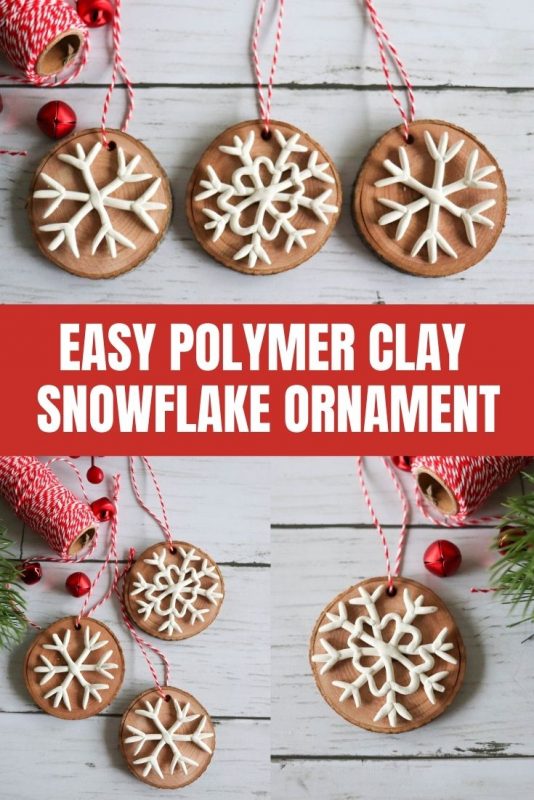
How to Make Polymer Clay Snowflake Ornaments
These sparkly polymer clay snowflake ornaments are easy, adorable, and perfect for adding handmade winter magic to every branch of your tree!

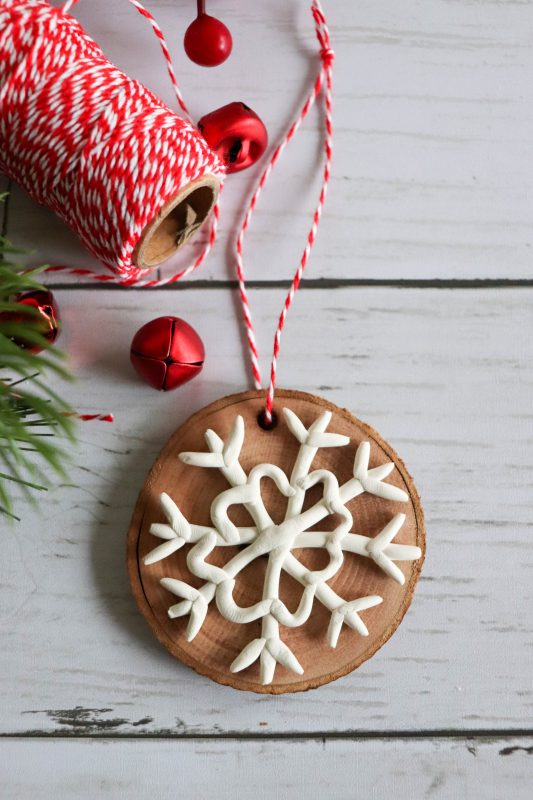
These wood slice snowflake ornaments are absolutely darling! Let me show you how to make these polymer clay ornaments in a matter of minutes.
There’s something extra sweet about making your own ornaments, especially when the house already smells like hot cocoa. These polymer clay ornaments are the perfect craft to make with the kids during the Christmas season.
My teens swore they were “too old” for Christmas crafts last year. Of course, they each still made their own clay snowflake ornament and immediately added it to the tree. Classic.
These little snowflake decorations come together so fast you can whip up a whole blizzard before the oven even finishes preheating. Plus, the mix of smooth clay and rustic wood slices gives your tree the cozy, natural texture we love.

Too busy to make this right away? Pin it for later! Pin this post to your favorite board on Pinterest and it will be there when you’re ready!
Why You’ll Love This Craft
These easy DIY snowflakes are perfect for making with kids, adorable enough to gift, and sturdy enough to last year after year. Polymer clay is incredibly forgiving, so even if your snowflakes start out a little…unique…the final result still looks charming and hand-crafted in the best way.
Add a simple wood slice and you’ve got a pretty little ornament that’s equal parts crafty and classic. Your tree will look like it came straight from the pages of a holiday magazine — without the effort or the price tag.
This year I decided to host the Twelve Days of Christmas Crafts on Instagram and we had so much fun! We’ve made a ton of crafts to go along with my DIY tree collar and holiday ribbon picks!
Be sure to check out the sweater ornament tutorial, clay farmhouse ornaments, and yarn and wood snowflake ornaments for more inspiration!
[mv_video doNotAutoplayNorOptimizePlacement=”false” doNotOptimizePlacement=”false” jsonLd=”true” key=”jlpgra9jhbxkqtakbquv” ratio=”16:9″ thumbnail=”https://mediavine-res.cloudinary.com/v1607473658/kk3c23q81j1ftemhqssg.jpg” title=”How to Make Polymer Clay Snowflake Ornaments” volume=”70″]

How to Make Polymer Clay Snowflake Ornaments

This post contains affiliate links.
Supplies
- White polymer clay – This clay shapes beautifully and bakes into the most perfect little snowflakes.
- 2″ Rustic wood rounds – Tiny tree cookies that give your ornament that extra pop of natural texture.
- Acrylic paint or stain (optional) – In case you want to dress up your wood slices.
- Hot glue gun – The trusty sidekick every crafter needs.
- Baker’s twine – Cute, classic, and perfect for hanging your ornaments without stealing the show.
- Cookie sheet and oven – For baking the snowflakes.
Instructions
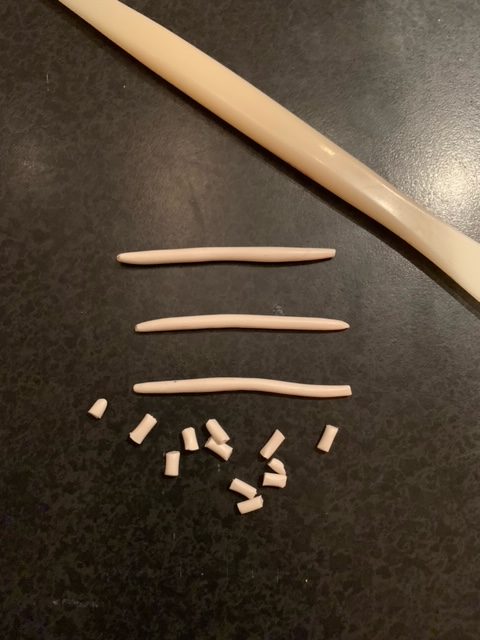
1. Roll a pea-sized ball of polymer clay into a 1.5″ strand. Repeat three times. Roll twelve small pieces into tiny balls and shape into 1/4″ lengths.

2. Overlap the longer pieces of clay in the center of each length, creating a cross shape. Then place the two of the smaller pieces at the end of each branch, creating a snowflake.
Tip: Be sure to press down firmly on the clay so that it adheres to itself.
3. Place the snowflakes on a parchment-lined cookie sheet and bake at 275°F for 15 minutes per 1/4″ thickness of clay.

4. Paint or stain the wooden rounds if desired. Drill a small hole at the top of each one. We liked both the natural and stained look!

5. Hot glue your baked snowflakes to the wood slices. Finally, tie with a length of baker’s twine for hanging.
Have fun and experiment with different snowflake designs and patterns! Be sure to check out our clay leaf ornaments and clay snowman ornaments too.
Explore the blog for some of our other snowman crafts and handmade ornaments. There are so many great ideas!

The sky is the limit when it comes to creating clay snowflakes. I can see the kids having a blast coming up with all kinds of ideas.
We liked framing the snowflakes with the wood slices, but this is totally optional too. We found that the wood gave this ornament a more sturdy base and bit of contrasting texture.
This fun project would make a lovely addition to any holiday home decor. I think they would look perfect as gift tags too.
Tips and Tricks
- Add a tiny bit of cornstarch to your hands to prevent fingerprints in the clay and keep your snowflakes smooth.
- Chill the clay for a few minutes before shaping if it gets too soft, especially when kids are helping.
- Use holiday cookie cutters to cut out different clay shapes to add to the wood rounds.
- Mix white clay with a pinch of glitter clay for subtle sparkle without messy cleanup.
- Let the wooden slice dry completely if you paint or stain it to avoid glue slipping.
- Make extra snowflakes for gift tags; they look adorable tied onto wrapped boxes.

More of My Crafting Essentials for Holiday Crafts
- We love using these Apple Barrel acrylic paints to add bright color to all of our projects.
- These paint brushes are ideal for most craft surfaces and a great price!
- This art supplies kit is our favorite because it has everything we needed to get started.
- This rolling storage cart helps to keep our craft supplies organized.
Frequently Asked Questions
How do I keep polymer clay from cracking?
Condition the clay well before shaping and bake it at the correct temperature to prevent cracks from forming.
How long do polymer clay ornaments last?
Properly baked polymer clay ornaments can last for decades, making them perfect keepsakes.
Can I use cookie cutters to make snowflakes?
Yes! Metal cookie cutters work beautifully for creating even shapes or adding light impressions for extra detail.
Should I seal the finished ornaments?
Sealing is optional but can add shine and protect the paint — just use a clay-safe varnish.
Can kids help with this project?
Absolutely! Kids love rolling the clay pieces and designing their own decorations, and the baking step keeps everything sturdy.
If you’re ready to turn your craft table into a winter wonderland, these little beauties are the perfect place to start. Have fun making, shaping, and decorating with these adorable clay snowflakes!
If you love this polymer clay snowflake ornament craft, please help me share it on Facebook and Pinterest!
Polymer Clay Snowflake Ornament
Materials
- White polymer clay
- 2 ” rustic wood rounds
- Acrylic paint or stain optional
- Hot glue gun
- Baker's twine
- Cookie sheet & oven
Instructions
- Roll a pea-sized ball of white clay into a 1.5" length. Repeat three times. Roll twelve small pieces into tiny balls and shape into 1/4" lengths.
- Overlap the longer white pieces of clay in the center of each length, creating a cross shape. Then place two of the smaller pieces at the end of each branch, creating a snowflake. Tip: Be sure to press down firmly so that the clay adheres to itself.
- Place the snowflakes on a baking sheet lined with a piece of parchment paper and bake in the oven at 275 degrees for 15 minutes per 1/4" of thickness of clay.
- Paint or stain the wooden rounds if desired. Drill a small hole at the top of each one. We liked both the natural and stained look!
- Use a hot glue gun to affix the snowflakes to the wood rounds. Finally, tie with a length of baker's twine for hanging.
Video
Notes
- Detailed step-by-step photos at homemadeheather.com.
- Be sure to press down firmly on the clay so that it adheres to itself.
- Add a tiny bit of cornstarch to your hands to prevent fingerprints in the clay and keep your snowflakes smooth.
- Chill the clay for a few minutes before shaping if it gets too soft, especially when kids are helping.
- Use holiday cookie cutters to cut out different clay shapes to add to the wood rounds.
- Mix white clay with a pinch of glitter clay for subtle sparkle without messy cleanup.
- Let the wooden slice dry completely if you paint or stain it to avoid glue slipping.
- Make extra snowflakes for gift tags; they look adorable tied onto wrapped boxes.
