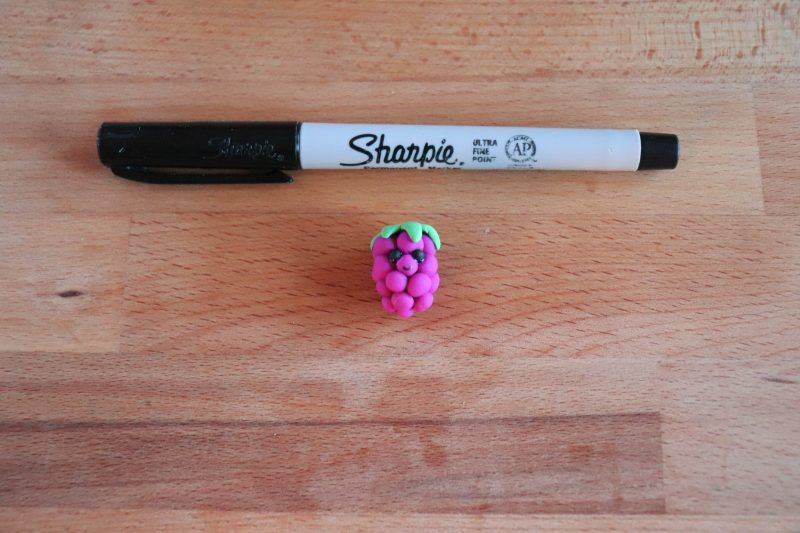
How To Make a Polymer Clay Blackberry Craft
This polymer clay blackberry craft is fun to make and perfect for identifying seeds that you have planted in the garden this spring. Let me show you how to make this cute garden marker…
Too busy to make this right away? Pin the post for later! Pin this project to your favorite craft board on Pinterest and it will be there when you’re ready.
When planting seeds in the spring it’s super easy to forget what you’ve planted once the seeds are under the soil. So I created this darling clay blackberry to mark our seeds this year.
This post contains affiliate links.My essentials for clay crafts:
- We love using this Sculpey Polymer Oven Bake Clay for all of our projects.
- This clay shaping tool kit is a must have for clay crafting!
- These paint brushes are ideal for most craft surfaces and a great price!
- This rolling storage cart helps to keep our craft supplies organized.
Supplies that you will need:
- parchment paper
- baking sheet
- polymer clay in green, purple and black
- clay cutting and shaping tools
- toothpicks
- black sharpie fine tip marker
- white glue
- white paint
- mod podge
- paint brush
How to Make a Polymer Clay Blackberry:
- Form a 2cm purple ball into a cylinder shape, form twenty ½-1 cm purple balls, then form a 1 cm green ball.
2. Press the small purple balls all around the cylinder. Press the green ball flat and shape leaves around the edges. Attach to the top of the berry.
3. Form two indents for eyes with the stylus. Pierce a hole in the bottom with a toothpick. Roll two tiny black balls for eyes.
4. Place the clay blackberry on a parchment lined baking sheet and bake as directed on the package. For me this was 20 minutes at 220 degrees.
5. Glue the black balls on for eyes.
6. Draw a smile with the black sharpie marker.
7. Add a white dot to the eyes with the paint and seal with mod podge.
8. Add a toothpick to create a little stake to press into the soil and voila!
How darling are these garden markers?! You can find the entire clay fruit garden marker tutorial here. We can’t wait to see all of our little fruit seeds sprout this spring.
Polymer clay crafting tips:
- Work with a high quality product like sculpey clay.
- Use plastic wrap in an air tight container to store clay.
- Score where you want two pieces of clay to stick together.
- Shape cutters work best on a flat, solid work surface.
- A craft oven is not needed.
- Bake at low temperatures to allow the clay to set slowly and prevent cracking.
- You can find clay of all kinds of different colors at Michaels stores.
If you love this cute blackberry garden marker, please help me share it on Facebook and Pinterest!


